Perfect for weddings, date nights, or afternoon garden parties, the Orchidée dress is full of romantic details that will help you elevate your sewing skills. One of these features is the bridal button loop, and today we are going to take a closer look at how to sew one together.
Constructing your own bridal loop band is admittedly finicky, but it’s not impossible with a little patience. While you can find pre-constructed versions of these button bands available for purchase (just watch the button count and spacing)—there is no reason you can’t sew one yourself. For many this is the most intimidating step of the Orchidée dress, but it doesn’t have to be. Let’s go ahead and make one!
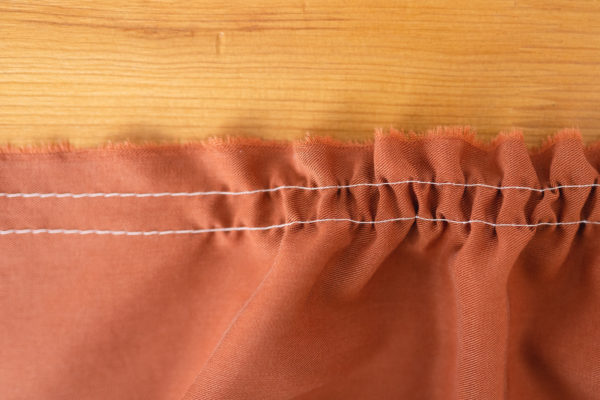
Follow instructions 1-6, until it is time to construct the button loop. You should have gathered the top and bottom of the front bodice, attached the waistband, and sewn the front and back bodices together at the shoulders.*

*Note that for the purposes of this tutorial, only the front bodice and waistband pieces have been photographed.
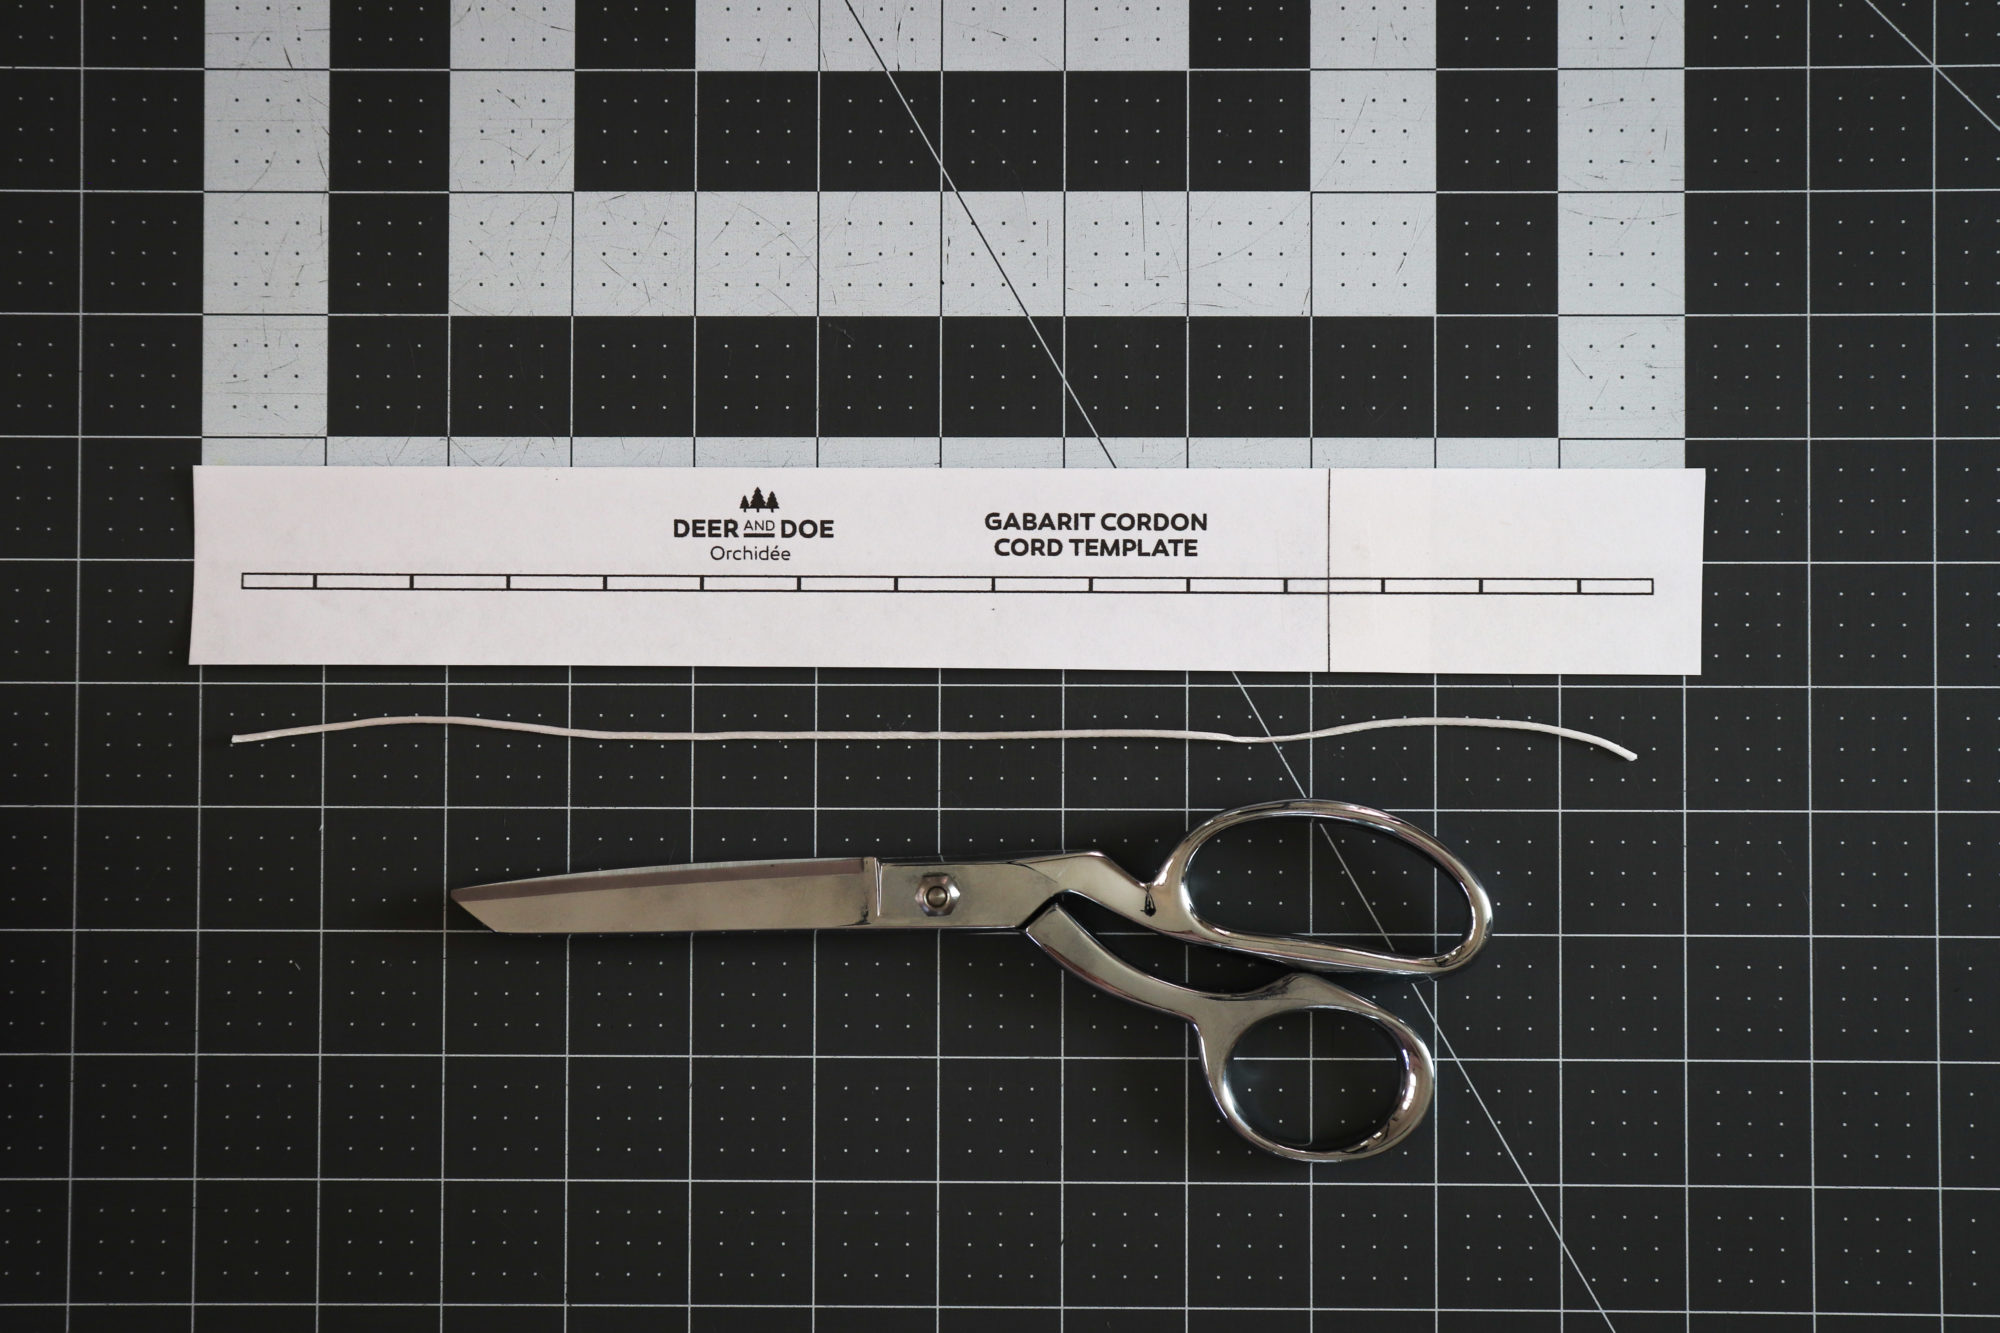
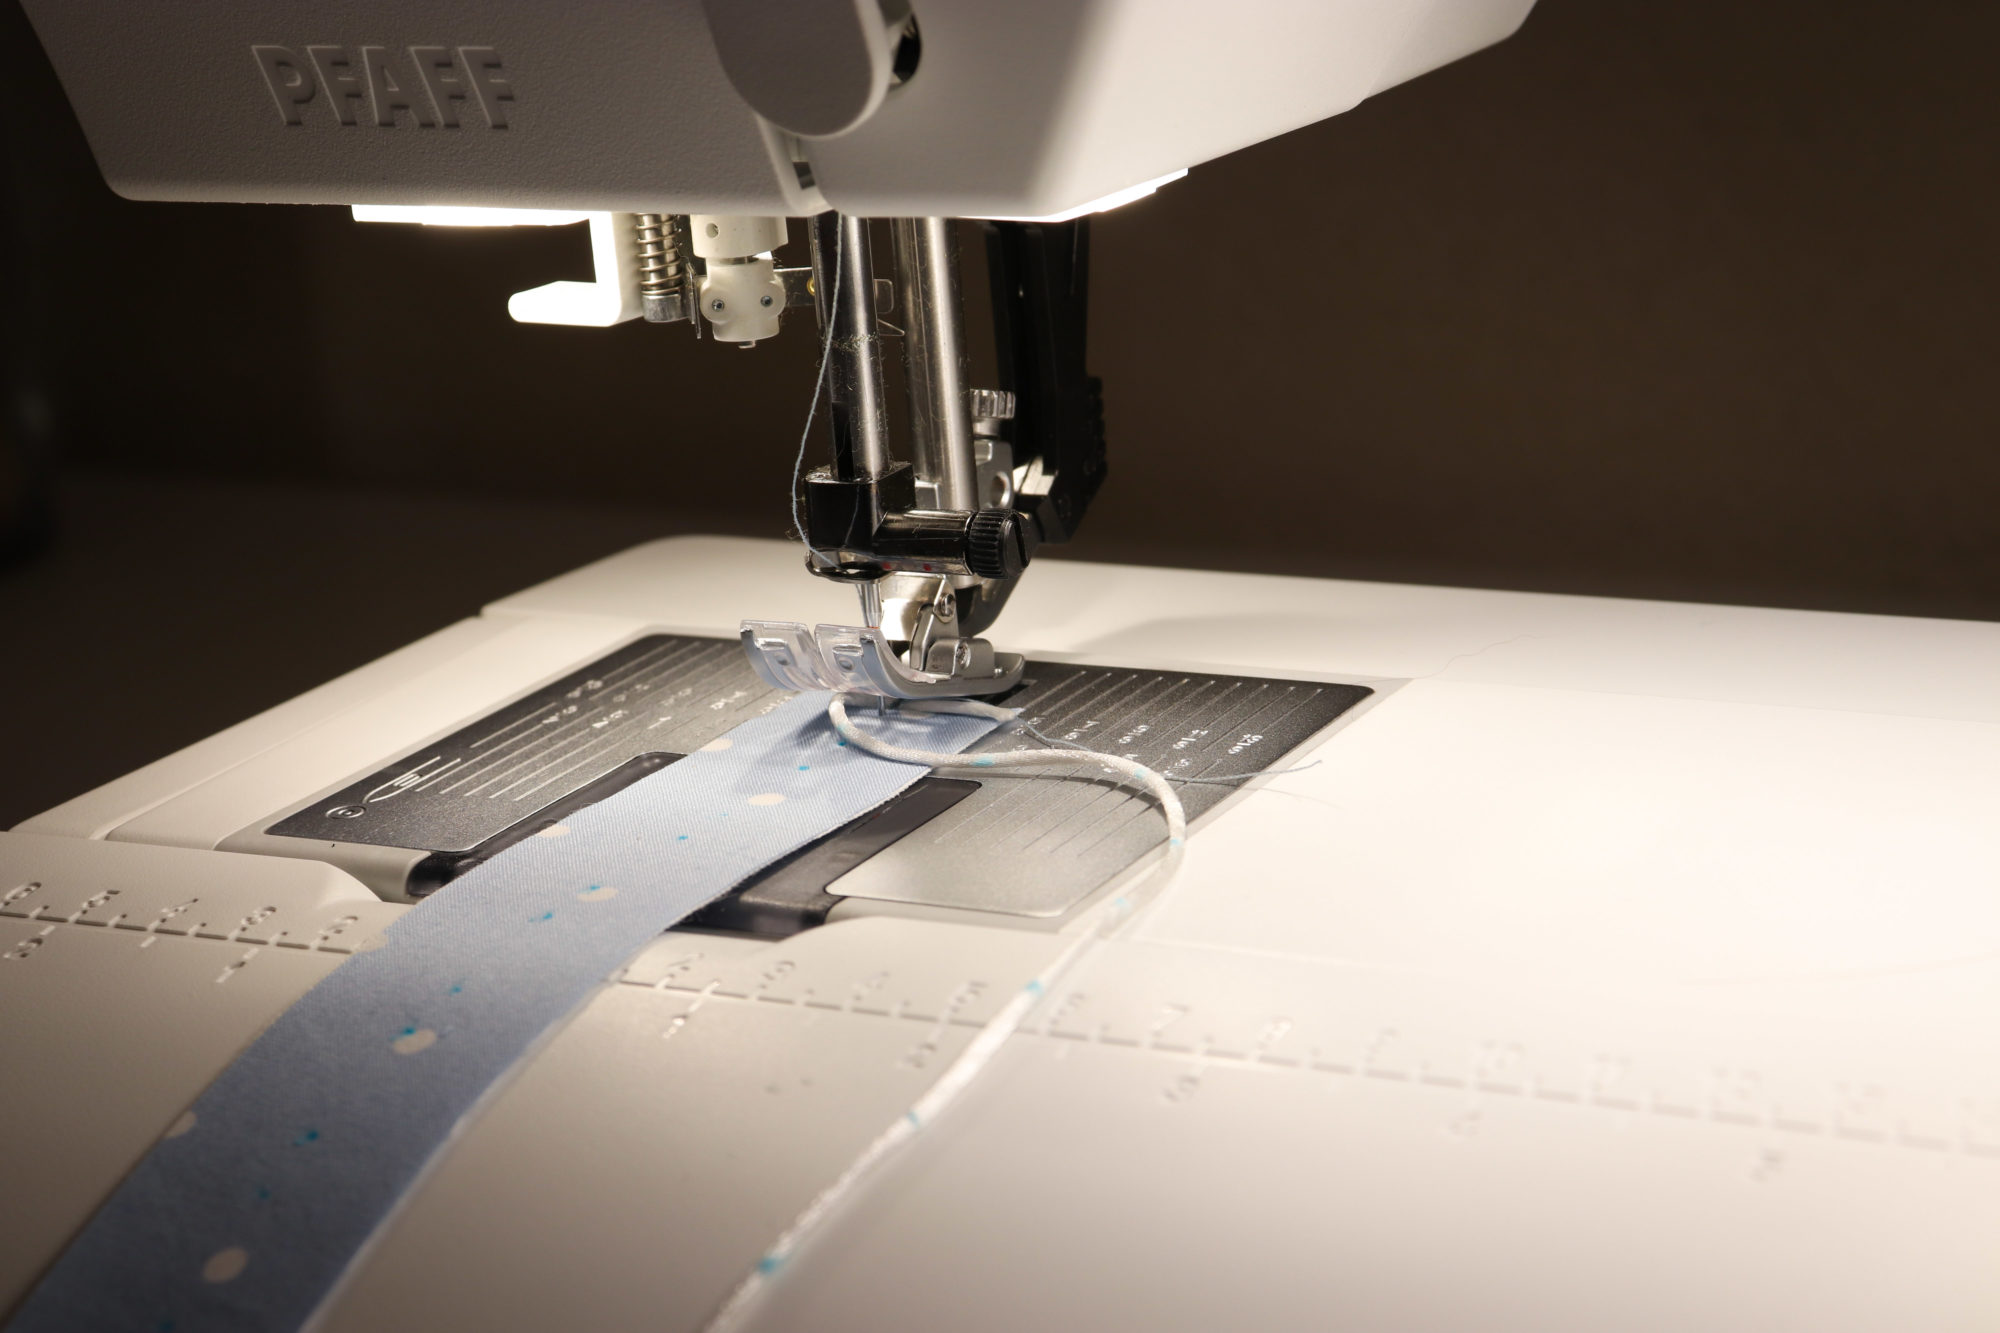
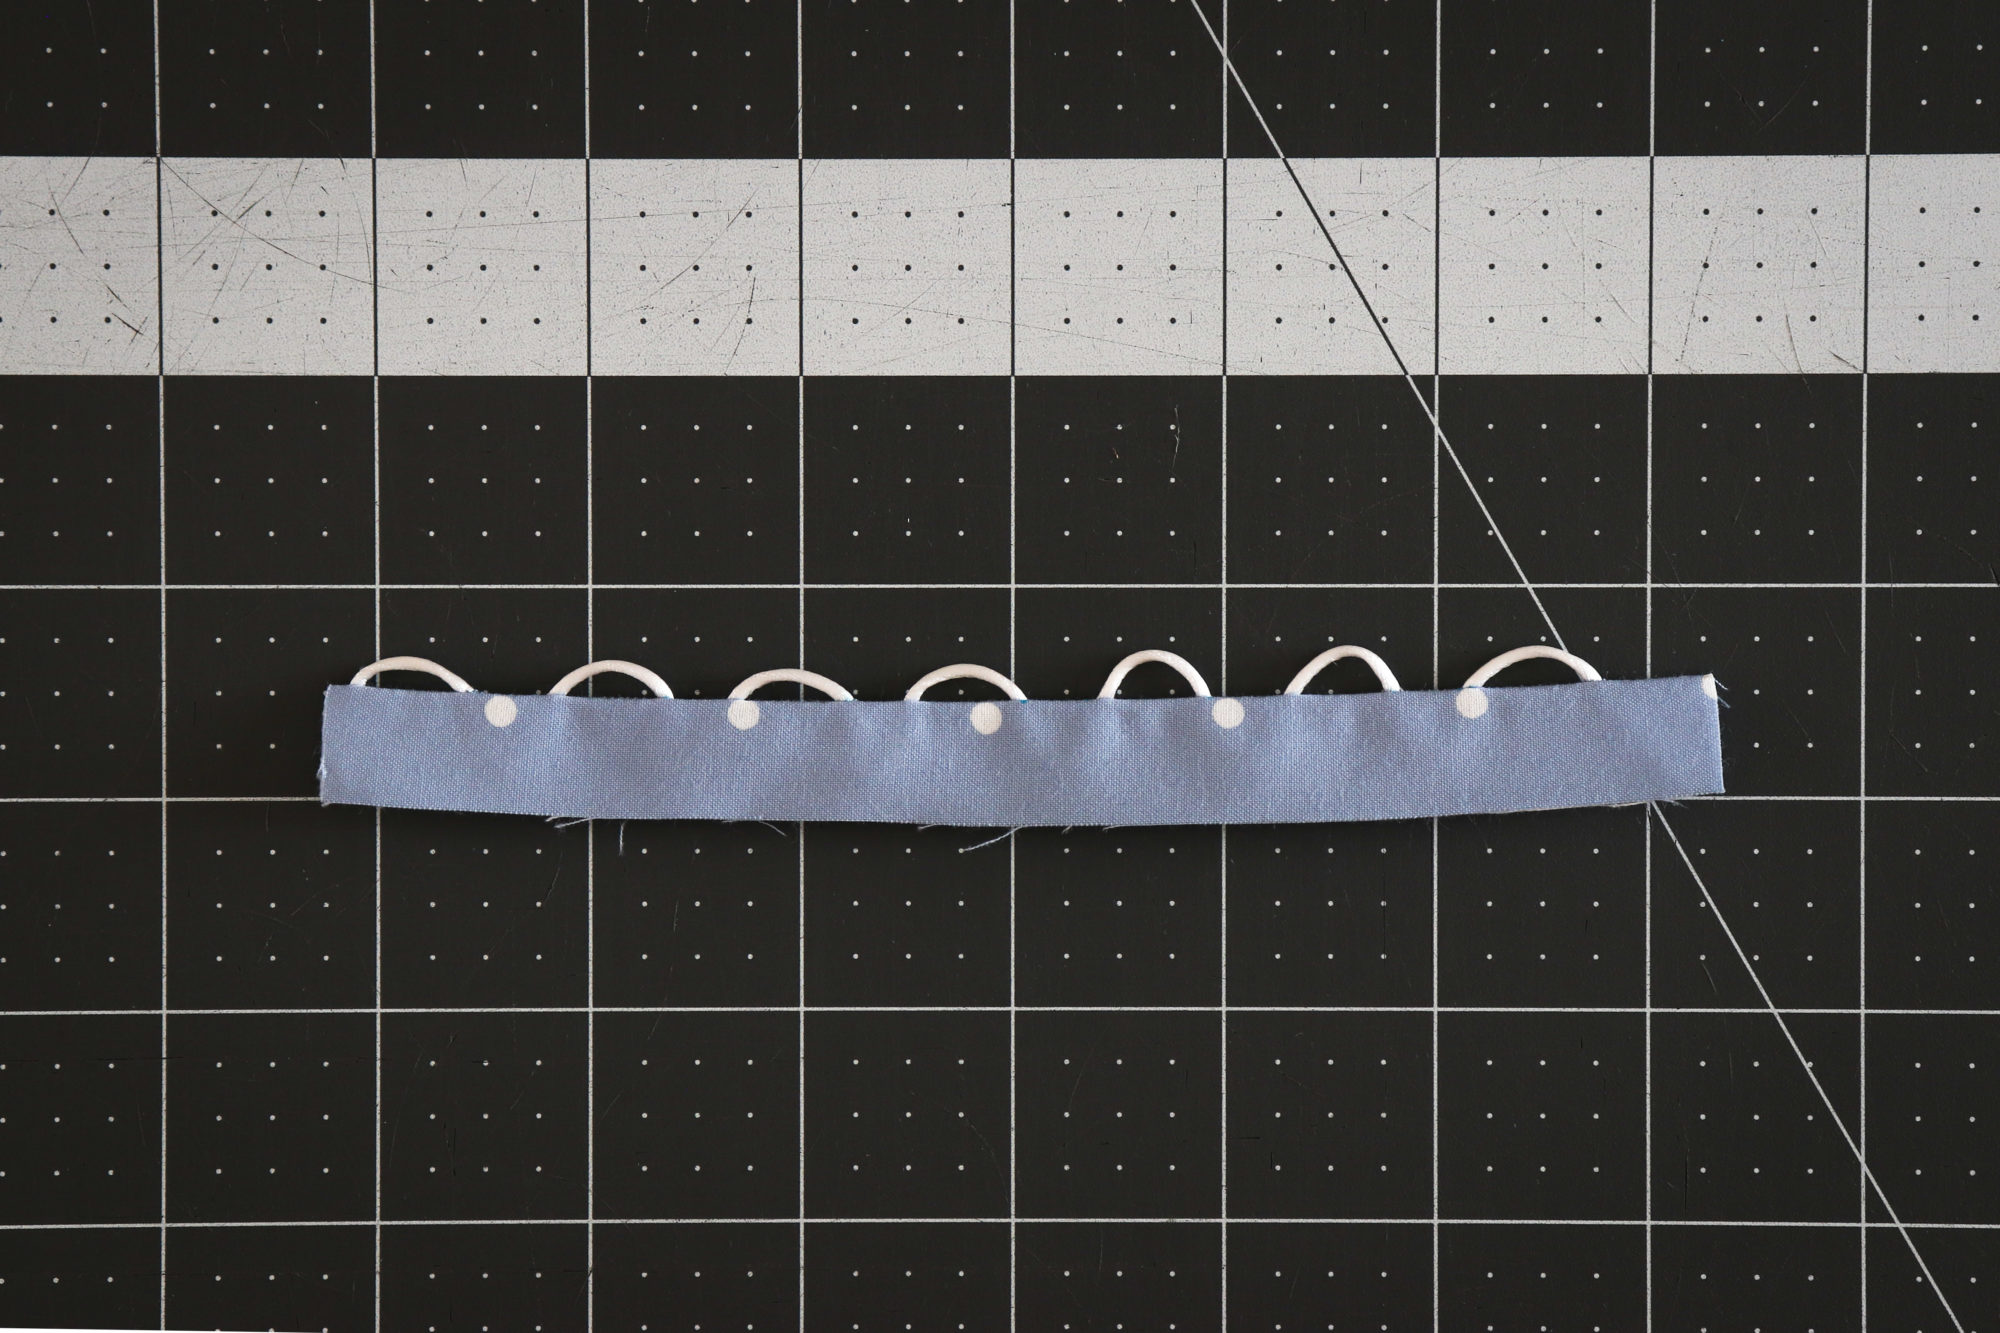
Using the cord template, cut a piece of the rattail cord (approximately 11.5″ or 29 cm). Mark the button loop spacing with a fabric marker of your choice. You may use tape to help secure the cord in place while you mark it.

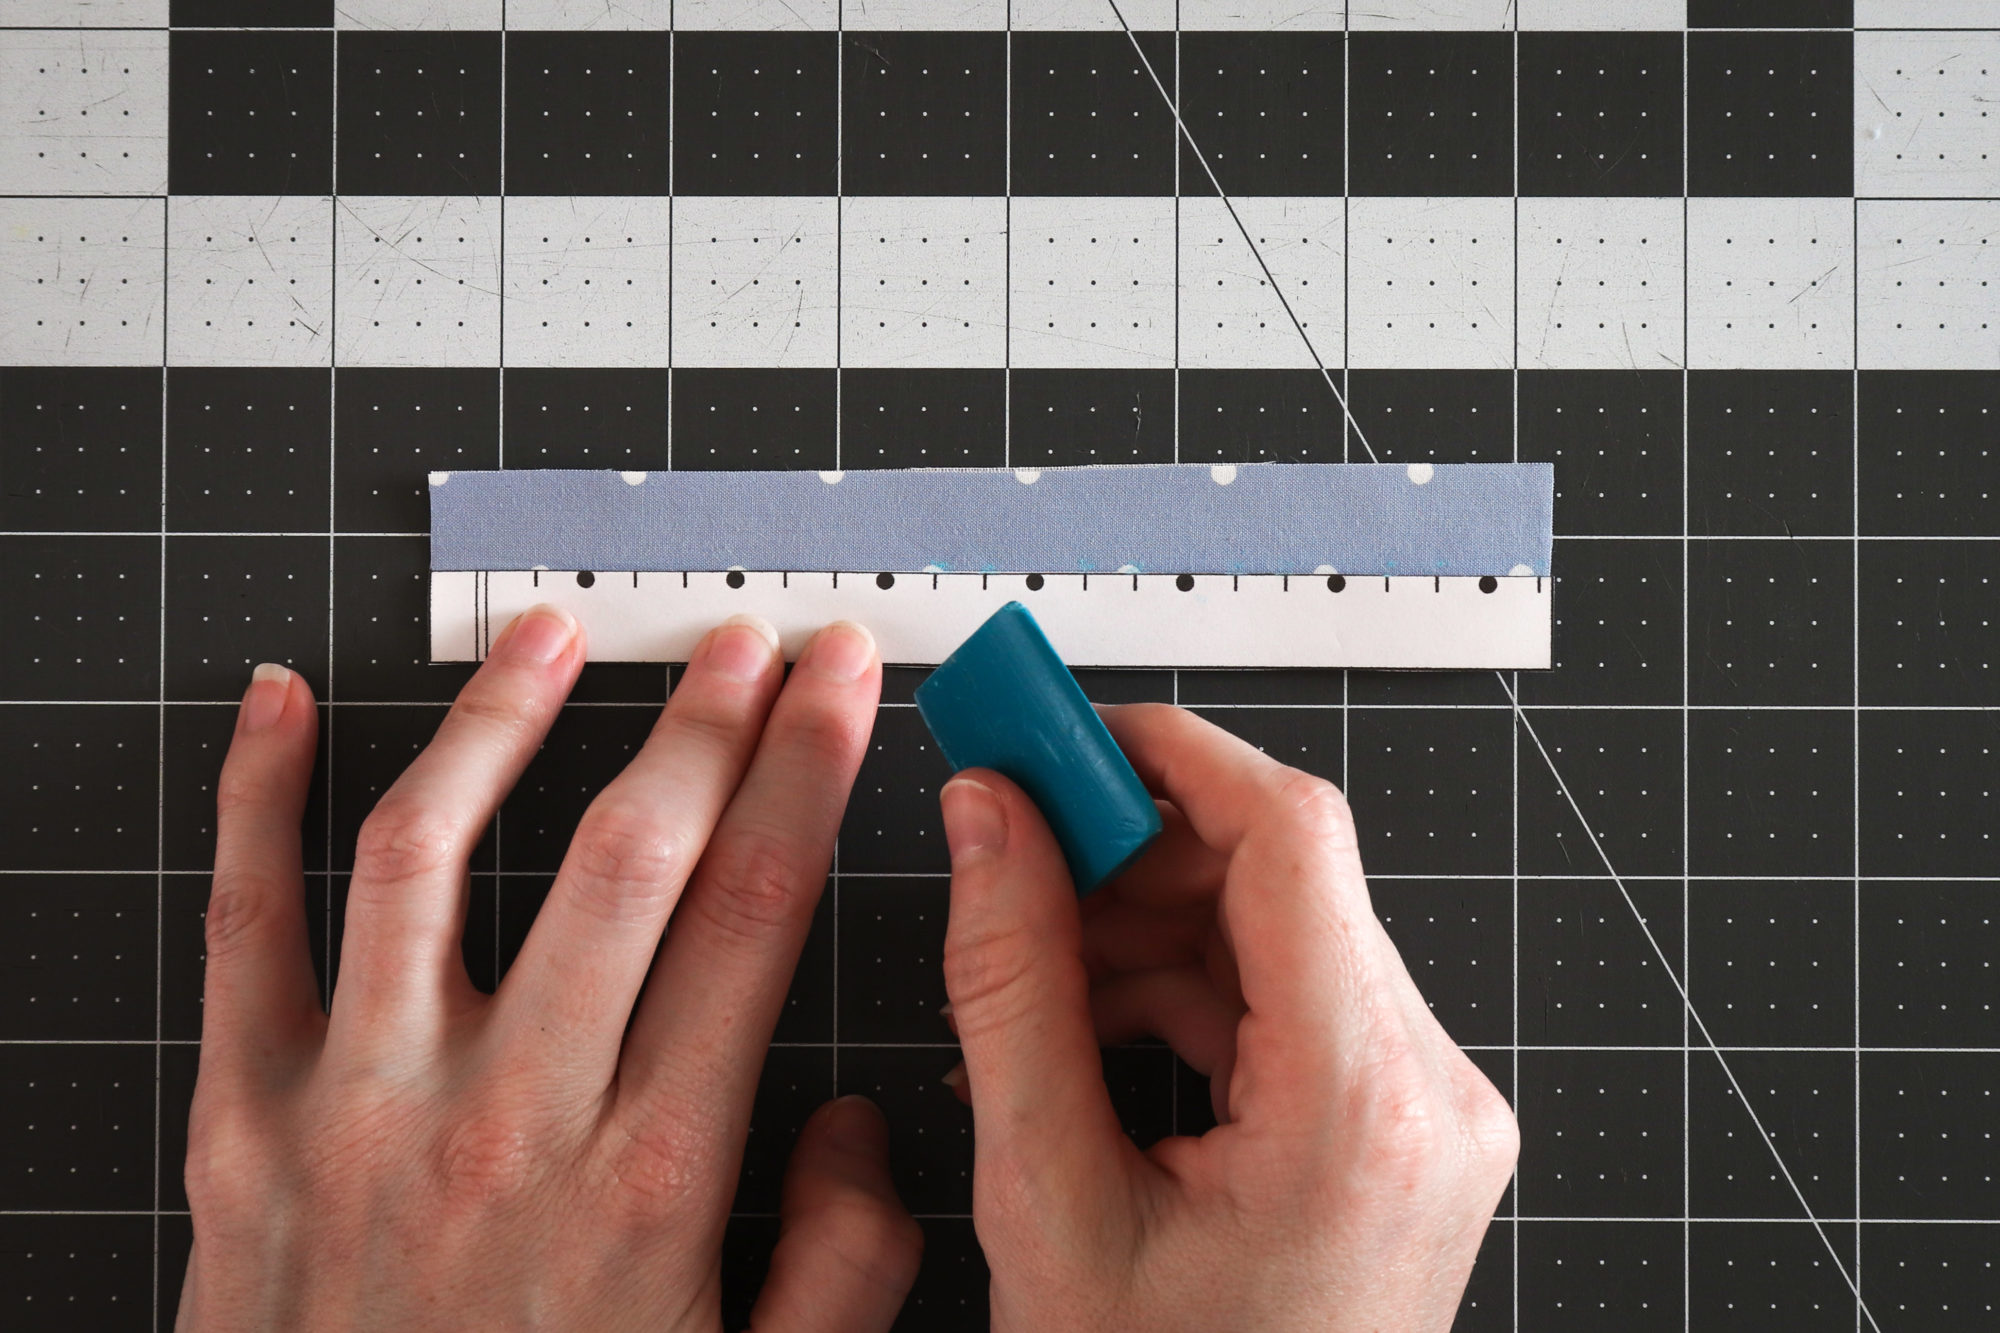
Take the button loop pattern piece (9), fold it in half, and transfer the button loop markings to the fabric. Make sure you are marking the small dashes and not the circles (which represent the buttons).
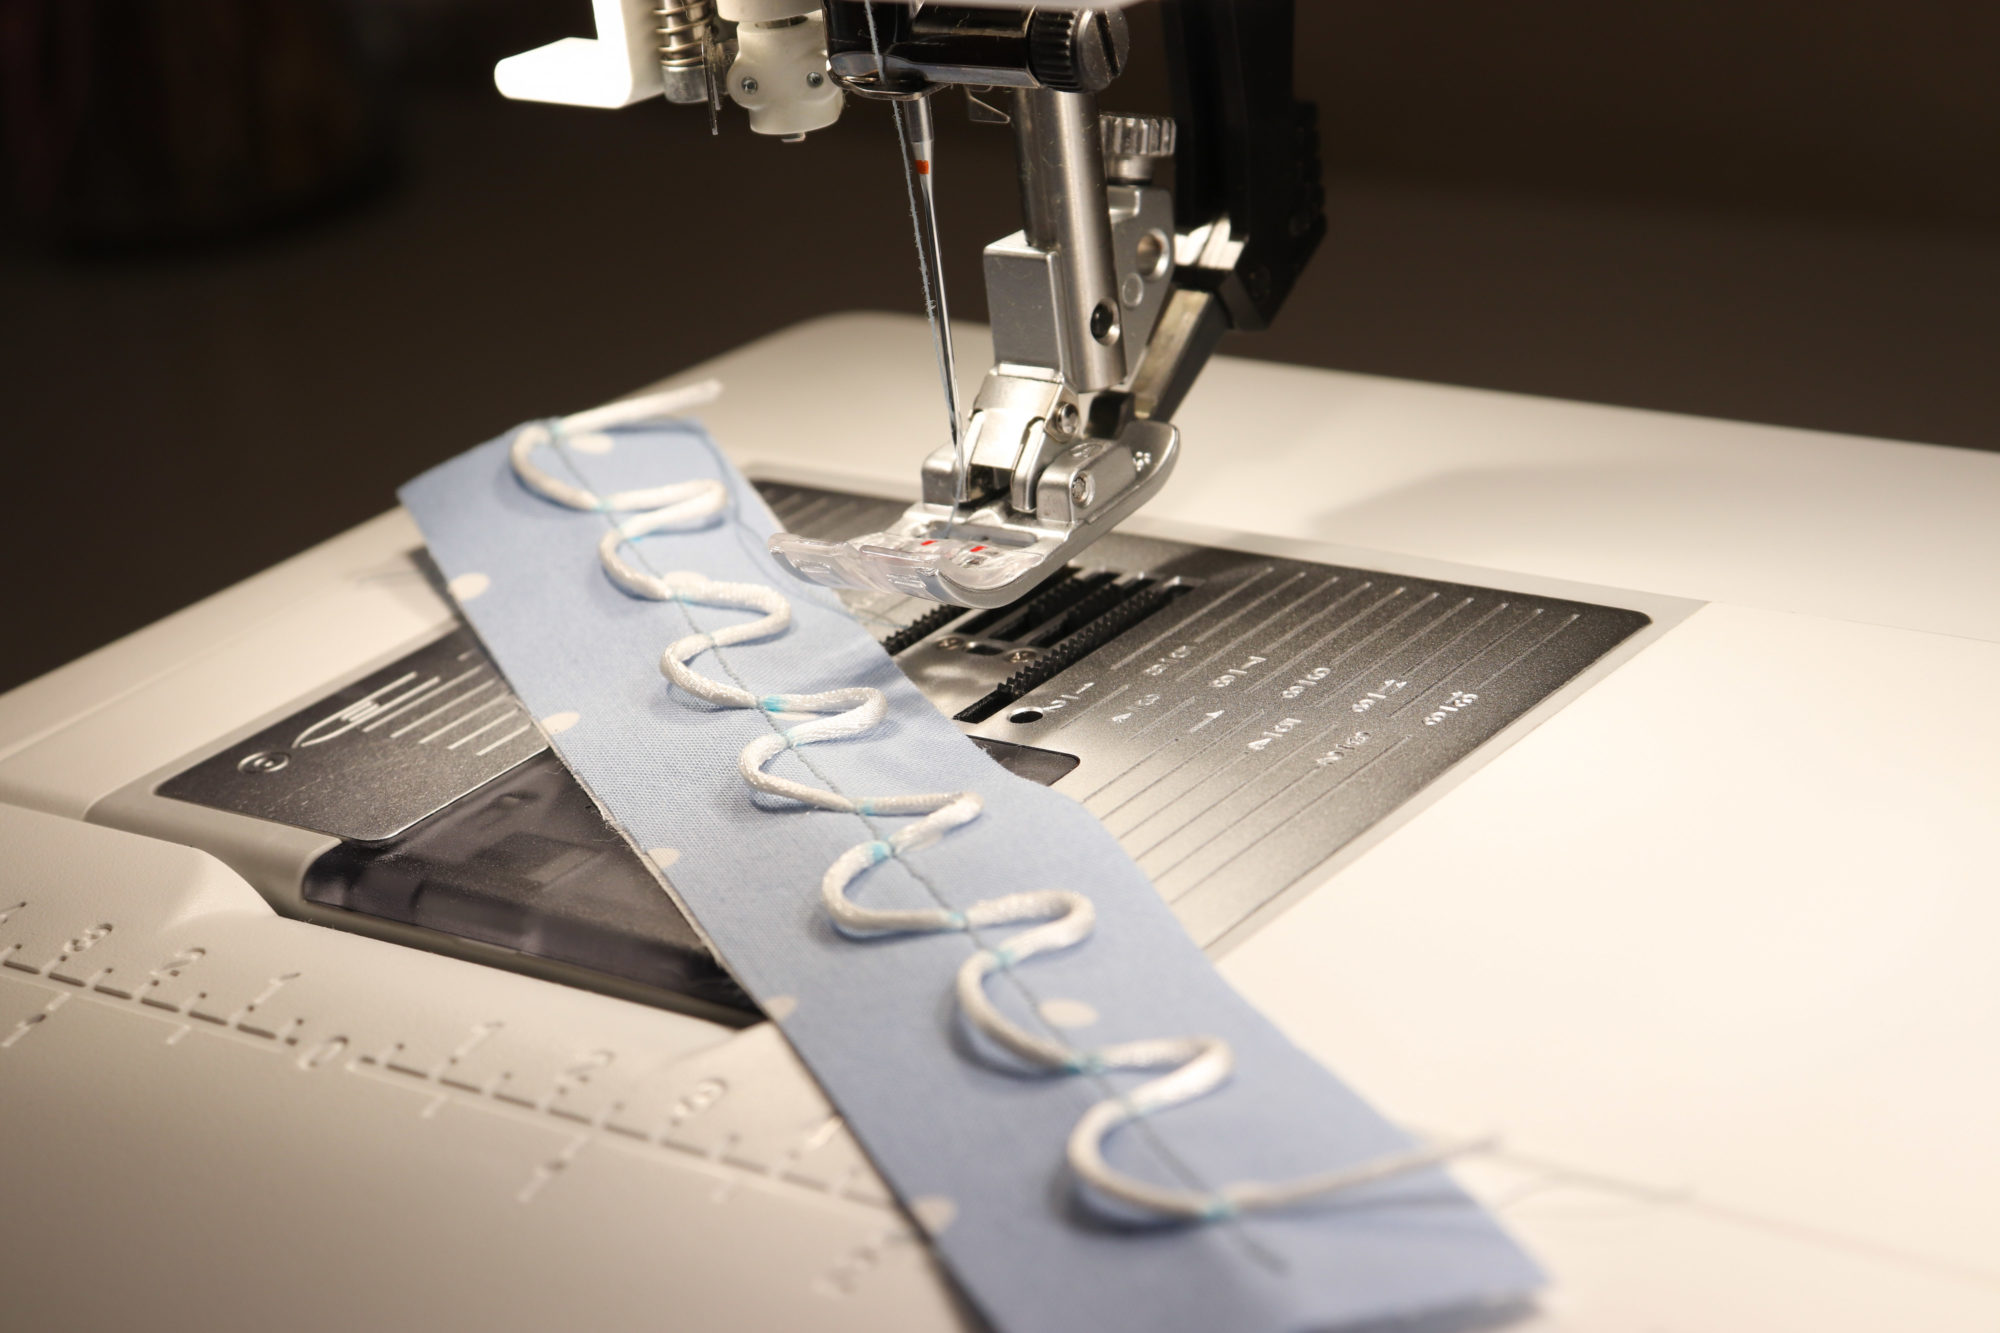
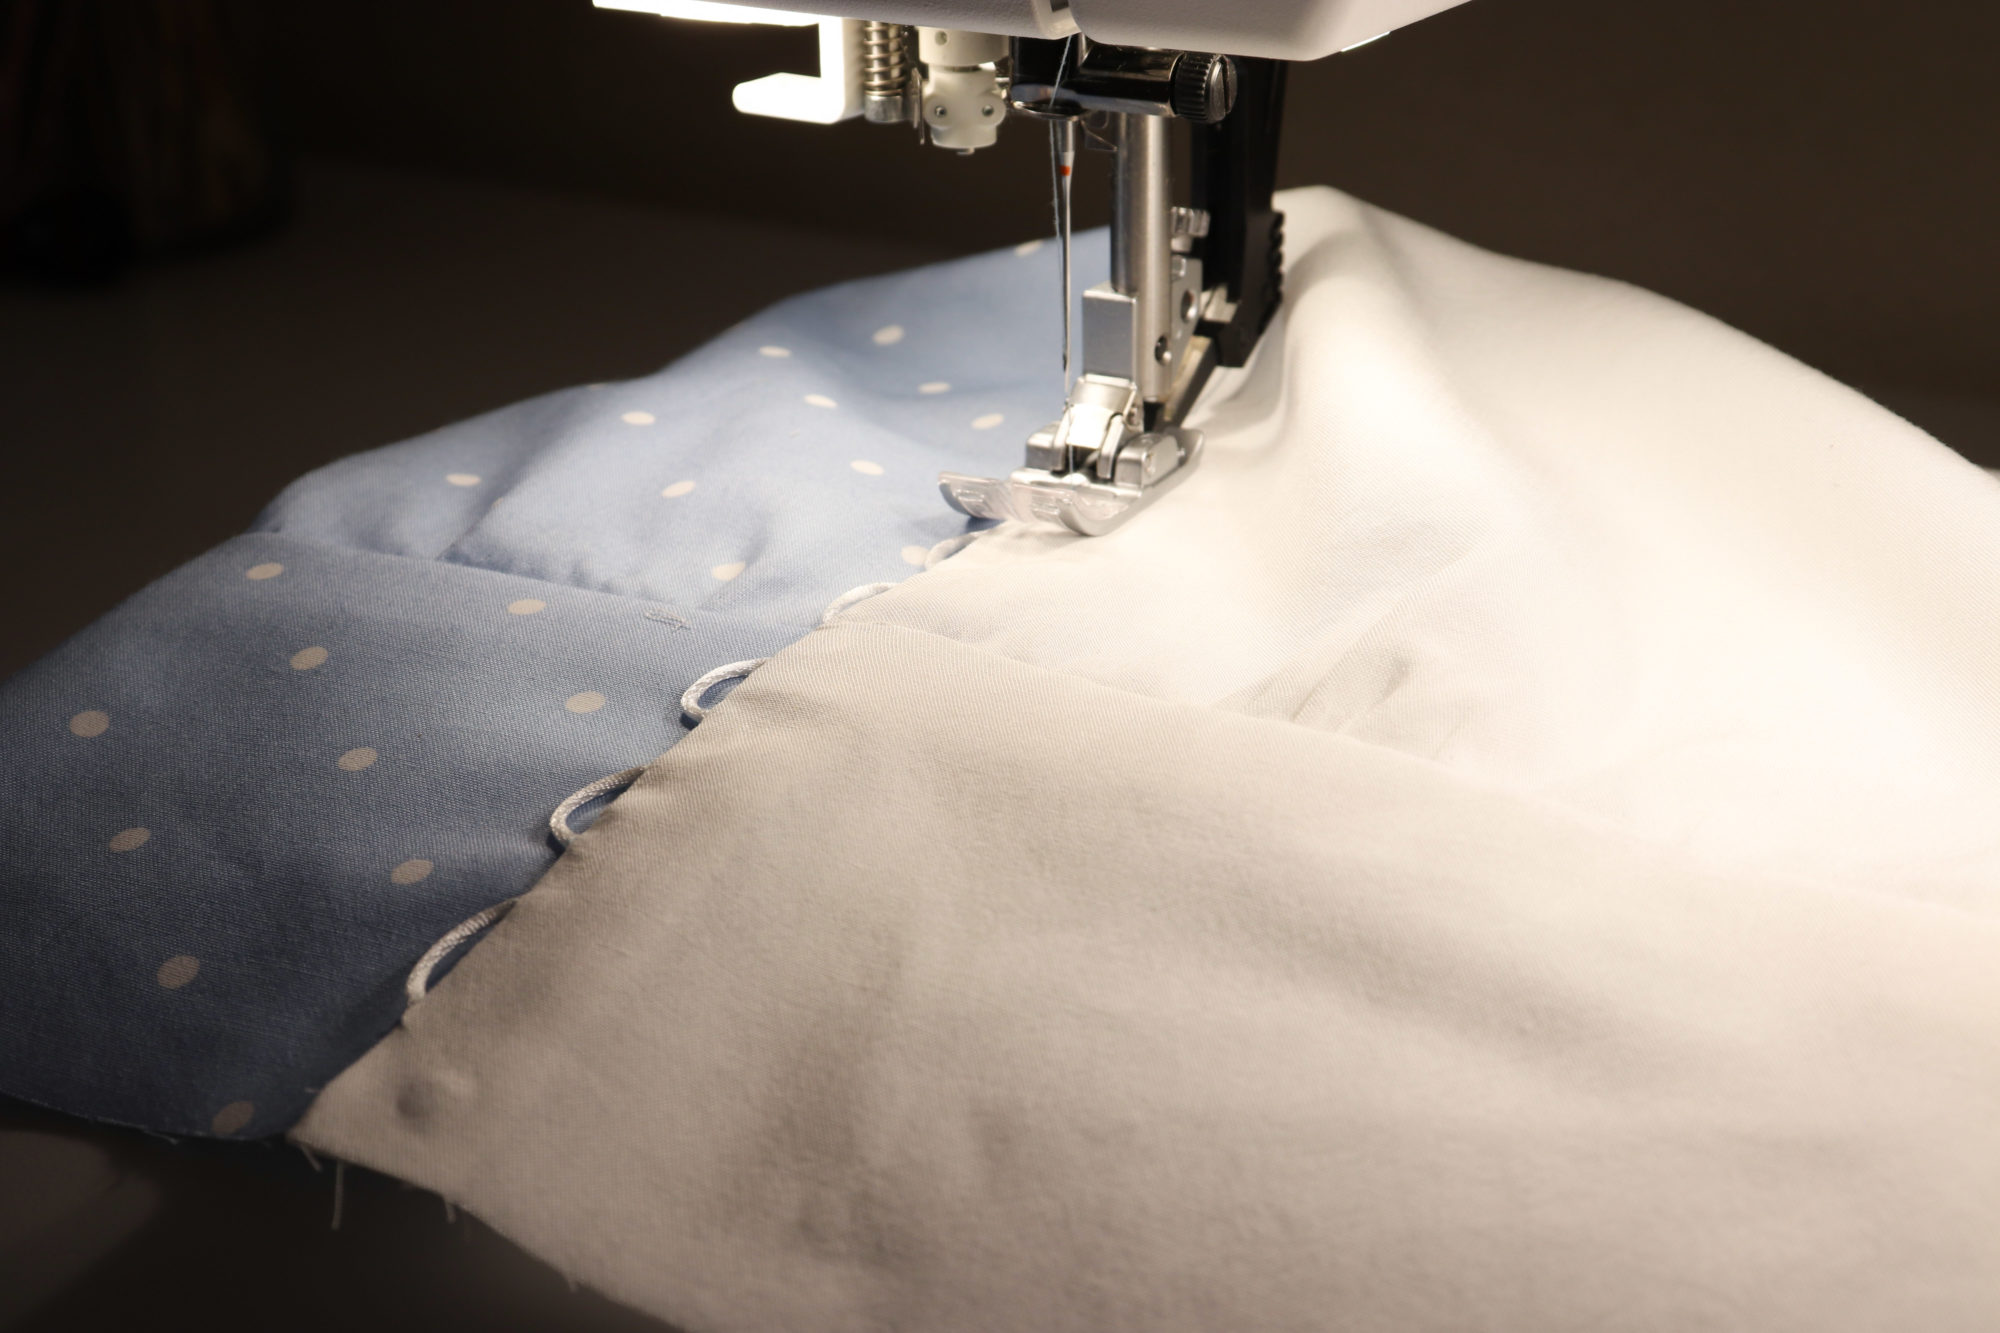
Starting at the top and making sure the tail is pointed to the right, use a scant ⅝” seam allowance and start sewing the cord to the button band using a very short stitch.
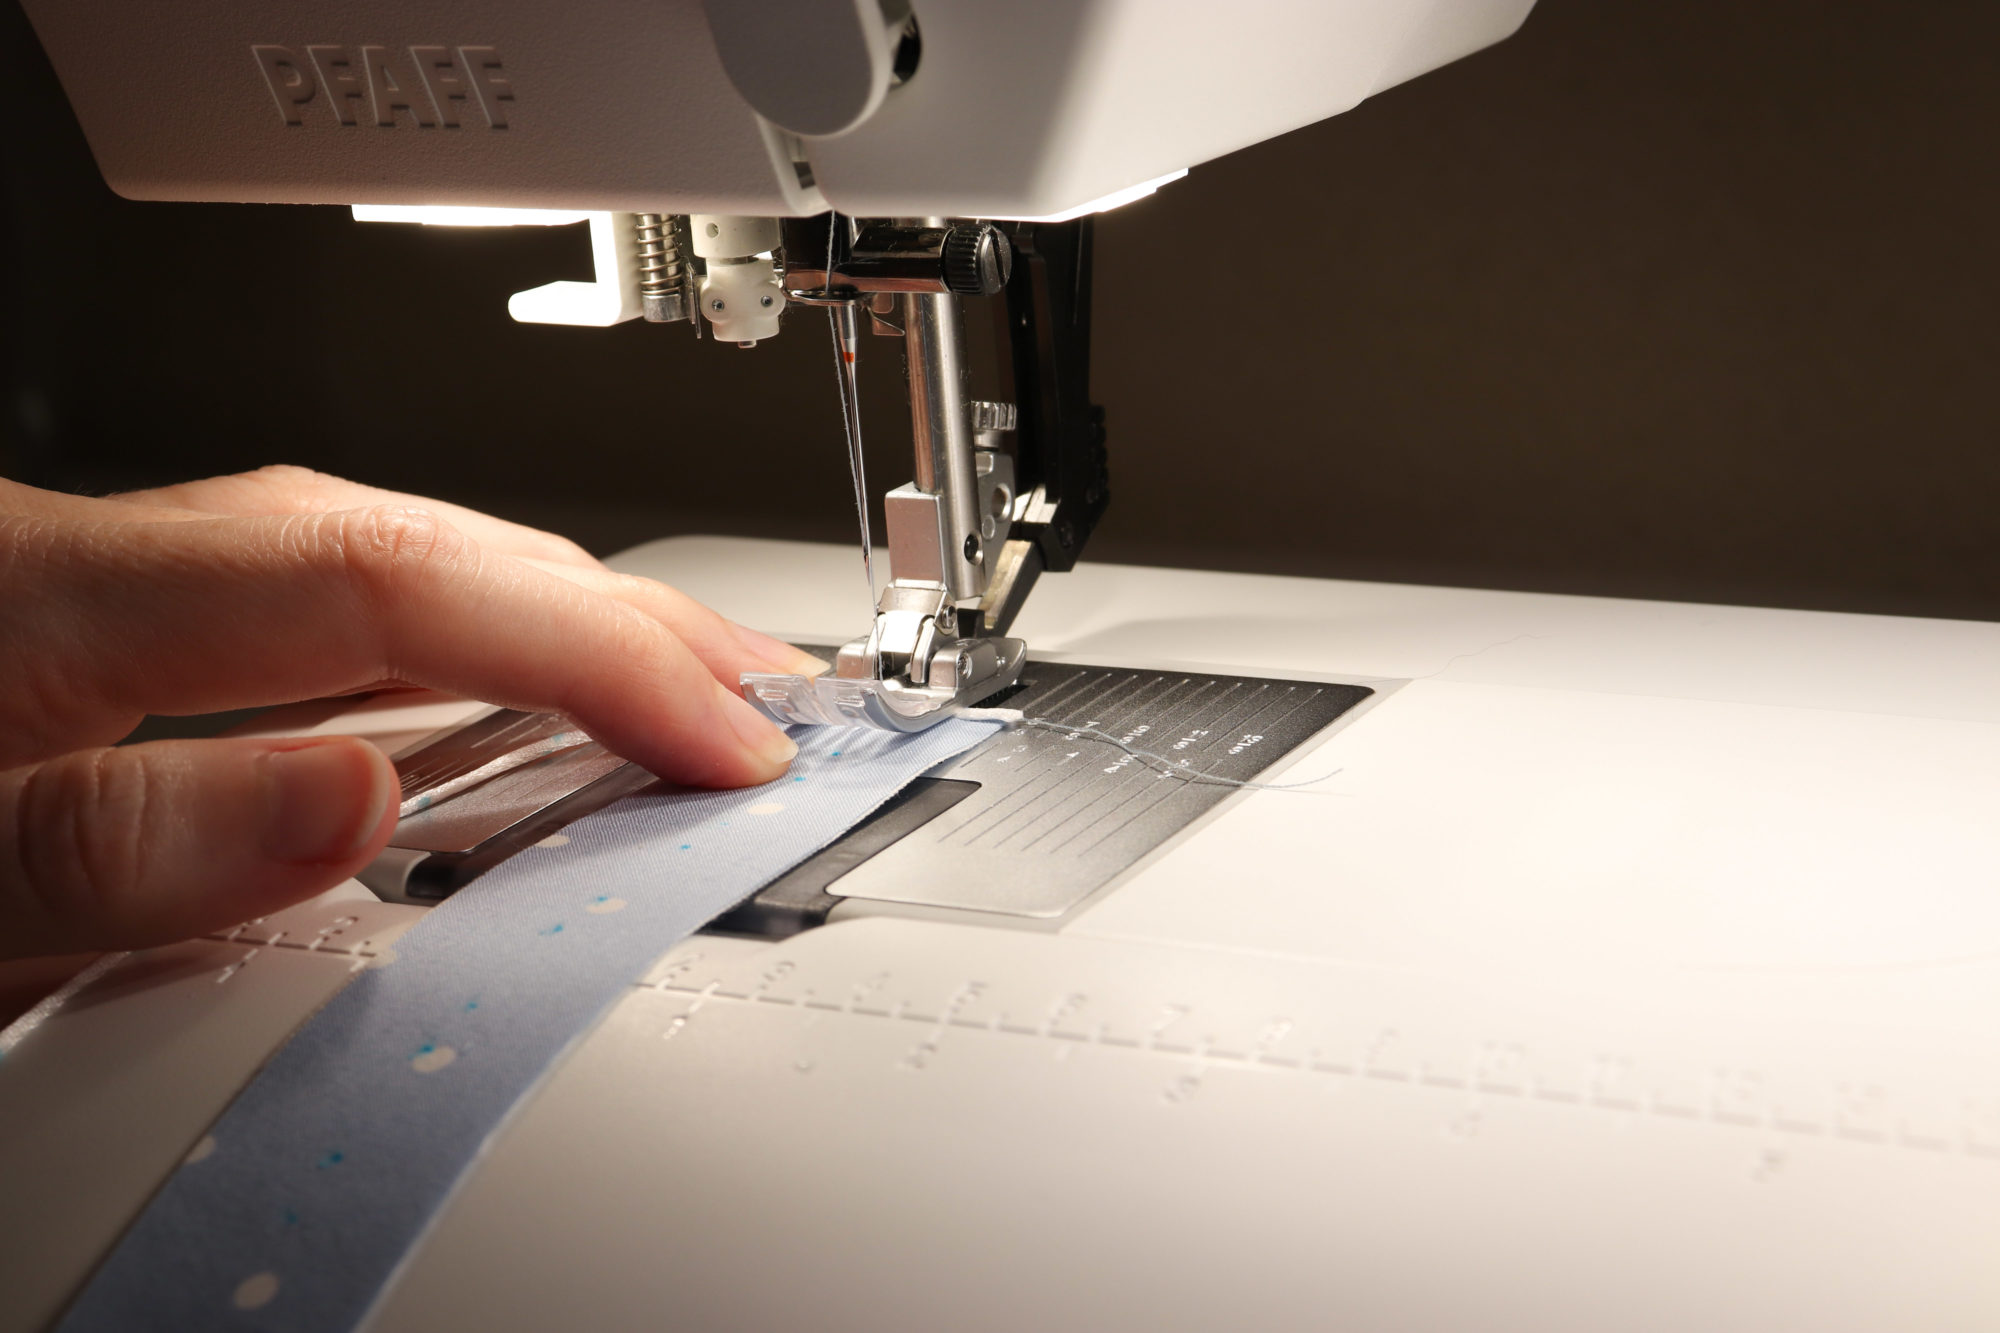
Go slowly, carefully matching the cord in a back and forth motion with the markings on the button band as you go.
An awl, pin, or similarly sharp point can help keep the cord in place while you sew. You may also try decreasing the pressor foot pressure if you find that the foot of the machine is shifting the cord.

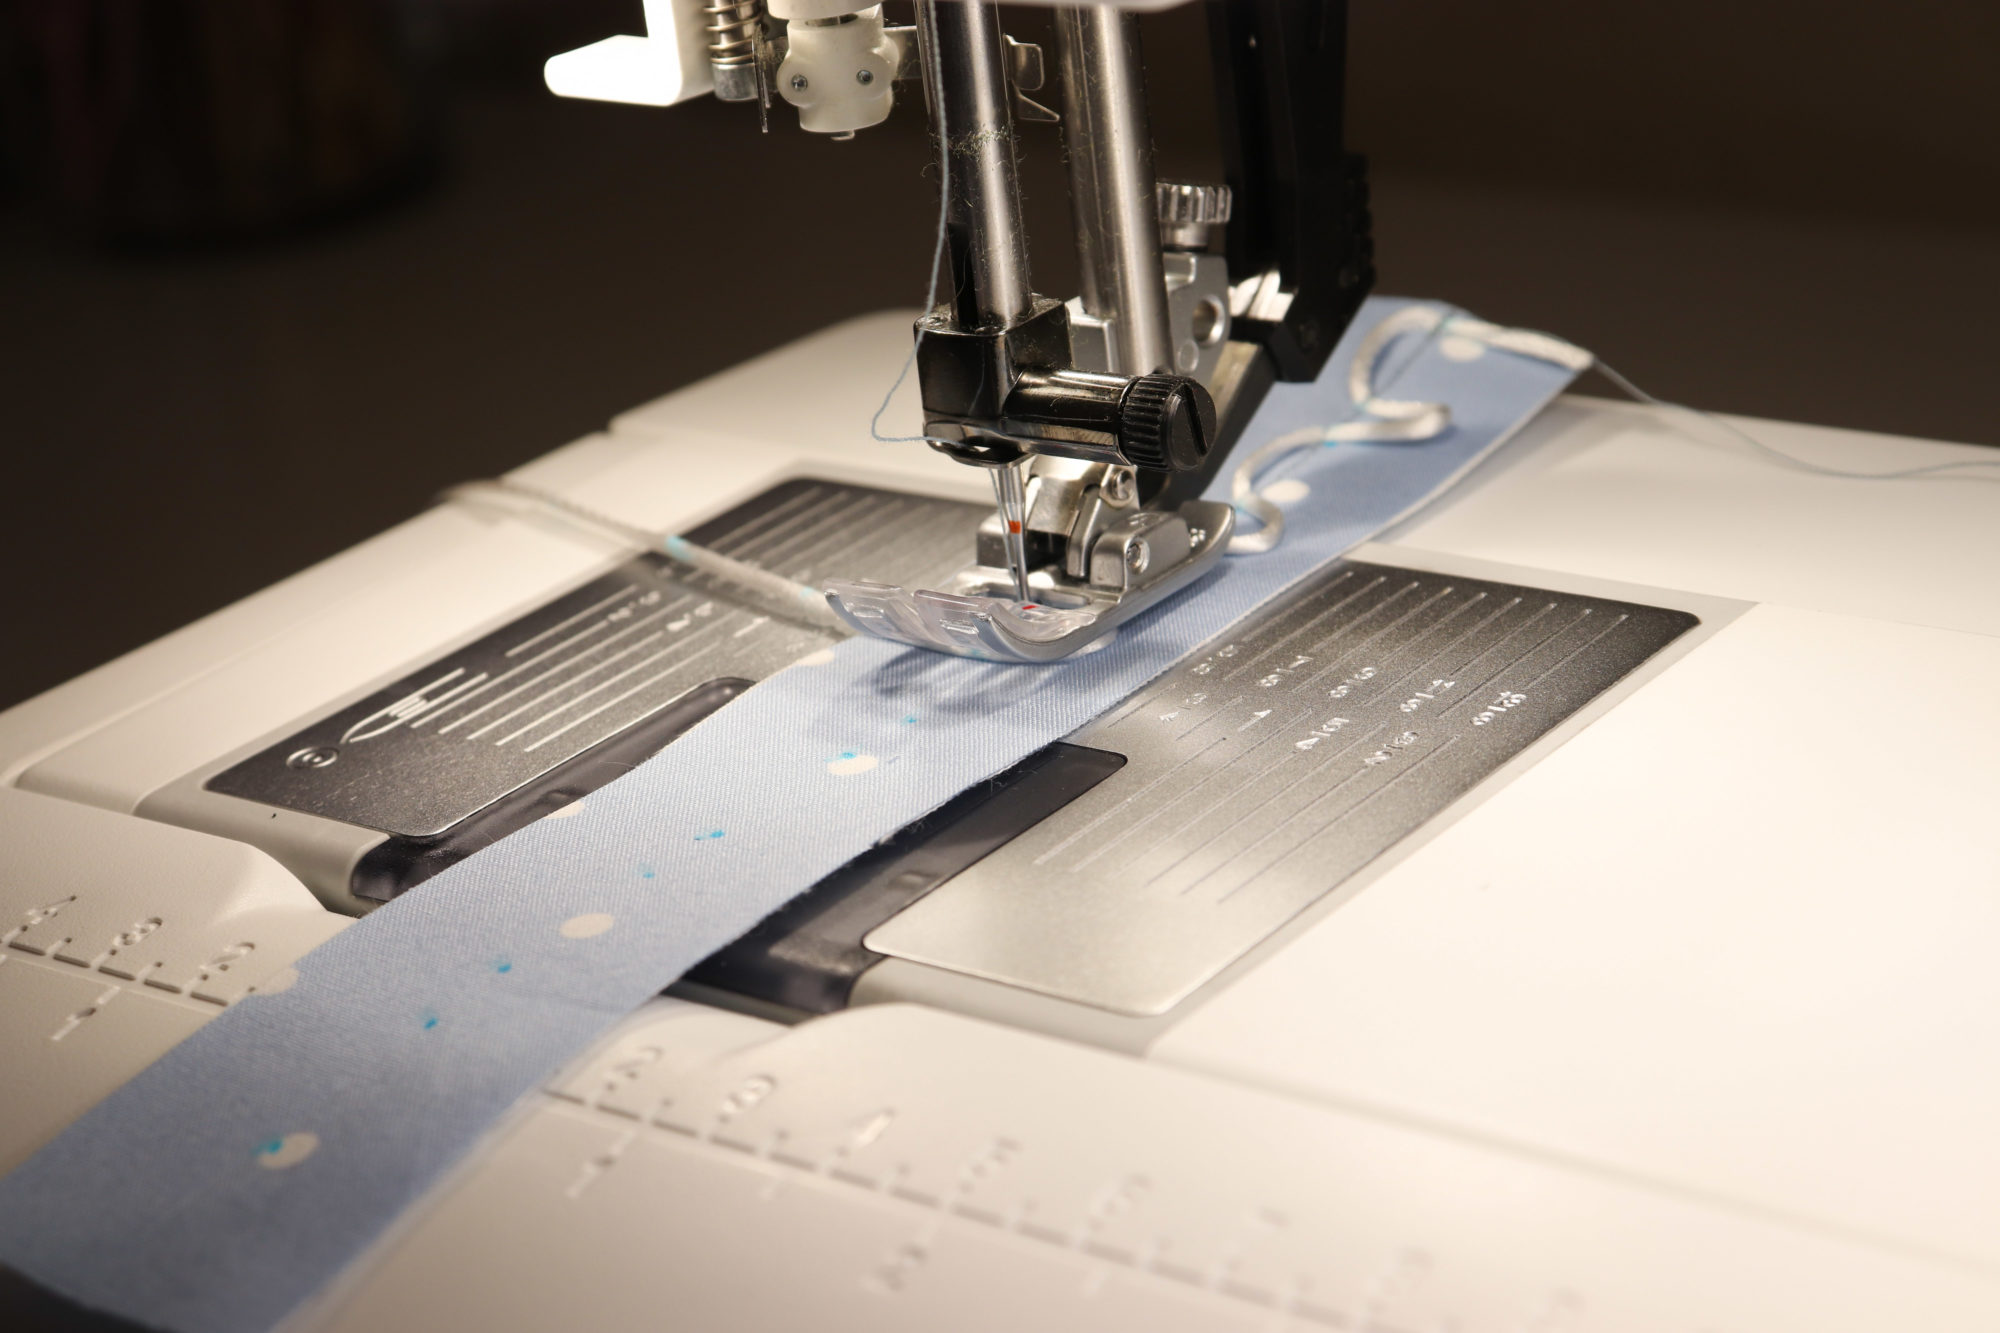
Optional: use office tape or a double-sided washable tape (like Wonder Tape) to place the rattail cord before you sew. Make sure the tape is not placed on the actual stitch line, and remove it after you’ve sewn the cord in place.
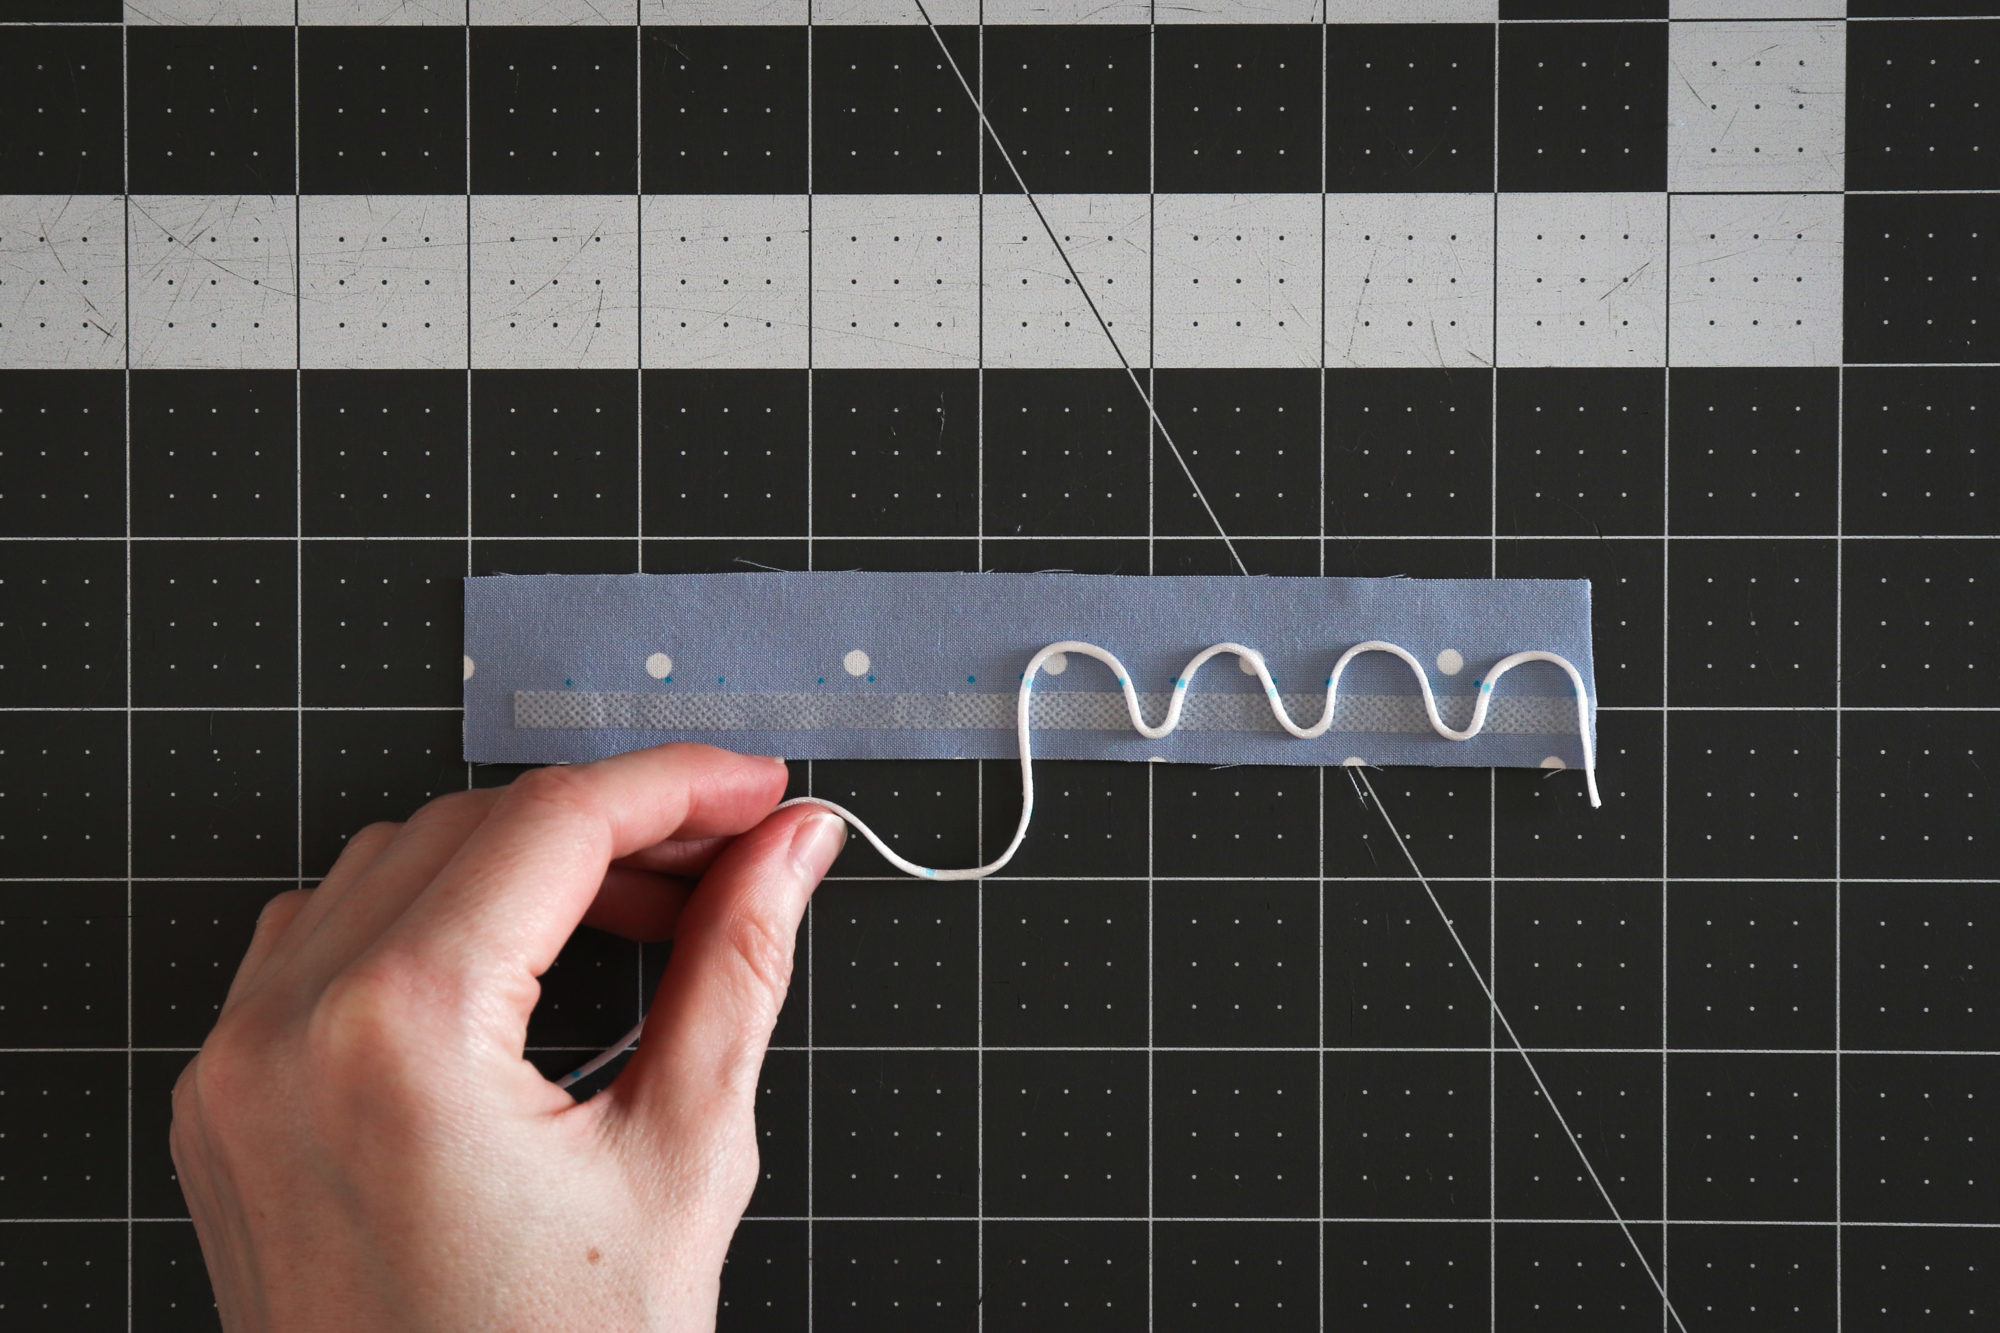
Once you’ve stitched the cord in place, it’s a good idea to double check that your buttons will fit through each loop. Small errors in alignment can affect the final result—so if you find any that are slightly too small, simply unpick and stitch them again.
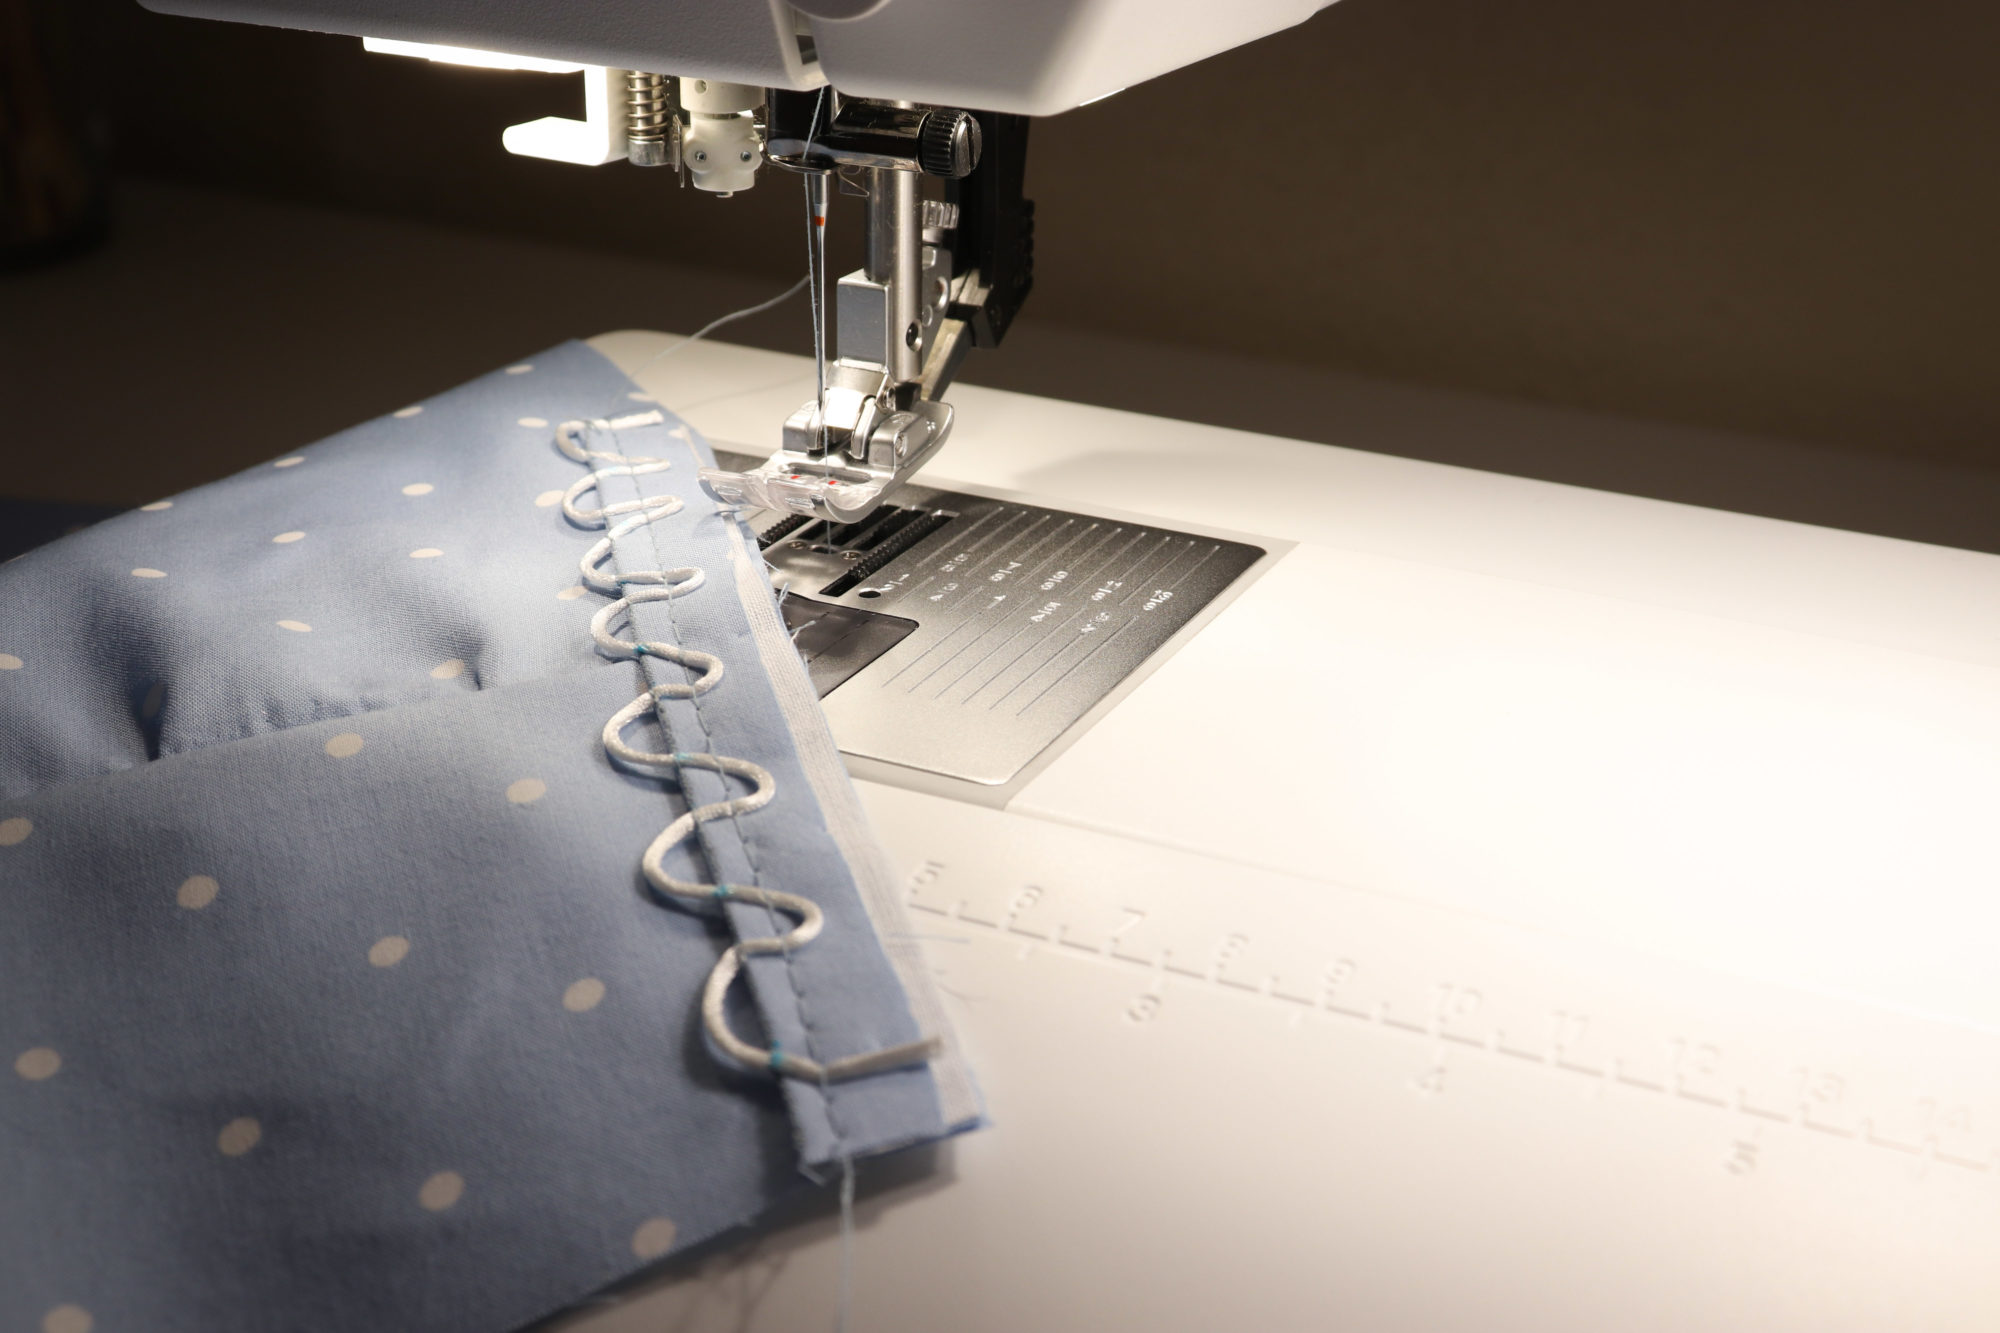
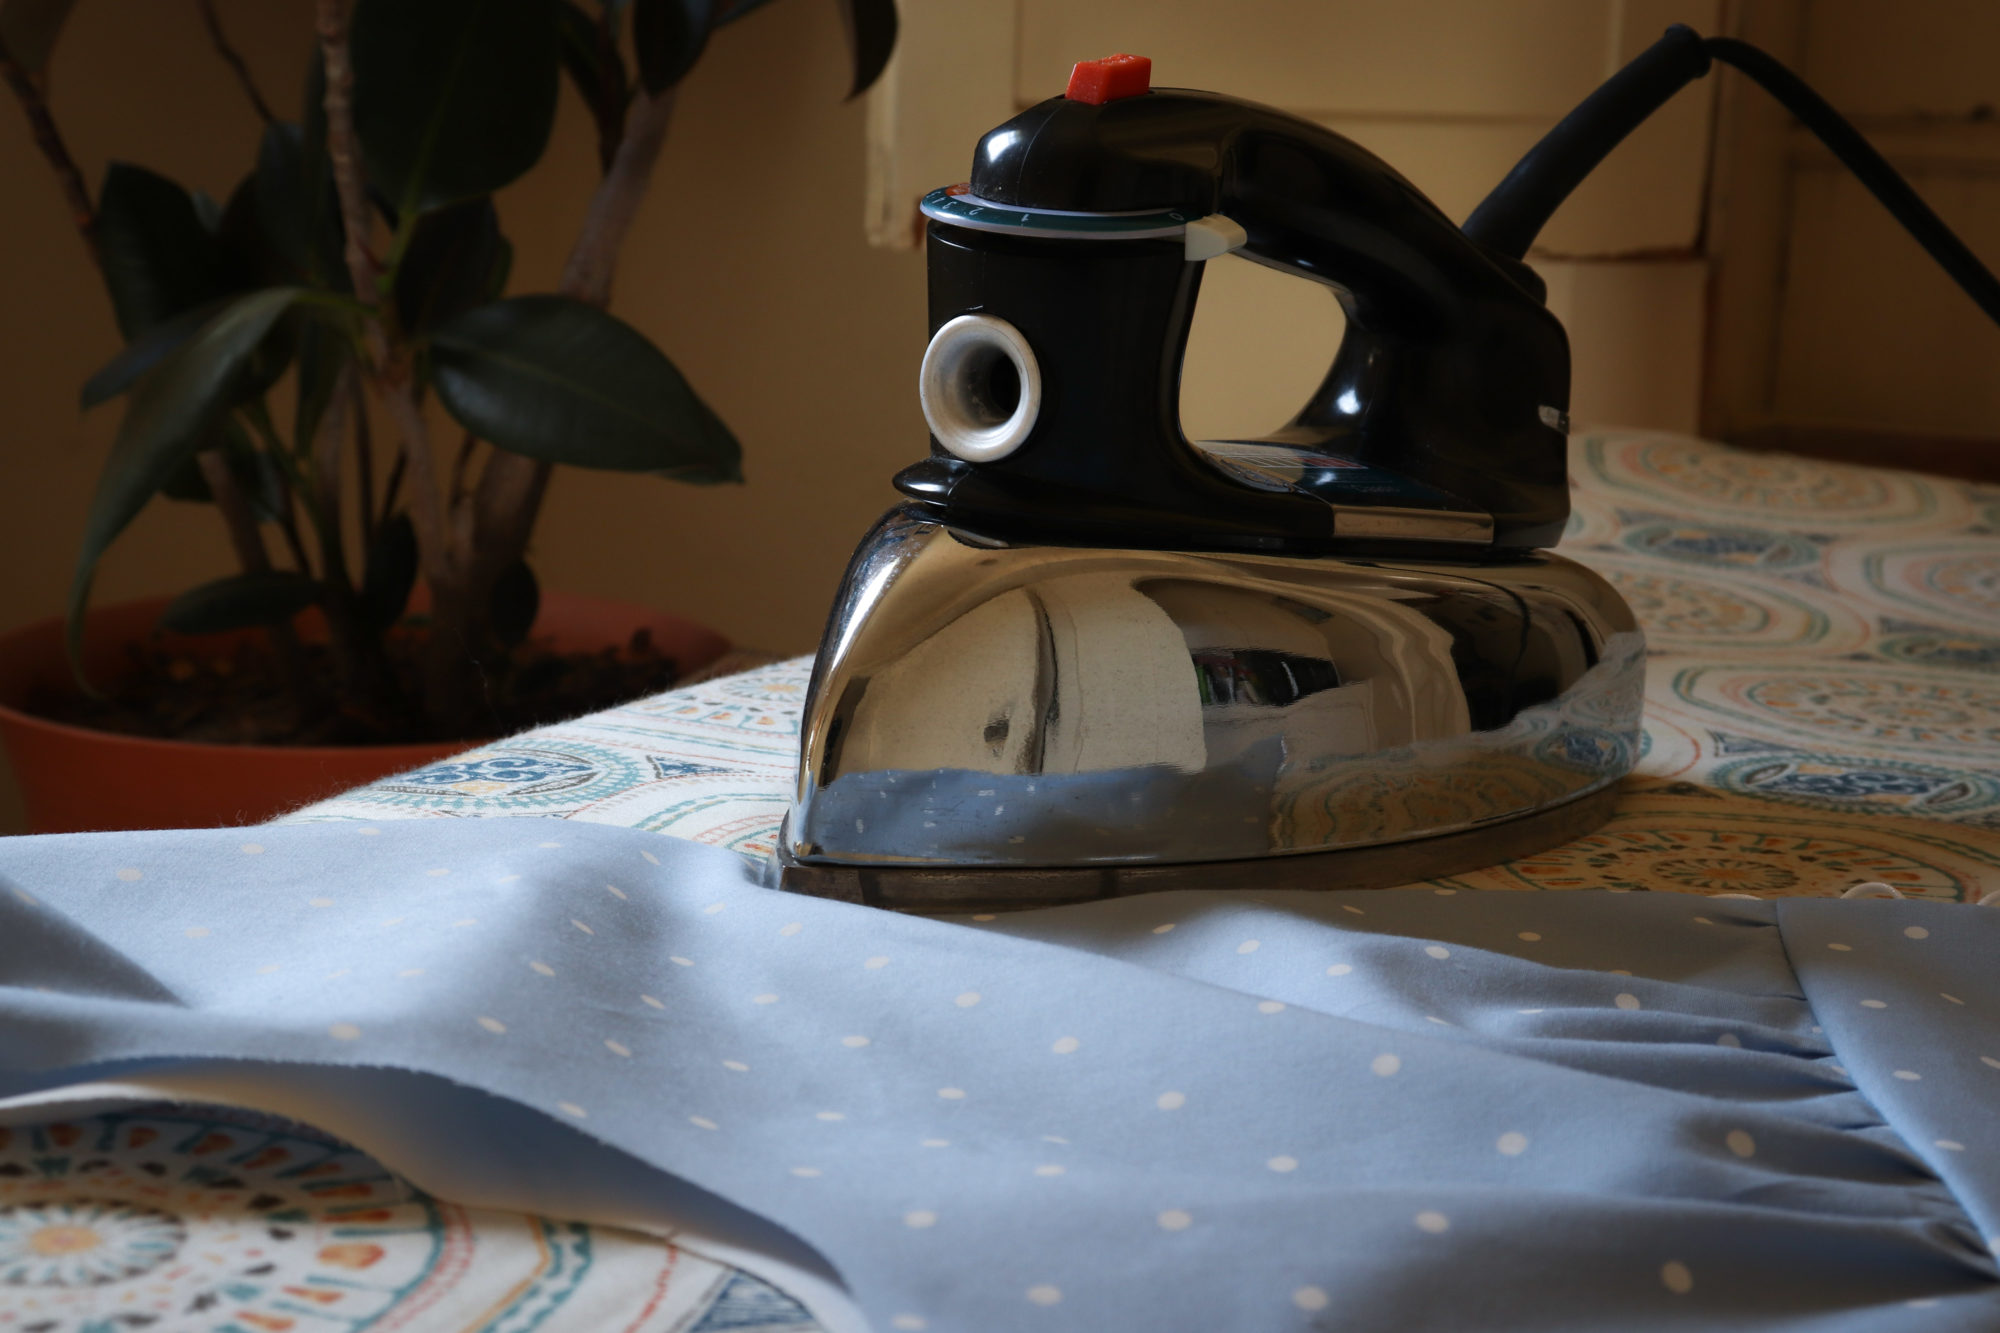
Fold the button band in half with wrong sides together, using the stitching as a guide. Press carefully.
Pin the button band to the exterior of the right-hand side (when worn) of the main fabric bodice, aligning it with the bottom of the bodice waistband. The rattail cord will be facing upwards.
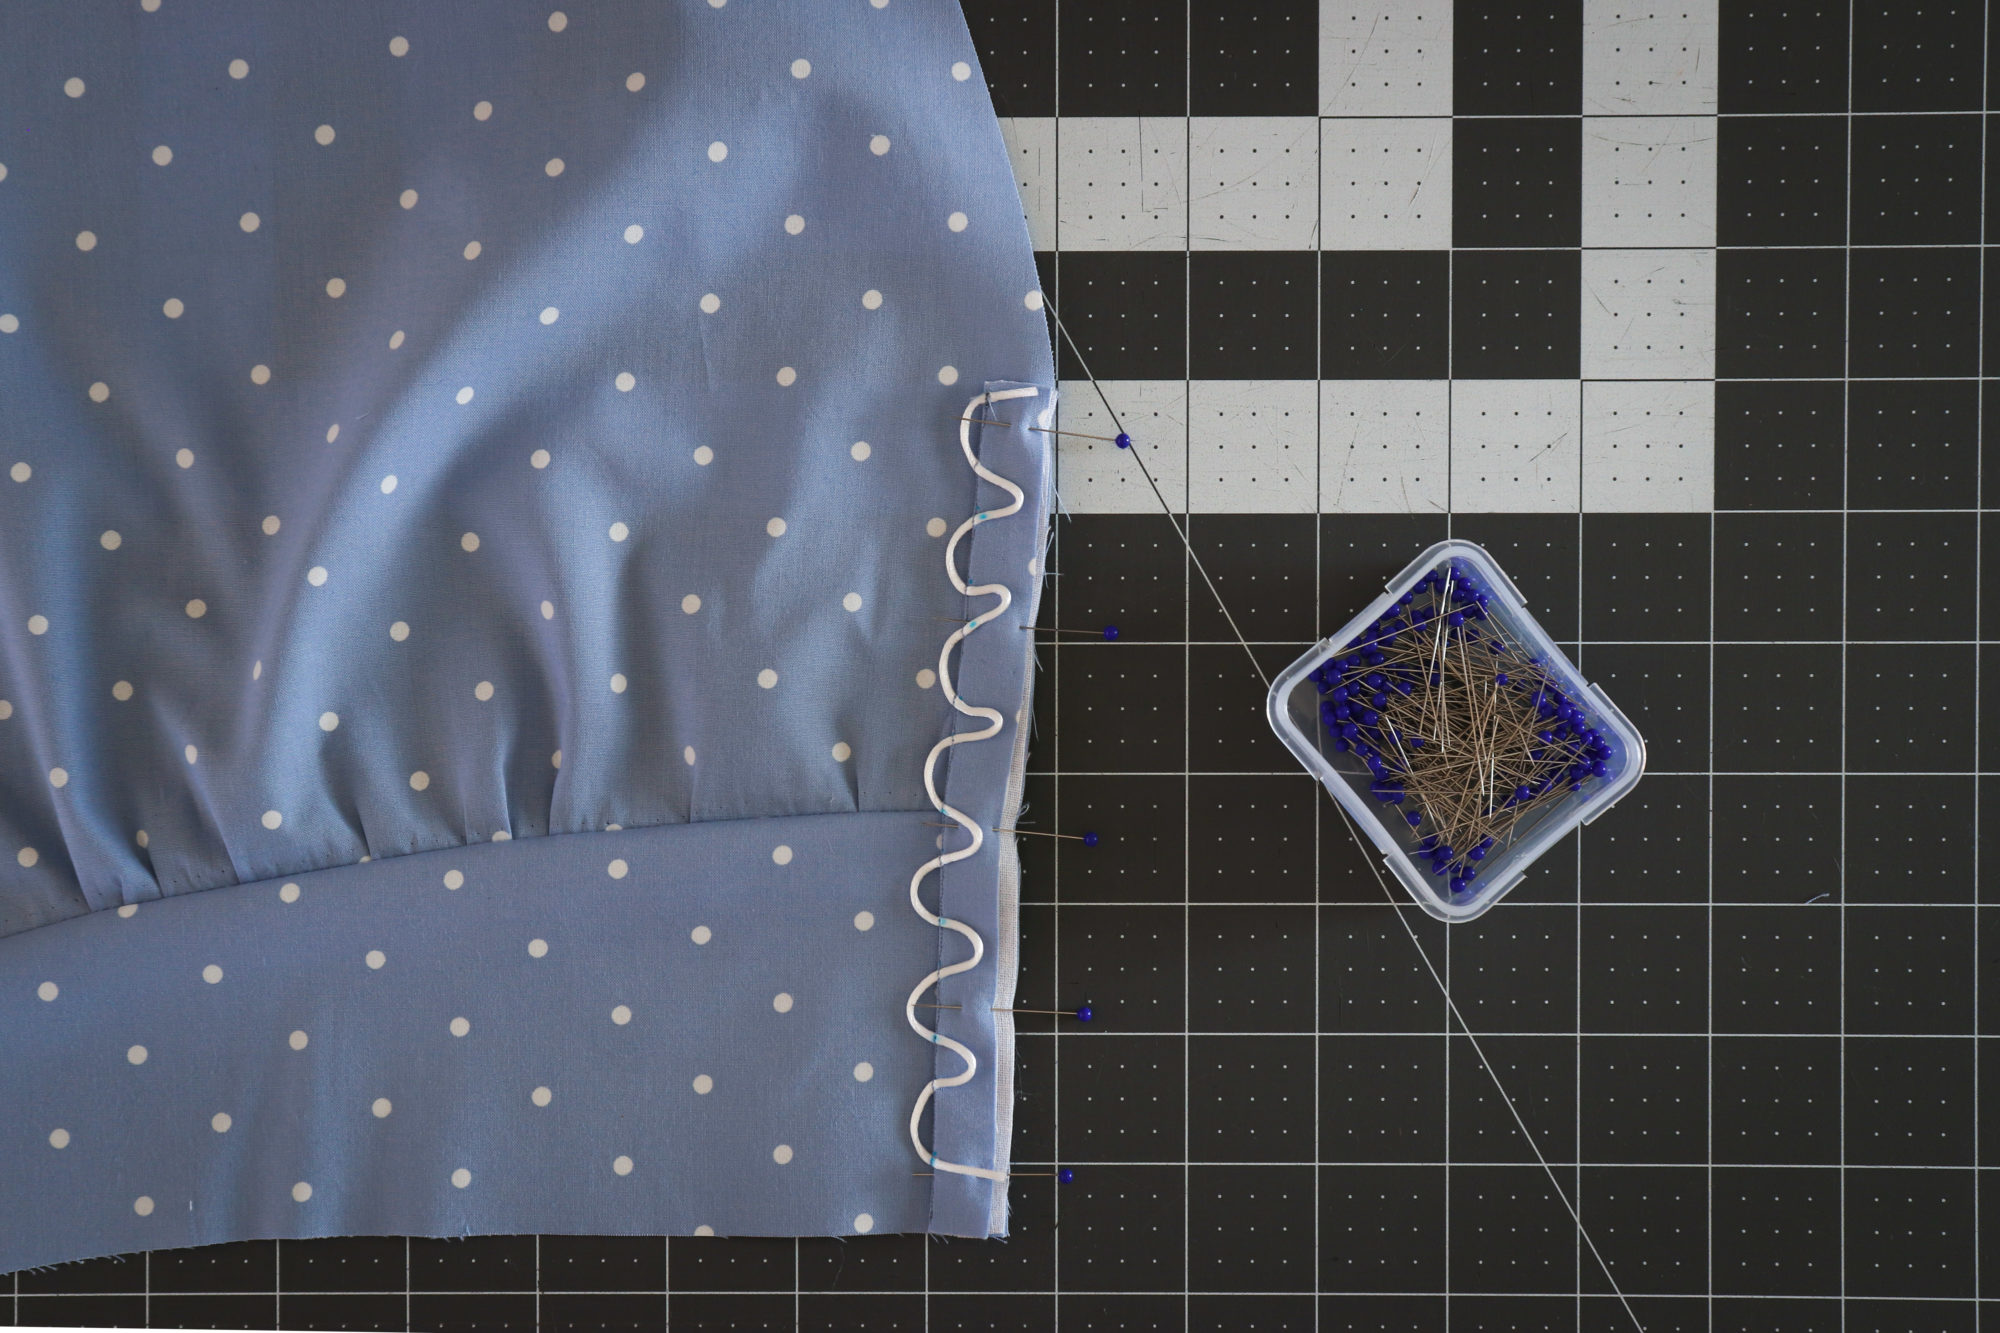
Baste the button band in place.
Continue sewing Orchidée per the instruction booklet until it is time to attach the bodice lining. Pin the main fabric bodice to the lining with right sides together. The button band will be sandwiched between the main fabric and the lining fabric.

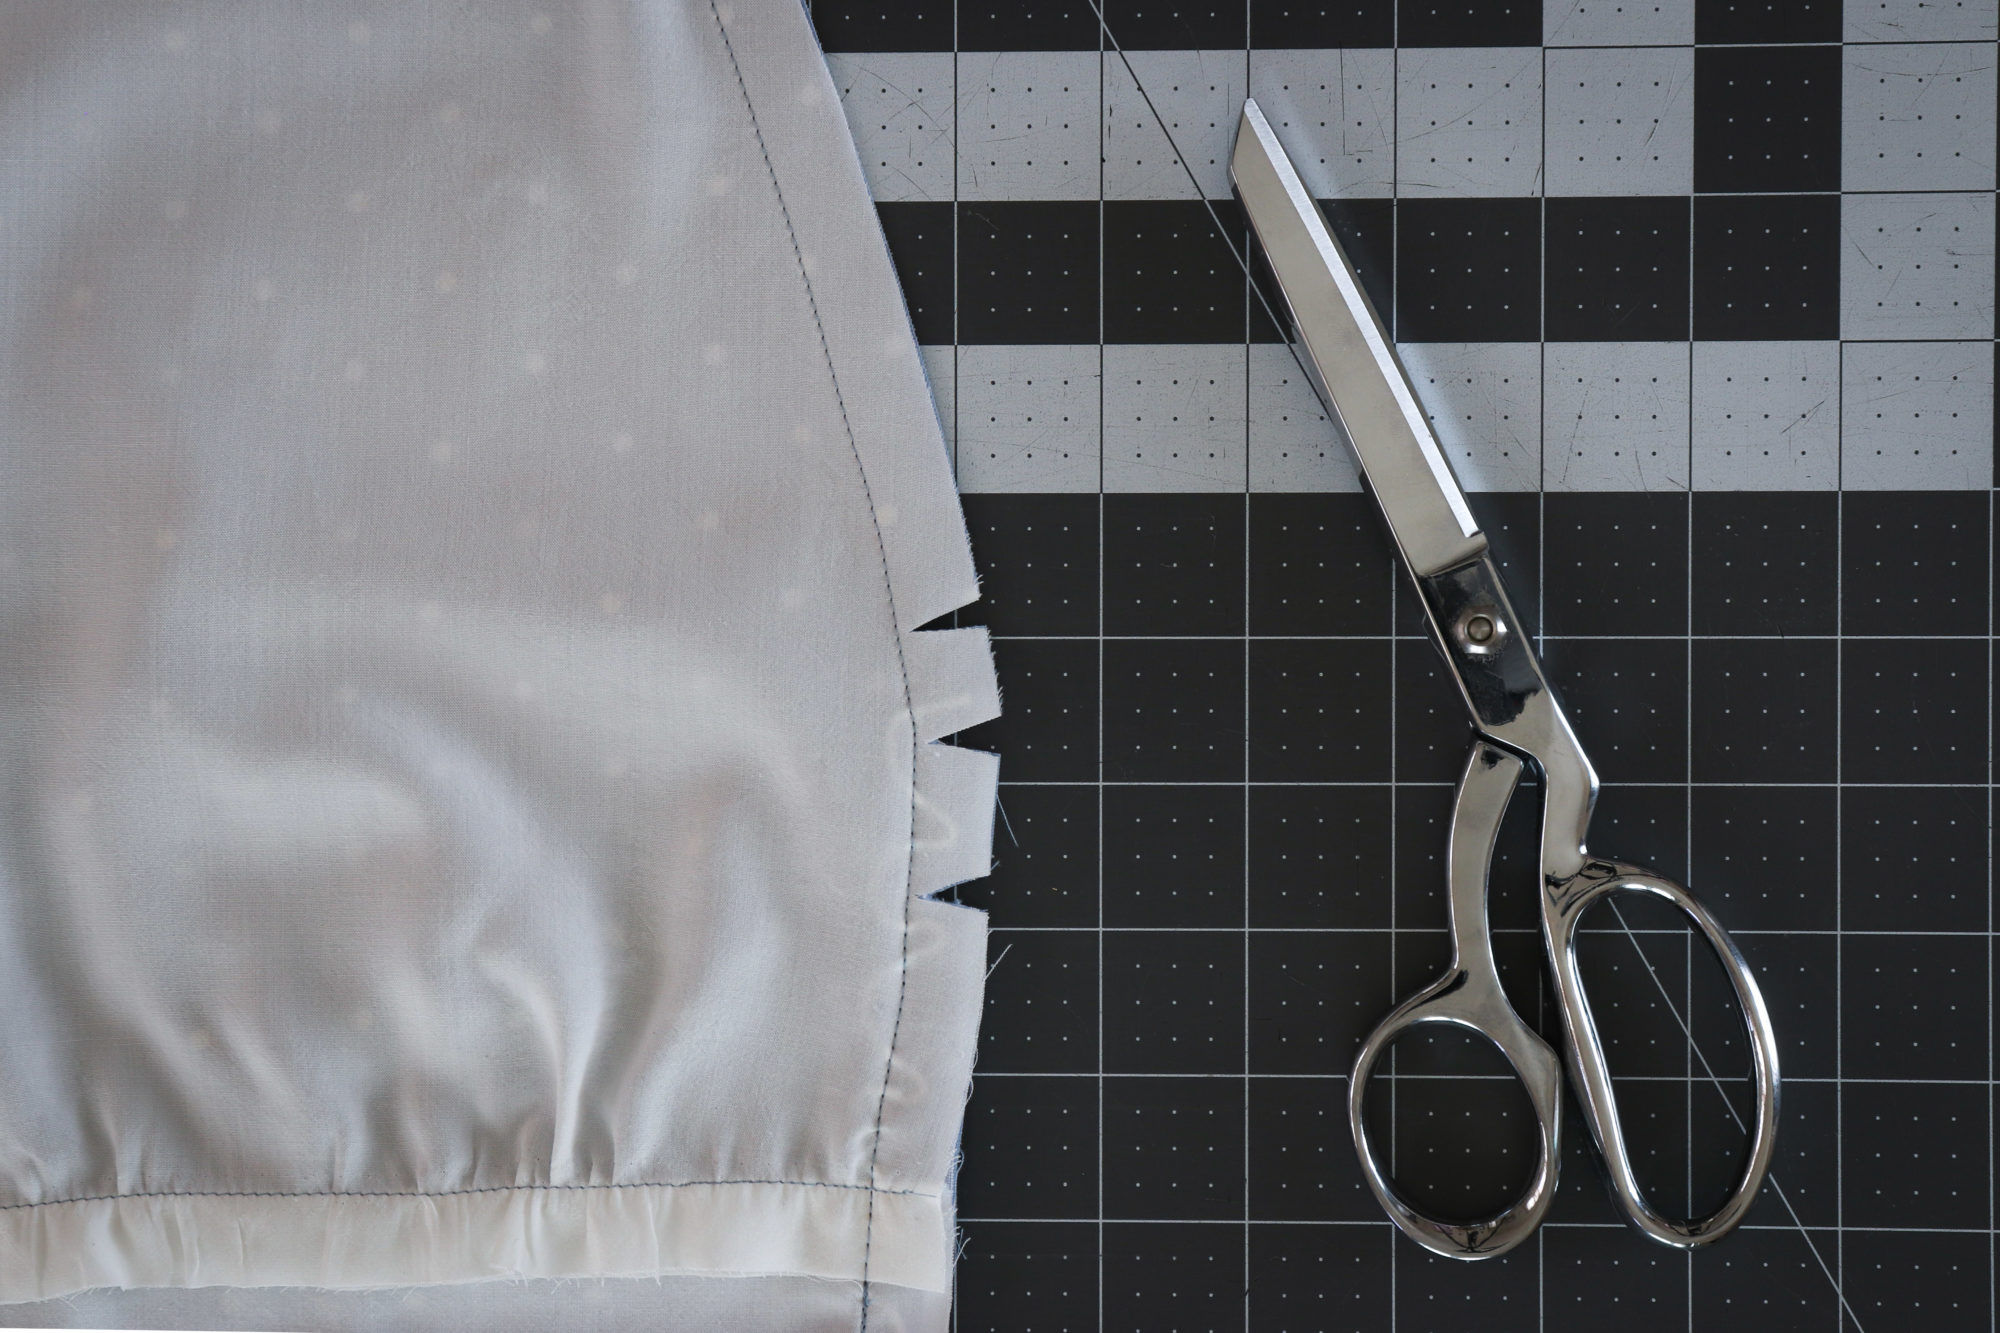
Stitch along the neckline, starting and stopping ⅝” from the bottom of the front waistband.
Notch the seam allowance to allow the curves of the neckline to lay flat once turned.
Open the seam and understitch the neckline, once again starting and stopping ⅝” from the bottom of the front waistband.
Turn the bodice and lining right side out and press carefully.
Continue sewing Orchidée per the instruction booklet.

Don’t forget that you can find the full Orchidée video sewalong here.