You want to make the Zéphyr dress, but you think you might need a full bust adjustment and you don’t know how to do one on a princess-seamed bodice? Let us walk you through the Deer and Doe method!
Zéphyr is a knit dress, so it can be more forgiving than woven dresses when it comes to fit. However, if you notice that the fabric is very stretched between your breasts or that the waistline rides up in the front, you might need to do a full bust adjustment!
To do an FBA on a princess-seamed bodice, you can follow what seems to be the classic american method, which is very well explained on the Colette Patterns sewalong site or the Sewaholic blog. One issue with this method is that, in addition to being a bit complex, it changes the side seams, which might create some unbalance or pulling. We thus developed our own FBA method, adapted from the classic FBA on a double dart bodice.

To know if you have to do an FBA, and how much width to add, you first need to make a muslin of the dress (skirt included, as the weight of the skirt pulls on the bodice and changes the way it fits). Avoid using a serger to assemble it, as we’ll need to undo some seams to measure the adjustment amount.
Once you have made your muslin, try it on and check the fit of the bodice. If the dress fits well around the shoulders but the fabric is very stretched out over your bust and the waistline rides up in the front, you need to do an FBA.
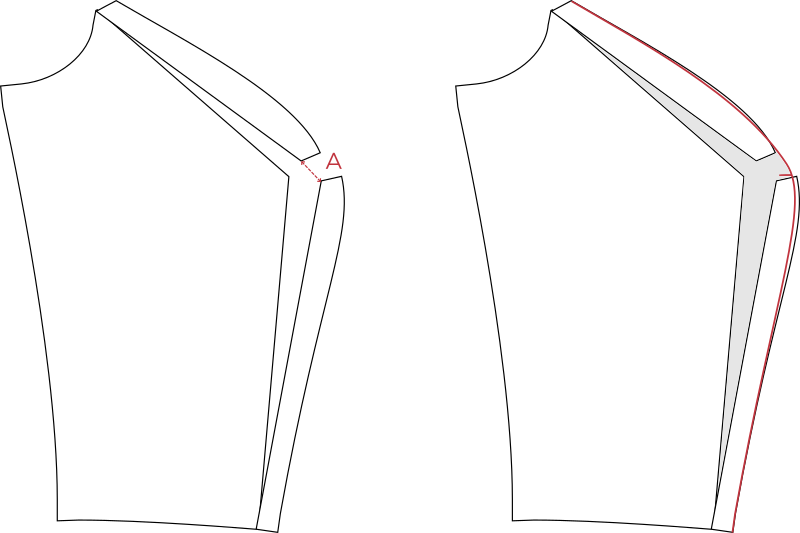
To measure the adjustment value, unpick the princess seams over your bust, a few inches above and a few inches below the apex, until the two sides of each seam are apart and the fabric stops being overstretched across the bust. Measure the distance between each apex on both sides, and sum these distances to find your full bust adjustment value. For instance, a gap ¾” wide on each side gives us a total value of 1½”. For this example we will add the same amount to each side of the princess seam: ⅜” per pattern piece, so ¾” per half-front and 1½” in total.
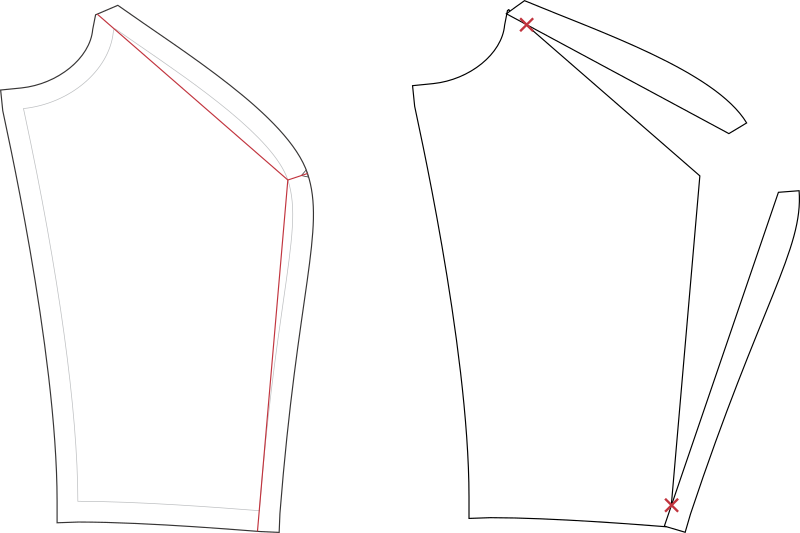
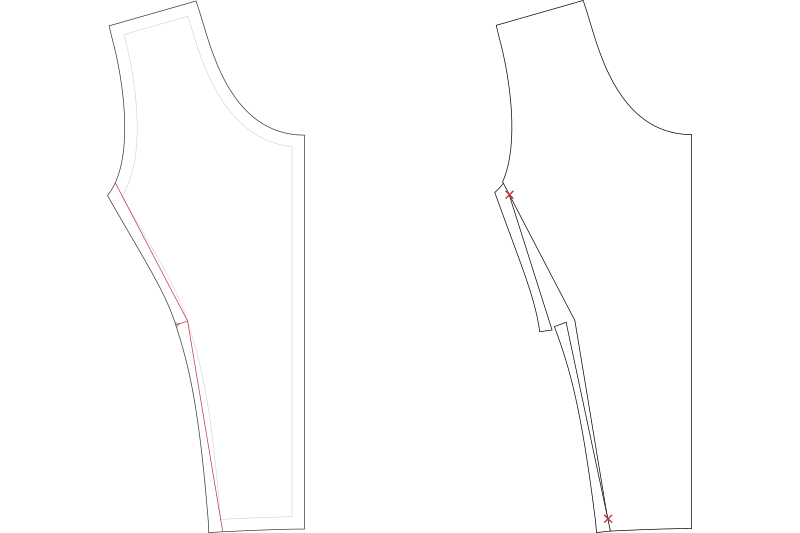
We will start by modifying the side front (piece #3). Trace the seam lines all around the pattern piece, 3/8” away from the edge, to use to draw your slash lines. Draw three lines on your pattern piece:
- one that starts from the notch marking the bust apex, and meets the seam line at a 90 degrees angle,
- one that starts from this new point on the seam line and goes through the point where the armhole meets the bust seam,
- one that starts from the same point and goes through the point where the waist seam meets the bust seam.
Slash along these three lines, leaving two pivot points: one at the armhole and one at the waist seam.
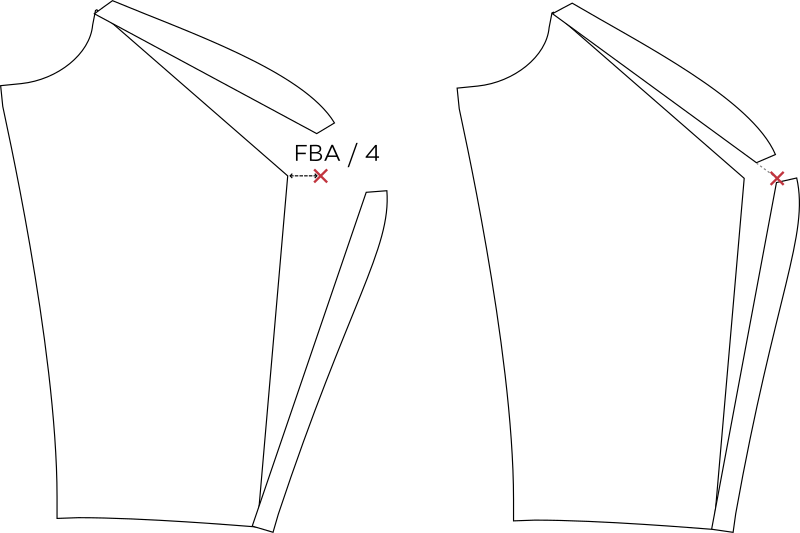
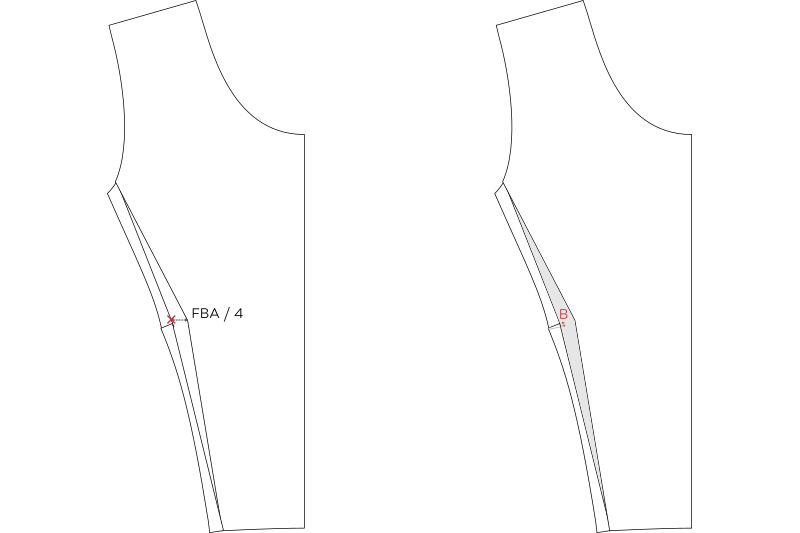
Place your piece on a new sheet of tracing paper, and draw a horizontal line starting from the bust apex. Place a point on this line at a distance of 1/4th of your augmentation value. This is the new bust apex. Pivot the two free parts of the pattern piece so that they point towards the new apex (c.f. figure) and tape in place.
Measure the distance between these two parts and write down this value (measure A): we will need it to modify the center front. Re-draw the bust curve, and place the new bust apex notch on the same horizontal line as the previous one.
We will also be modifying the center front (piece #1 or #2) to add some width. Just like with the side front, use the seam lines to draw three lines:
- one that starts from the notch marking the bust apex, and meets the seam line at a 90 degrees angle,
- one that starts from this new point on the seam line and goes through the point where the armhole meets the bust seam,
- one that starts from the same point and goes through the point where the waist seam meets the bust seam.
Slash along these lines leaving a pivot point at the armhole and another at the waist seam.
Place your pattern piece on a new paper sheet and draw the point corresponding to the new apex. Again, it is placed on the same horizontal line as the old one, at a distance corresponding to your adjustment value divided by 4. Pivot the two free parts so that the apex is in line with the slashed lines and tape in place. Measure the distance on which these two parts overlap (measure B).
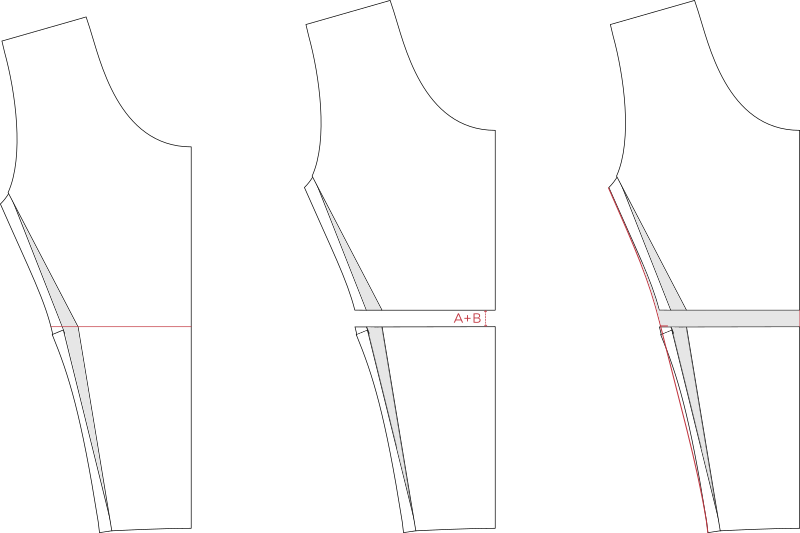
We have added some width, now we are going to lengthen the center front to make sure that the princess seam lines are the same length. Draw an horizontal line passing through the bust apex and slash through this line. Spread the two parts by a distance corresponding to A + B. Redraw the bust curve. The bust notch is placed on the horizontal slash line of the bottom part of the pattern piece.
You now have your two new pattern pieces! The sides of the bodice don’t change, so you don’t need to make any adjustment to the back bodice pieces.