Our month-long pattern hack challenge has come to a close, and we are so excited to officially announce the winner! Congratulations to @atelier_de_myrtil_et_morio, our winning finalist!
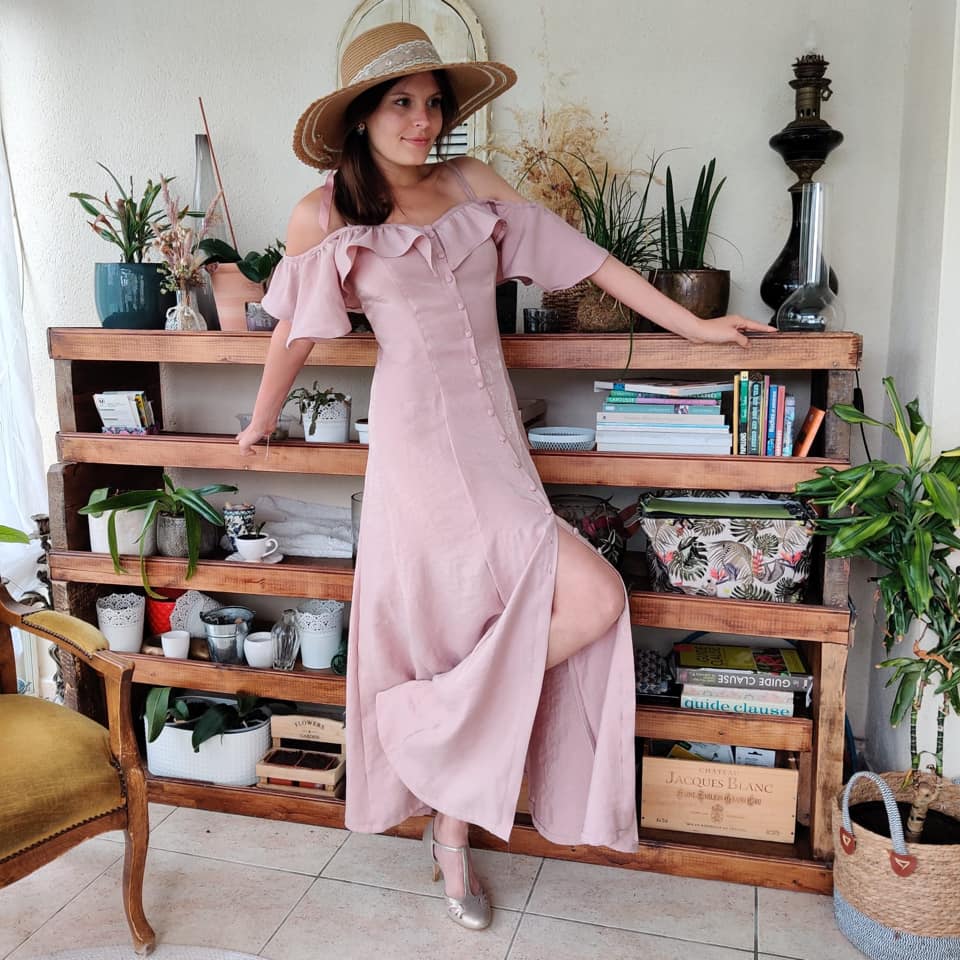
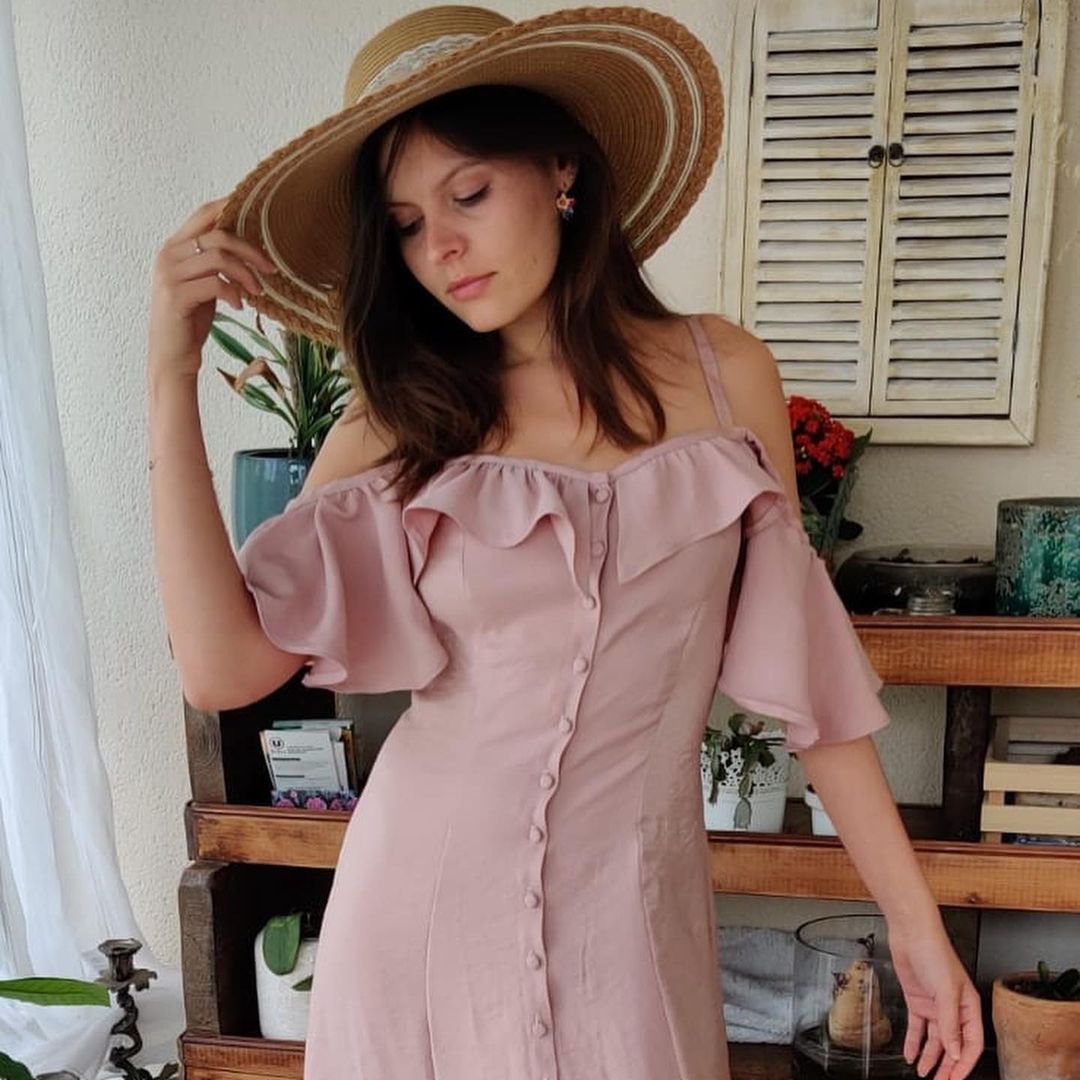
Thank you so much to everybody who took the time to enter and share your creations. We were blown away by the amount of creativity in each entry and it was incredibly difficult to choose our semi-finalists! Today we want to highlight the winning entry, which was—if you can believe it!—hacked from the Fumeterre skirt pattern.
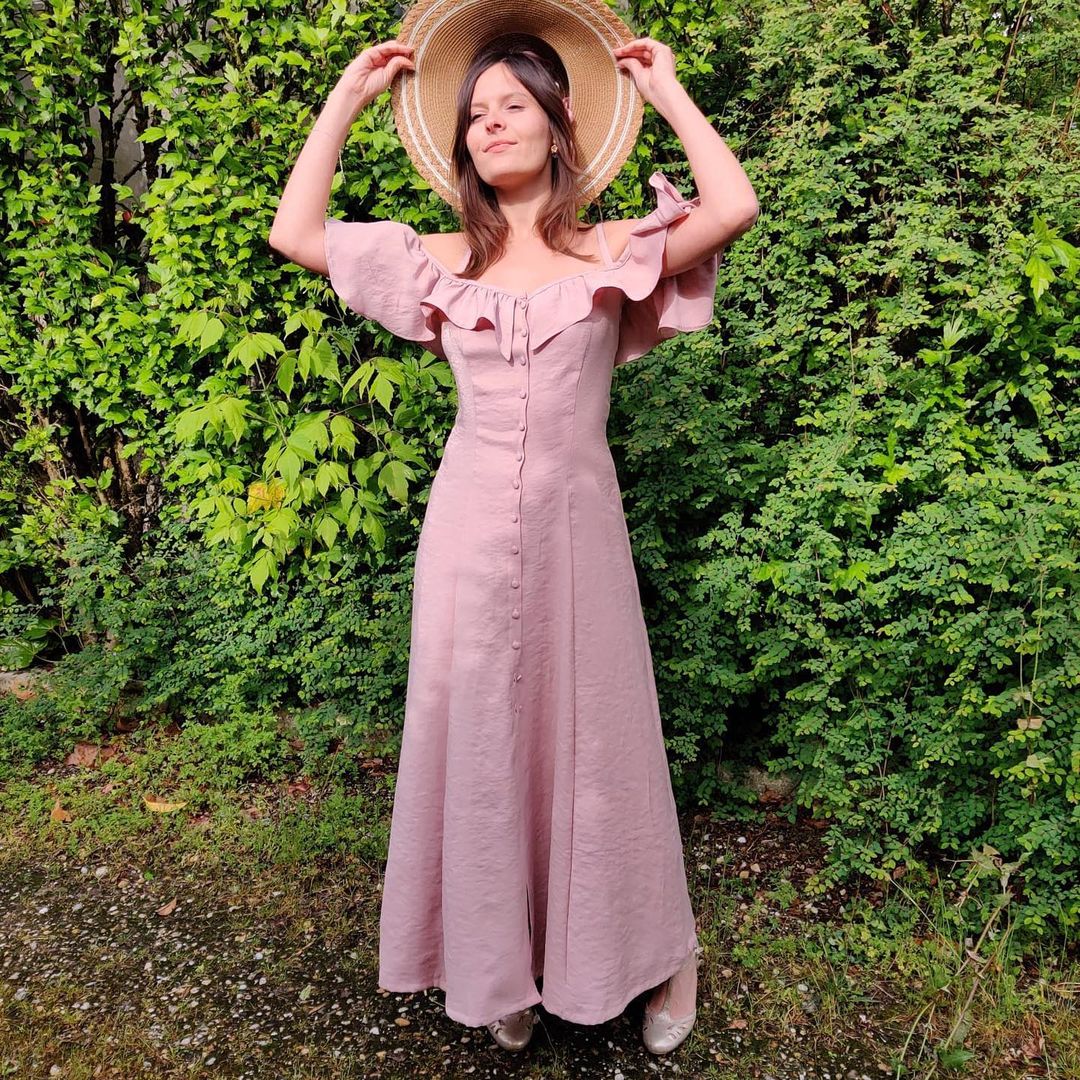
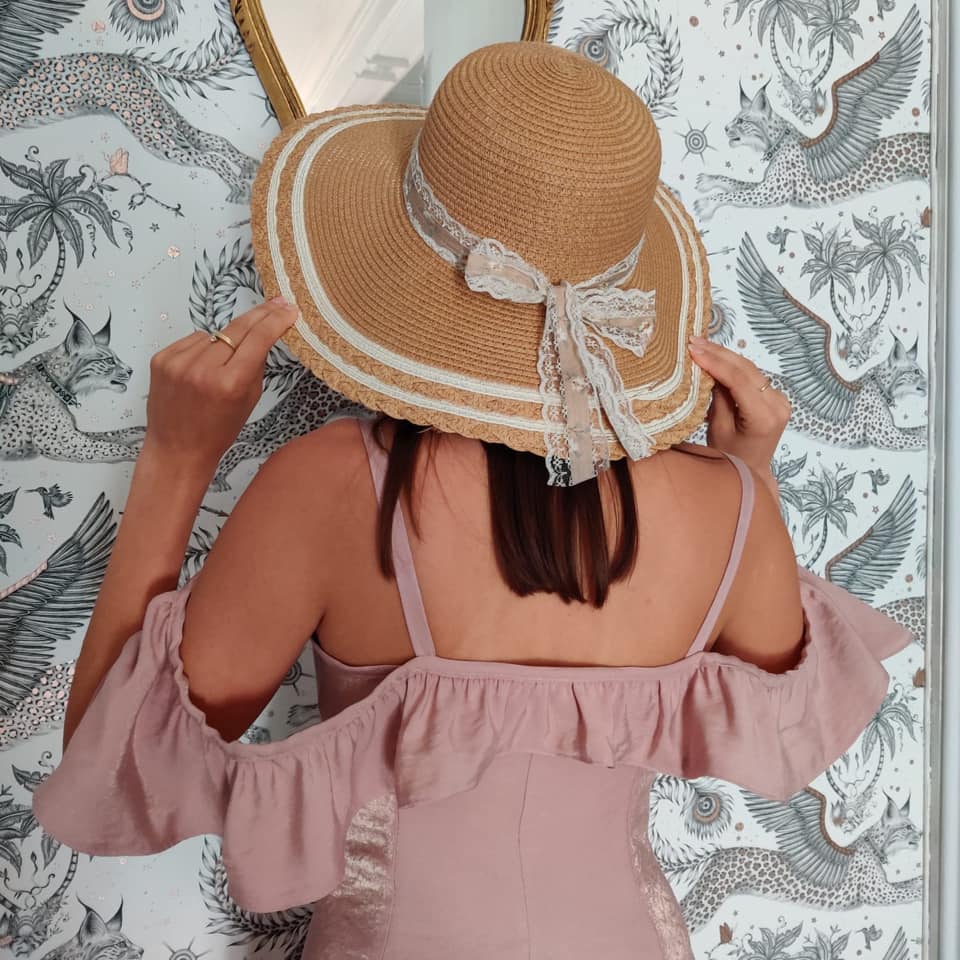
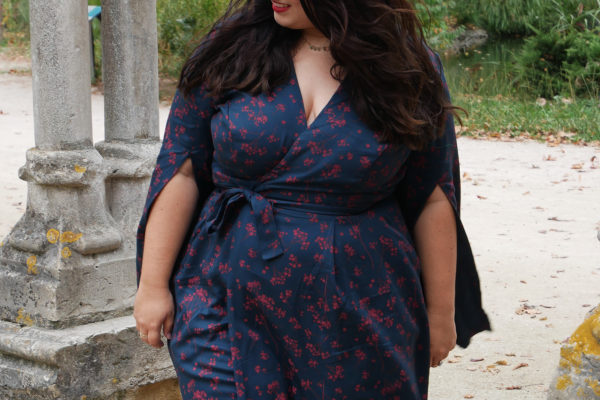
I hacked the Fumeterre skirt by extending the skirt panels and adding a ruffled neckline to create the bodice. I have been sewing for two years now (I am self-taught), and I’m very proud of my progress. I’d love to hack more patterns! Thank you to my little sister, who agreed to serve as my model.
@atelier_de_myrtil_et_morio

@atelier_de_myrtil_et_morio also shared some amazing sketches of her design and process to help illustrate how she did this hack.
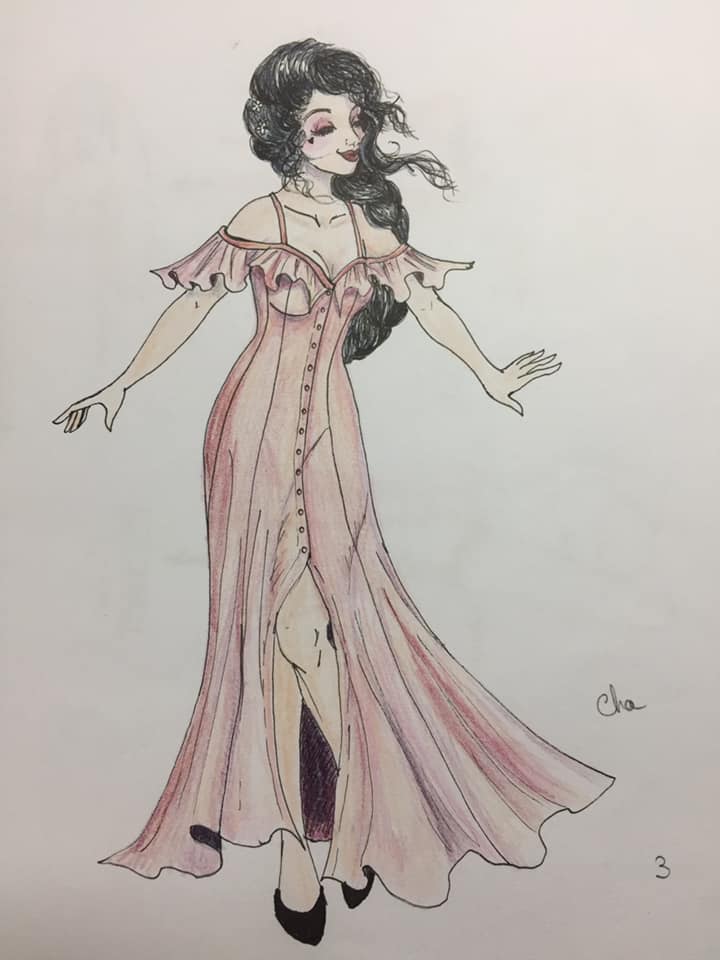
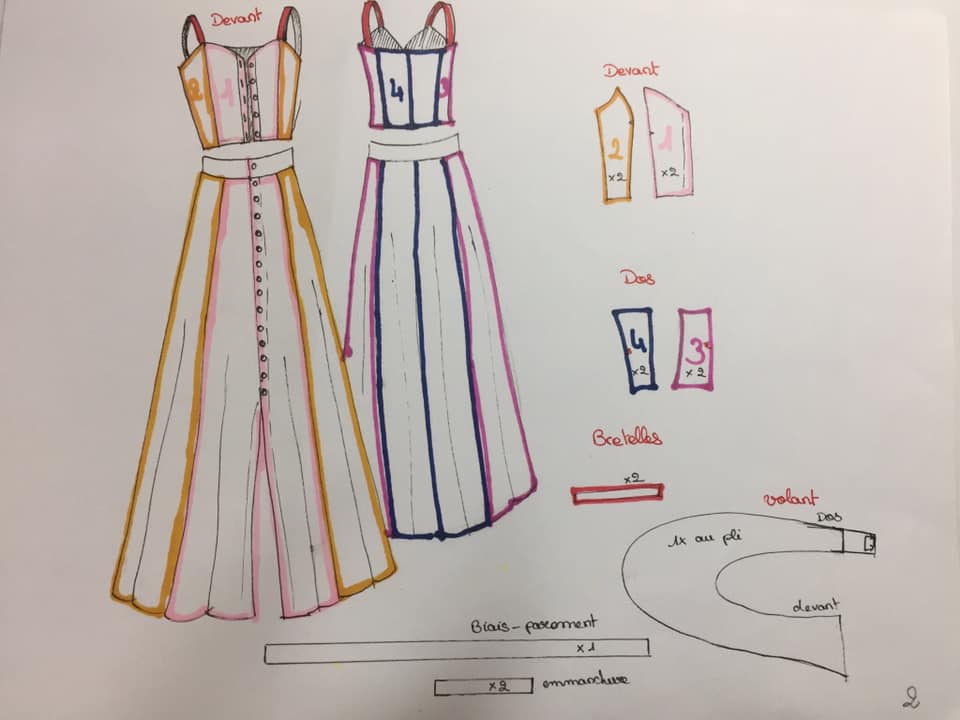
Below is plan A for my Fumeterre hack, transformed into a dress with added ruffles. First, I worked on the body of the dress:
I looked at a bustier pattern as a reference for the shape of the pattern pieces (the Jessica dress from Mimi G). I used the Magnolia‘s princess seams and adjusted the pattern pieces until I got a similar shape to the bustier pieces, dividing the bodice into 8 pieces to match the skirt panels.
It took me 2 muslins to get an acceptable fit. In the end I went with another approach . . .
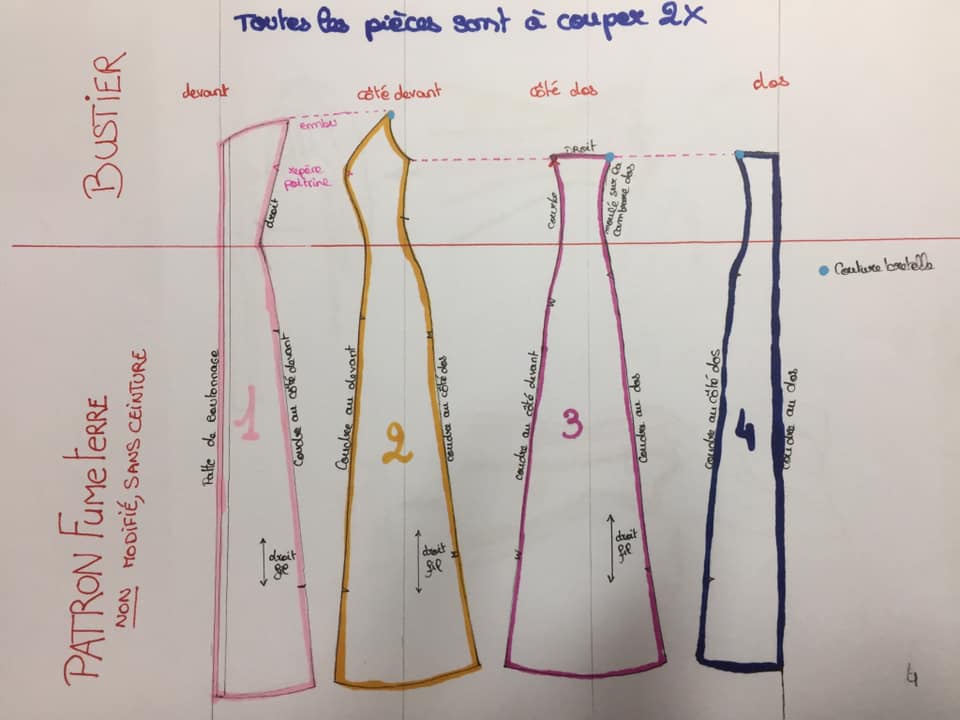
I decided to remove the waistband. To do so, I removed the waistband, lengthened the bustier by as much as I removed and drew pattern pieces as follows (see image below).
A new muslin is necessary here to adjust the back curves and the ease in the front. The harder piece to pattern is the side front because there are only curves. Remember to keep the markings to avoid getting the pieces mixed up, especially the back ones. Concerning piece 3, side back: the curves on either side of the bustier are different.
Once the core of the dress is done, it’s FREESTYLE TIME
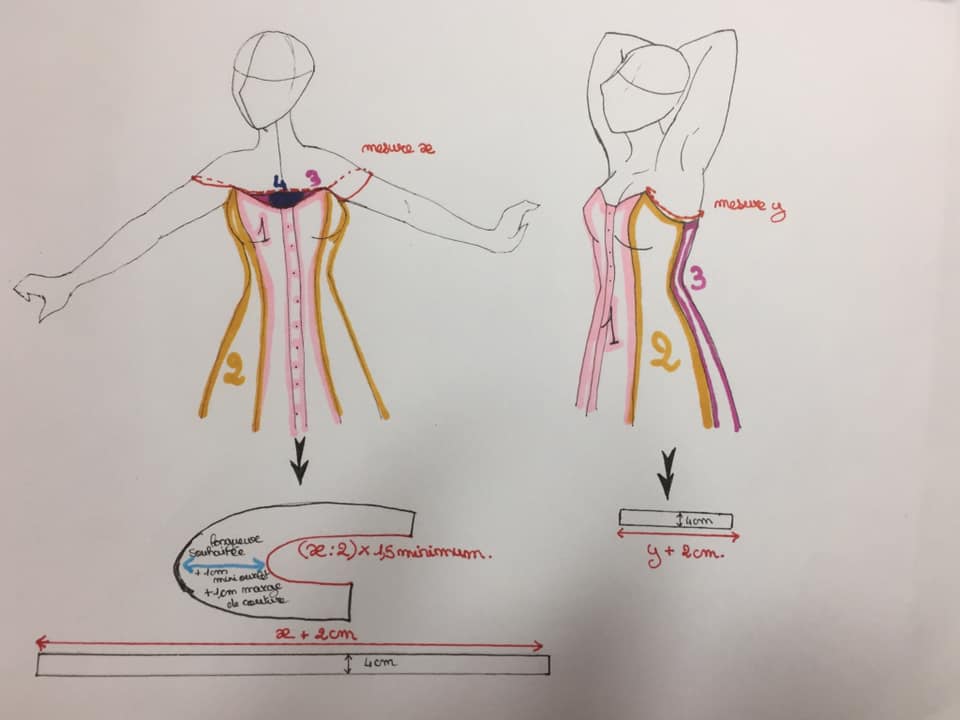
You’ll have to get some help to measure the ruffle, and I find it’s best to measure high on the shoulders and up to the button band. I created a piece to be cut on fold, taking that measurement into account as indicated on the drawing below. I marked the center back carefully. I did a 0.5 cm baby hem but I’ll admit I made a mistake there.
The ruffle is long so gathering it is tedious. So, on my dress, I decided to gather using elastic (don’t judge, it was 1AM and I broke my gathering thread). I don’t recommend it. I think the longer sleeves should be more gathered than in other places. I gathered until I reached length x; and I checked that the center back marking was centered.
I cut bias binding in my fabric: 2 shorter strips first; slightly longer than the front and back side pieces, and I sewed it on the edge.
Then I pinned the gathers starting at the center back, up to the place where the back side pieces join the back pieces.
Then, I took the ends and pinned from the button band to the place where the front side pieces join the front pieces.
I sewed inside the seam allowance.
I cut the long bias strips all around the neckline.
Finally, I sewed the spaghetti straps by hand with an invisible stitch, adjusting them directly on my sister Garance.


TM, June 18 2021
Beautiful dress, I’d love to have a pattern for it. A good write up too. I liked reading how she worked through all the difficulties