Hi everyone! This week, I’ve decided to write a few tutorials to help you get the most of the Aubépine pattern.
Today we’ll see how to alter the bodice to make a small bust adjustment (SBA) or full bust adjustment (FBA). Warning: before starting to adjust your pattern, always sew a muslin first: depending of the size of your back, your shoulders, and the shape of your bust, you might not need to adjust anything even if you are an A or E cup!
If you need an adjustment (the bodice is too loose, or too tight on your chest), start by measuring the amount of fabric to remove (or add) to either side of the bodice. Write this down carefully, and here we go!
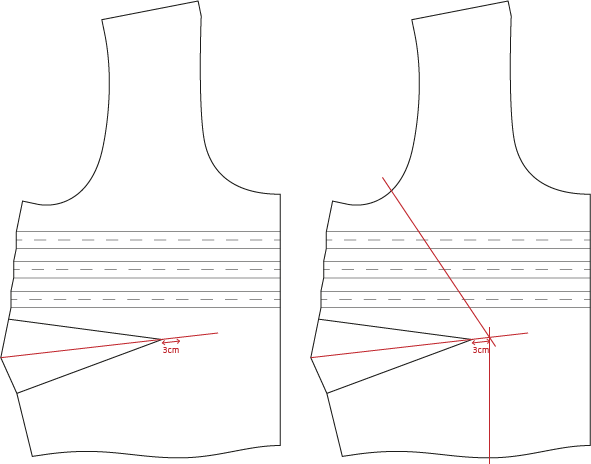
Trace pattern piece #1 in your size. Draw a line starting from the middle of the dart (on the size) and going through the dart point. Place a mark 3cm to the right of the dart point.
Draw two lines going through this mark: a vertical line parallel to the right edge of the pattern piece, and one going approximately through the middle of the armhole.

Cut along these lines, leaving two pivot points: one at the bottom and one at the armhole.
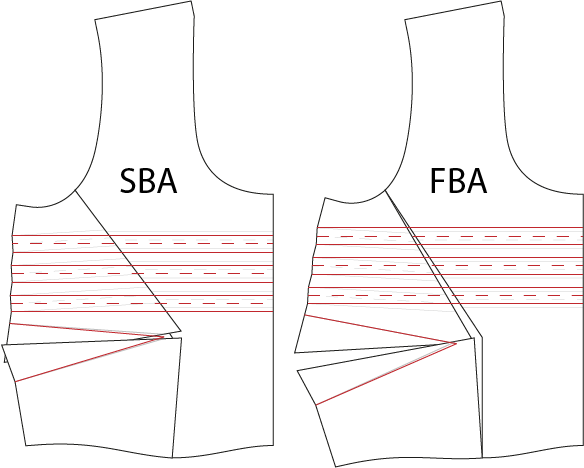
For a SBA: Rotate the pieces like on the first drawing to reduce the bodice width.
For a FBA: Rotate the pieces like on the second drawing to augment the bodice width.
Now we’ll draw new lines for the tucks. Just draw lines perpendicular to the right edge of the piece, starting at the same points on the left as the old lines.
Draw a new bust dart, using as a new dart point the mid-way point between the two old points.

Trace the piece on a new sheet of pattern paper: you’re done! For an SBA, you can also modify the bottom half of the bodice by reducing the curve under the bust (on the drawing above, the old curve is in grey).
Modifying the bodice lining
After modifying the bodice piece, don’t forget to also change the corresponding lining: to do so, just fold your new bodice along the tuck lines as follows:

Trace this piece to get your new lining piece!