The main asset of the Magnolia dress is its plunging neckline, so we really had to address bust adjustments on this pattern! Our patterns are drafted for a C or D cup, but if your bust is smaller or larger, no worries: here’s how to adjust the pattern.
First of all, you’ll need to determine if you need a bust adjustment, and if so how much you need to add or remove! To do so, you’ll need to do a muslin of the garment, as the adjustment value will depend of your body type and your preferences in terms of ease.
Your muslin has to fit properly through the shoulders, which means that the armhole seam must hit the edge of your shoulder, and not fall down your arm. Similarly, it shouldn’t ride up on the shoulder and hinder arm movements.
- If your muslin feels too tight at the bust and you notice horizontal drag lines, you’ll need a full bust adjustment. Unpick a few inches of the princess seam around the bust apex, on each side, and measure the gap that forms naturally, which will give you your adjustment value.
- If your muslin bags at the bust, you’ll need a small bust adjustment. Pinch and pin the fabric excess on each breast until you get to a fit that you like: the amount of fabric pinned is the value to remove.
- Finally, if the neckline is gaping at the bust even after ensuring that the bias finish is correctly done (it should pull in the neckline slightly), you could need either a full bust adjustment if you also notice horizontal drag lines and a tight feeling, or it could be that the neckline is too long. In the latter case, pinch the front neckline edges until you eliminate the gaping to determine the length you’ll need to remove. Be careful not to overfit and remove too much length to avoid pulling the waistband upwards!
Important: small or full bust adjustments specific to the Magnolia dress are slightly different than usual bust adjustments on princess-seamed bodices: we want to keep the same length on the neckline diagonal edge no matter the cup size.
Small Bust Adjustment (SBA)

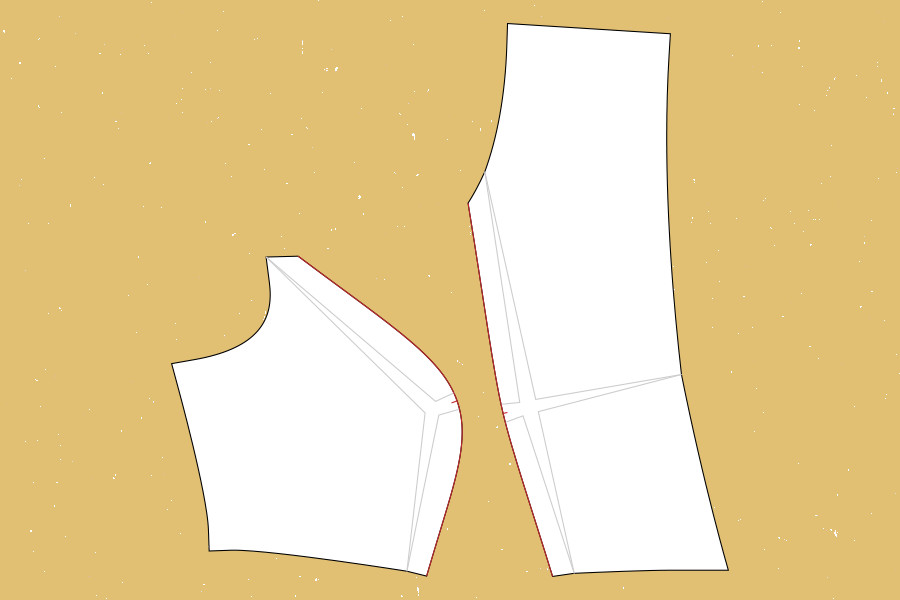
1/ Draw the seam lines on the inside of pieces #1 (#2 for version B) and #3 to use as a reference. They are 5/8” (1.5 cm) from the edges, and 3/8” (1 cm) from the neckline edge.
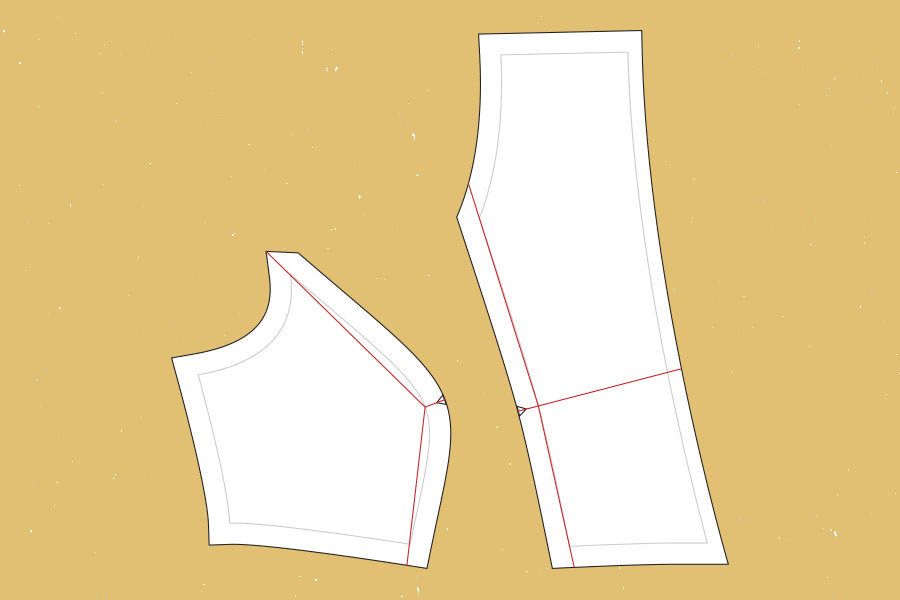
2/ Draw three lines on your two pattern pieces:
- one line starting at the notch that marks the bust apex, and meeting the seam line at a 90° angle,
- one line starting from this point on the seam line and going through the tip of the armhole,
- one line starting from the same point and going through the intersection of the princess seam and the waist seam.
On the center front piece, extend the first line all the way to the neckline.

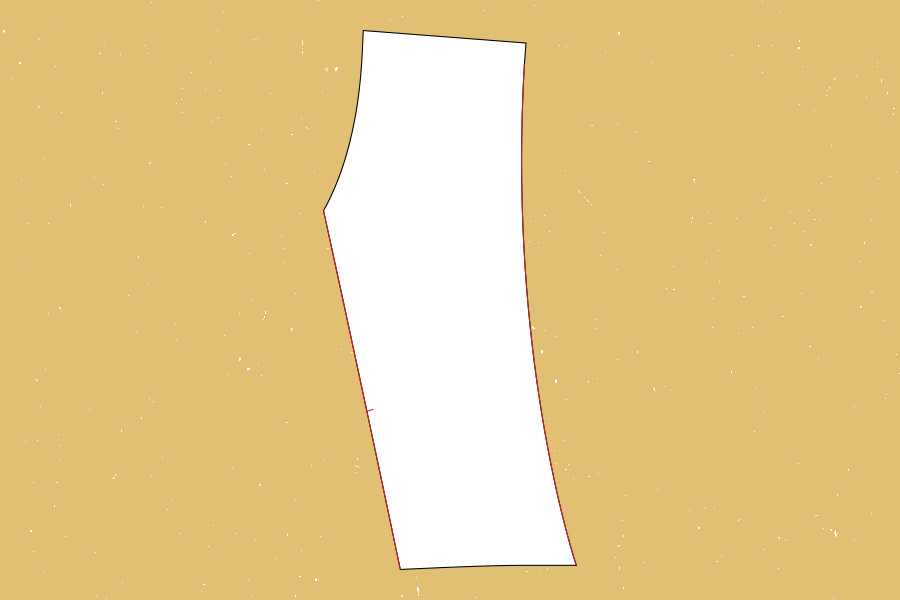
3/ Cut along these three lines, leaving two pivot points: one on the seam line at the tip of the armhole, and one on the seam line at the waist. Do not cut along the horizontal line on the center front piece yet (the red line on the illustration).

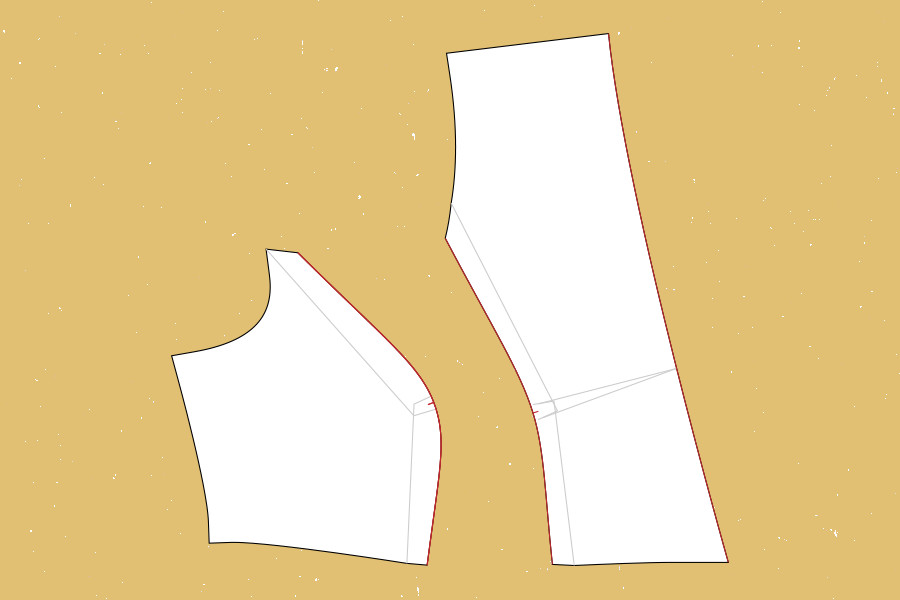
4/ Pivot the two free parts on each piece to remove the desired amount from the bust width (total width to remove at the bust divided by 4, on each piece). Tape in place.

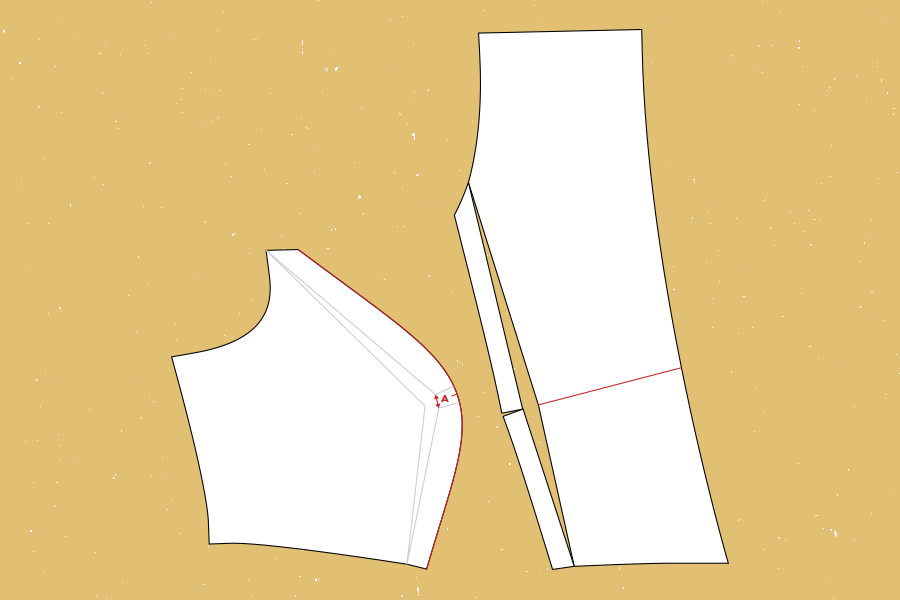
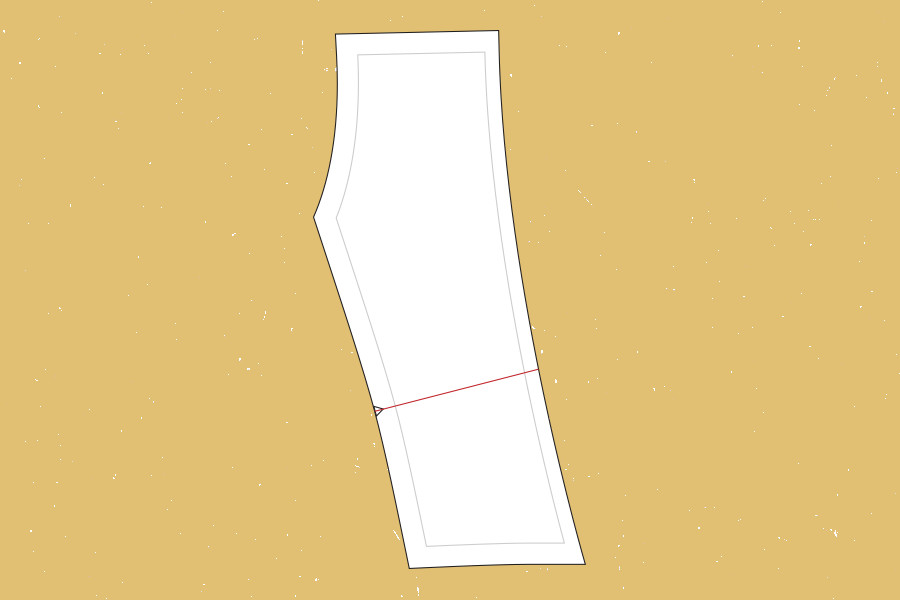
5/ Draw a new curve on the side front piece (#3). Measure the overlap of the two small parts at the seamline (distance A on the illustration).

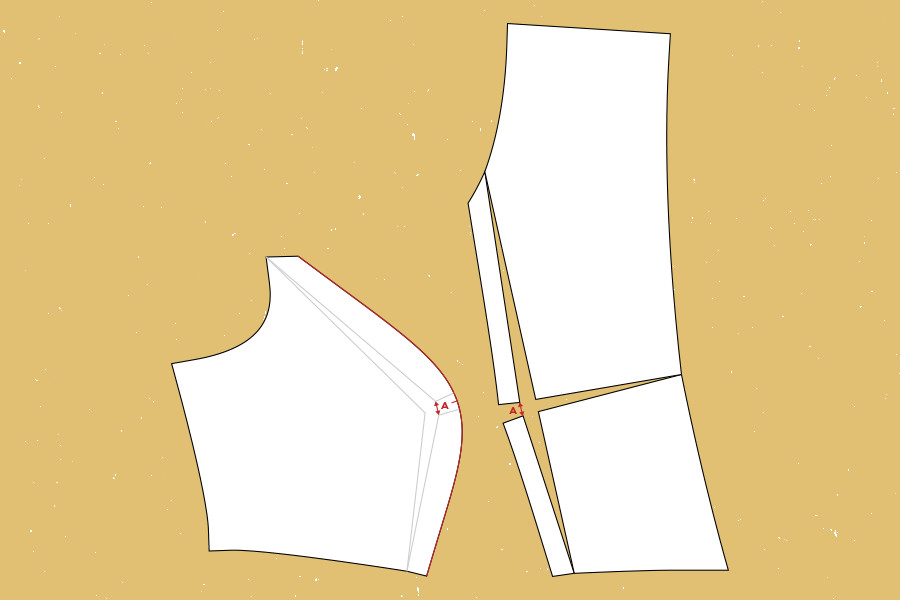
6/ On the center front piece (#1 or #2), slash the remaining horizontal line, leaving a pivot point at the neckline. Pivot the top part of the piece until you reach an overlap equals to A at the seamline. Tape in place.
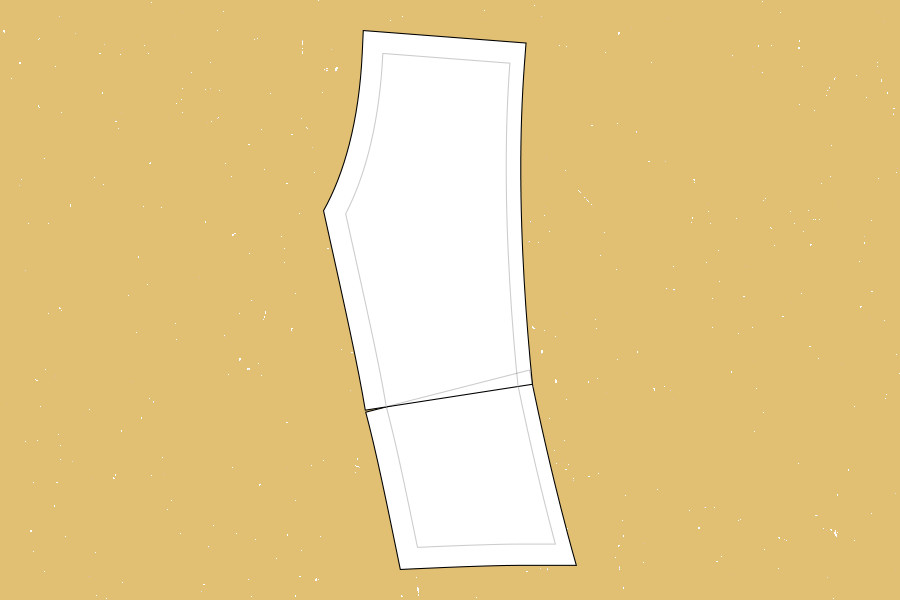
7/ Redraw the curve of the princess seam and straighten the neckline on the center front piece. Place the bust notches at the center of the overlapping parts on each piece (c.f. illustration).
Full Bust Adjustment (FBA)
1/ Draw the seam lines on the inside of pieces #1 (#2 for version B) and #3 to use as a reference. They are 5/8” (1.5 cm) from the edges, and 3/8” (1 cm) from the neckline edge.
2/ Draw three lines on your two pattern pieces:
- one line starting at the notch that marks the bust apex, and meeting the seam line at a 90° angle,
- one line starting from this point on the seam line and going through the tip of the armhole,
- one line starting from the same point and going through the intersection of the princess seam and the waist seam.
On the center front piece, extend the first line all the way to the neckline.
3/ Cut along these three lines, leaving two pivot points: one on the seam line at the tip of the armhole, and one on the seam line at the waist. Do not cut along the horizontal line on the center front piece yet (the red line on the illustration).
4/ Pivot the two free parts on each piece to add the desired amount to the bust width (total width to add at the bust divided by 4, on each piece). Tape in place.
5/ Draw a new curve on the side front piece (#3). Measure the distance between the two small parts at the seamline (distance A on the illustration).
6/ On the center front piece (#1 or #2), slash the remaining horizontal line, leaving a pivot point at the neckline. Pivot the top part of the piece until you reach a distance equals to A at the seamline. Tape in place.
7/ Redraw the curve of the princess seam and straighten the neckline on the center front piece. Place the bust notches at the center of the gap on each piece (c.f. illustration).
Shortening the neckline
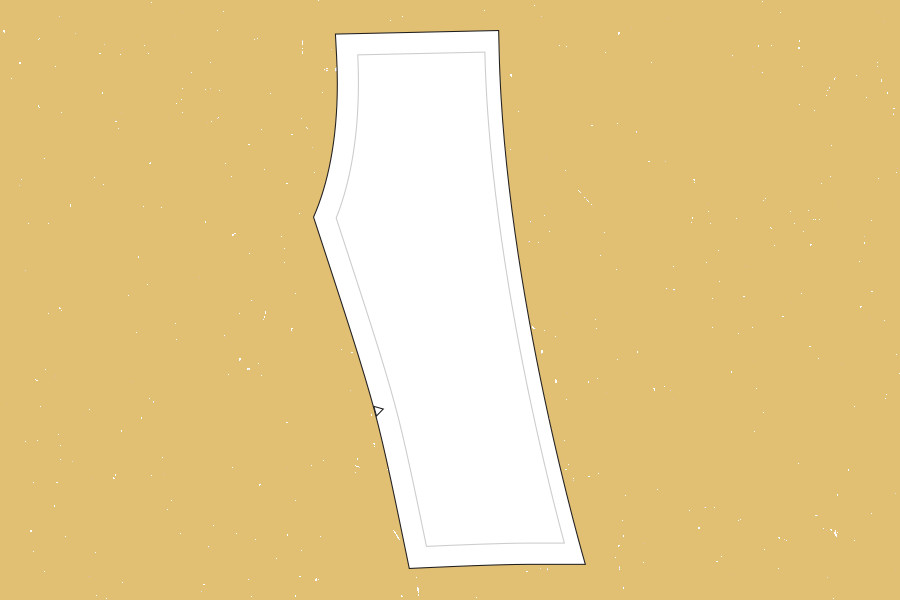
1/ Draw the seam lines on the inside of the center front piece (#1 or #2 depending of the dress variation) to use as a reference. They are 5/8” (1.5 cm) from the edges, and 3/8” (1 cm) from the neckline edge.
2/ Draw a line starting at the notch that marks the bust apex, and meeting the neckline at a 90° angle.
3/ Cut along this line, leaving a pivot point at the seam line on the bust notch side. Pivot the top part of the piece to get the desired overlap at the neckline. Tape in place.
4/ Straighten the neckline and redraw the curve of the princess seam on the center front piece.