Have you ever wondered how to overlay an image of fabric onto a sewing pattern line drawing? Contrary to what you might think, you do not need an expensive program like Photoshop to do it. Today we will show you a quick and easy way to create a pattern mockup, using the free online photo editor Pixlr X.
Planning your projects this way is not only fun, it’s a great way to test how you will feel about a print and pattern together. You can try pairing fabrics already in your stash with a potential pattern, test out a particular print before you click “buy”. You can also use this technique to experiment with color and print blocking! So without further ado, let’s show you how.
First, we need to save the line drawing we’d like to edit to our computer. These can typically be found somewhere on the product page of a pattern designer’s website. If the website does not allow you to save the image file directly, you can use a program like the Snipping Tool (Windows) or Grab (Apple) to copy and save it as a file.
For Deer&Doe patterns, you can access a black and tan version of the line drawings on our project pages, or a black and white version in the pattern PDF instructions. We will walk you through how to edit both versions below.
Next, visit https://pixlr.com/x/. Not only is this a free tool, it is web-based, which means there is no need to download any extra software to your computer. You don’t even need to create an account to use it (although it’s recommended if you would like to save your work). To toggle languages, click the green earth grid icon in the upper right hand corner.
Black and Tan Line Drawings
Visit the Deer&Doe product page of the pattern you want to mock up. Click through the product images until you get to the line drawing, and save that to your computer.
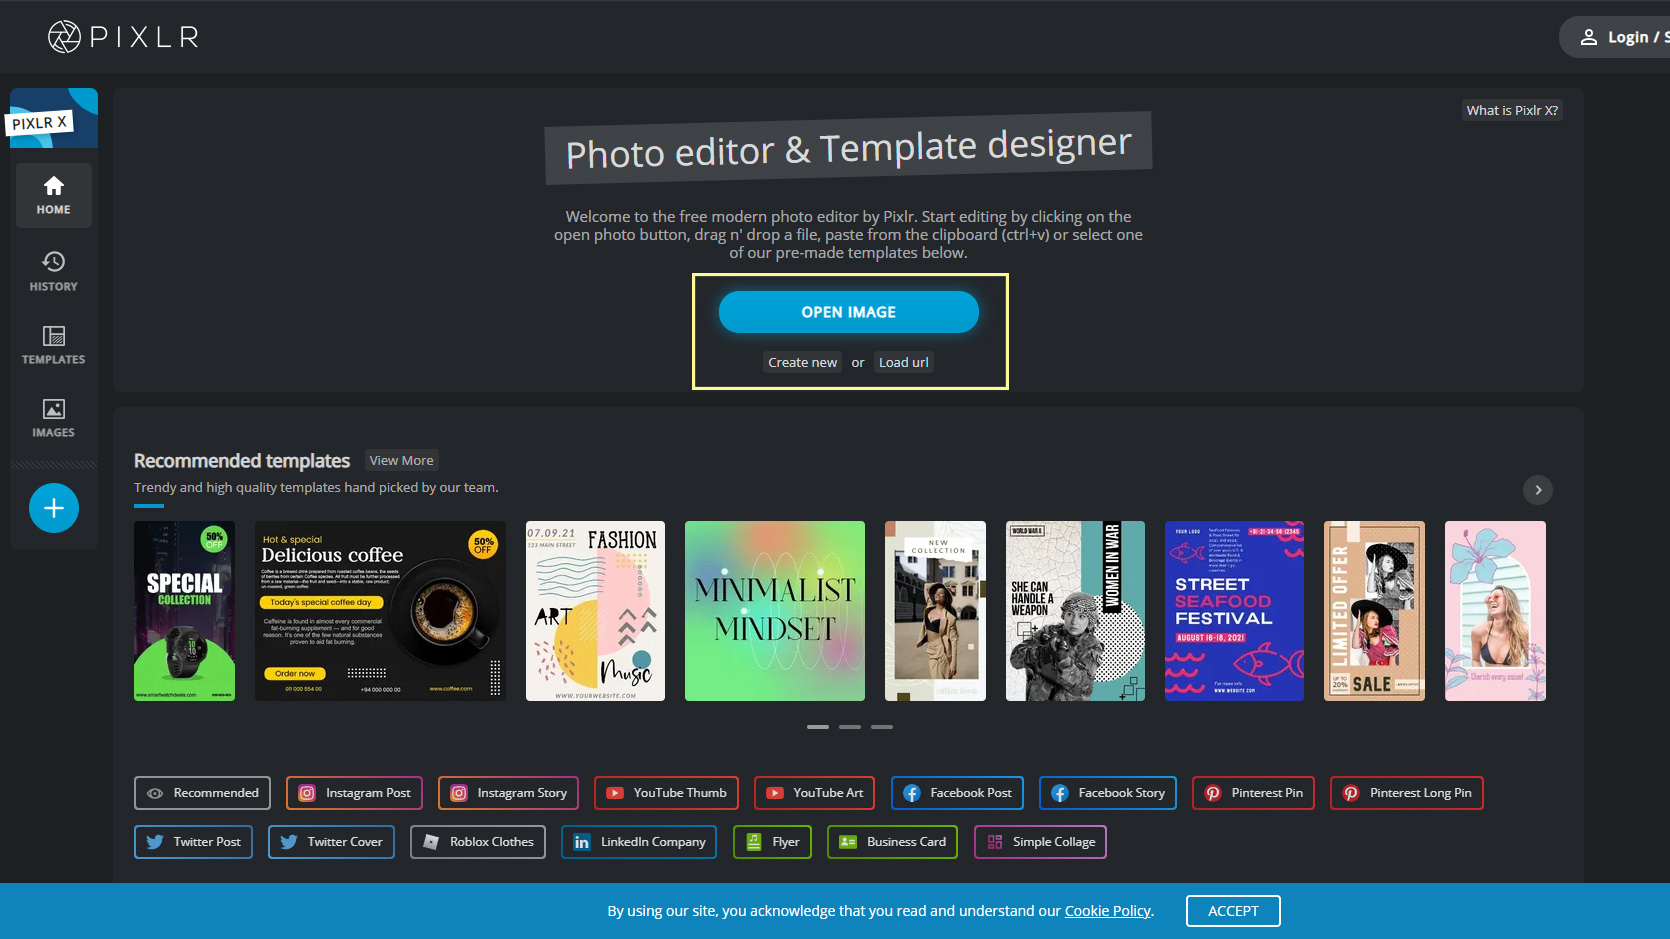
On Pixlr X, click “Open Image” and select the file you just saved.
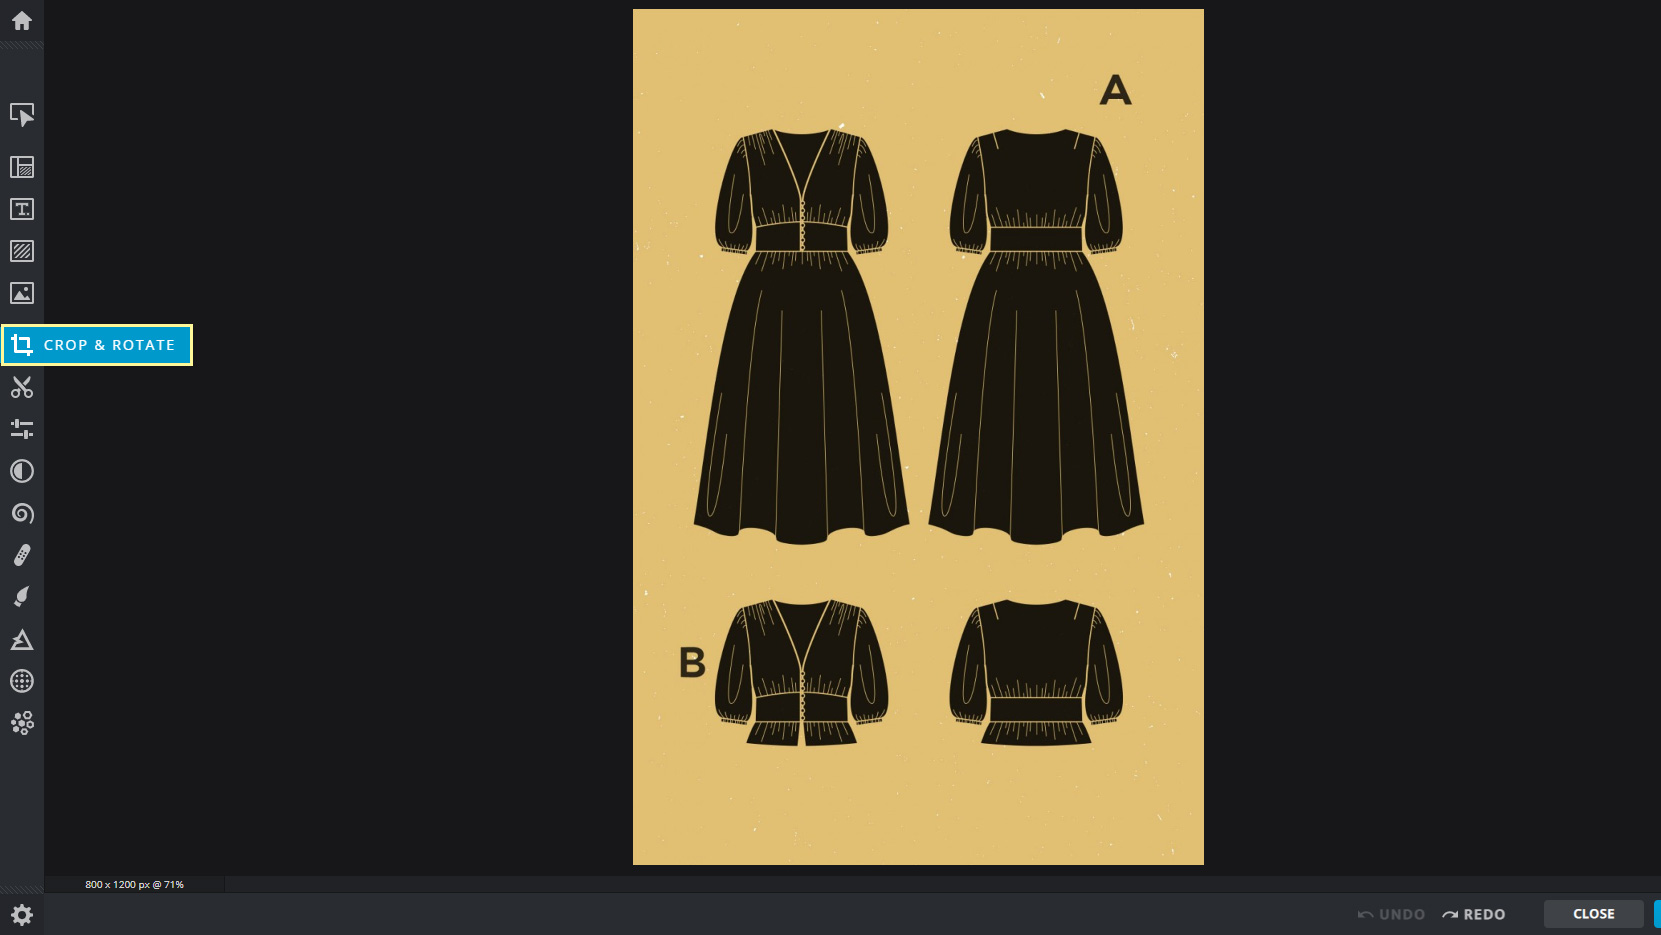
Your line drawing will now open in the photo editor. From the left hand menu, select the square icon that says “Crop & Rotate”.
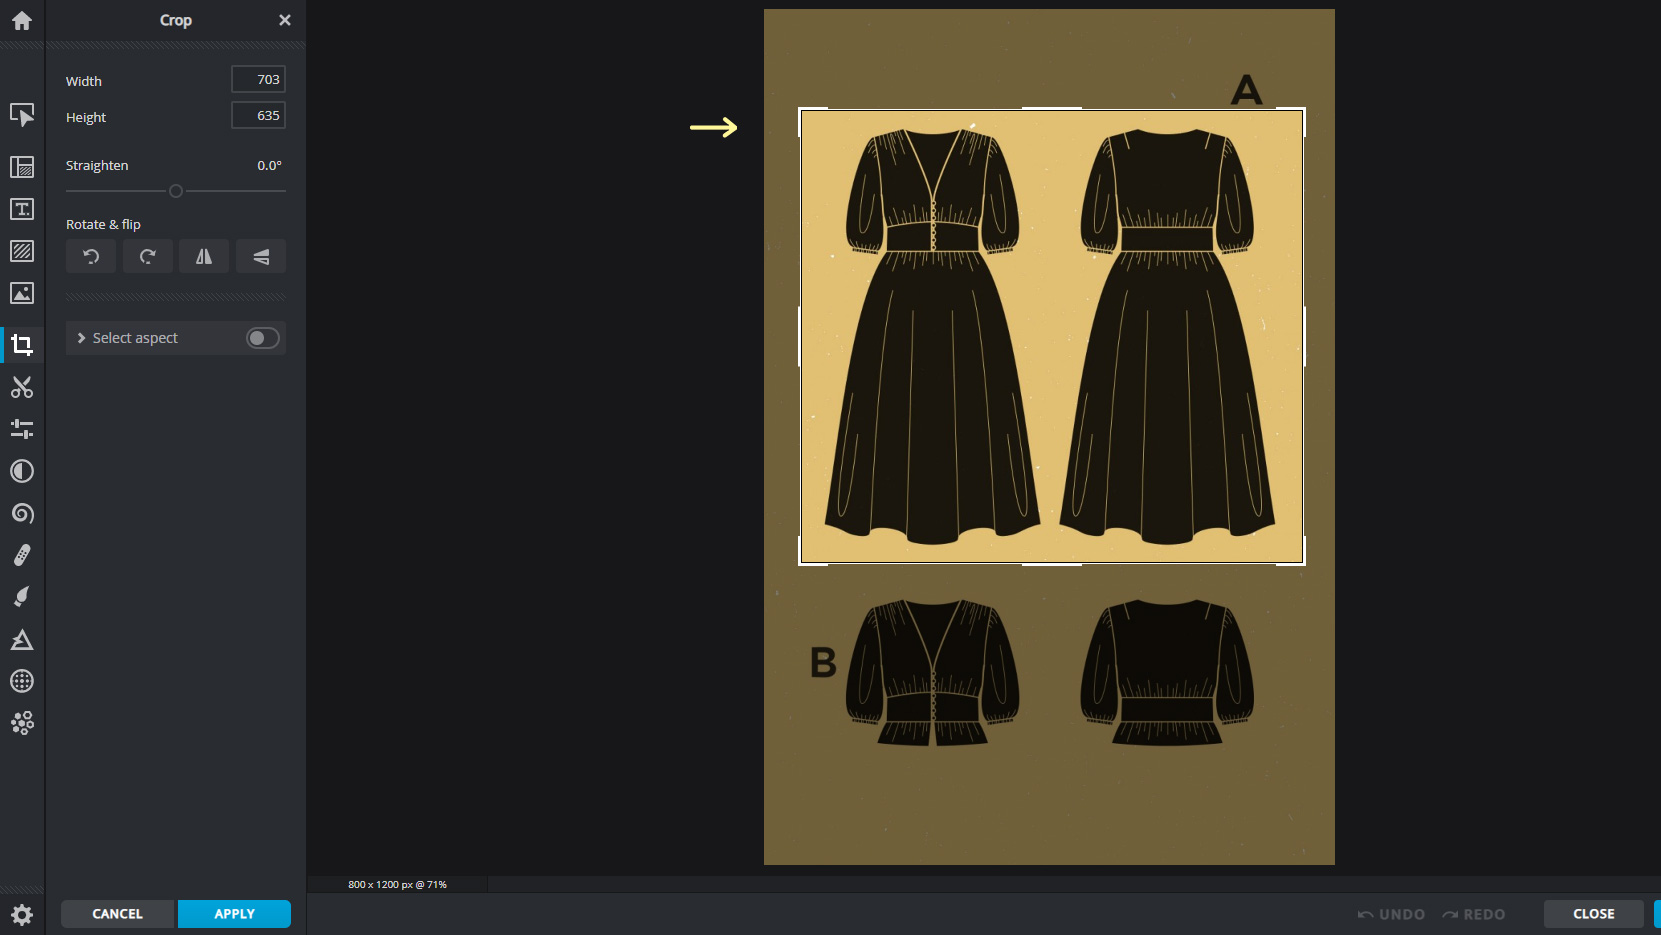
Move the bounding box so you only have the pattern view you want to work with in frame. Hit enter to crop.
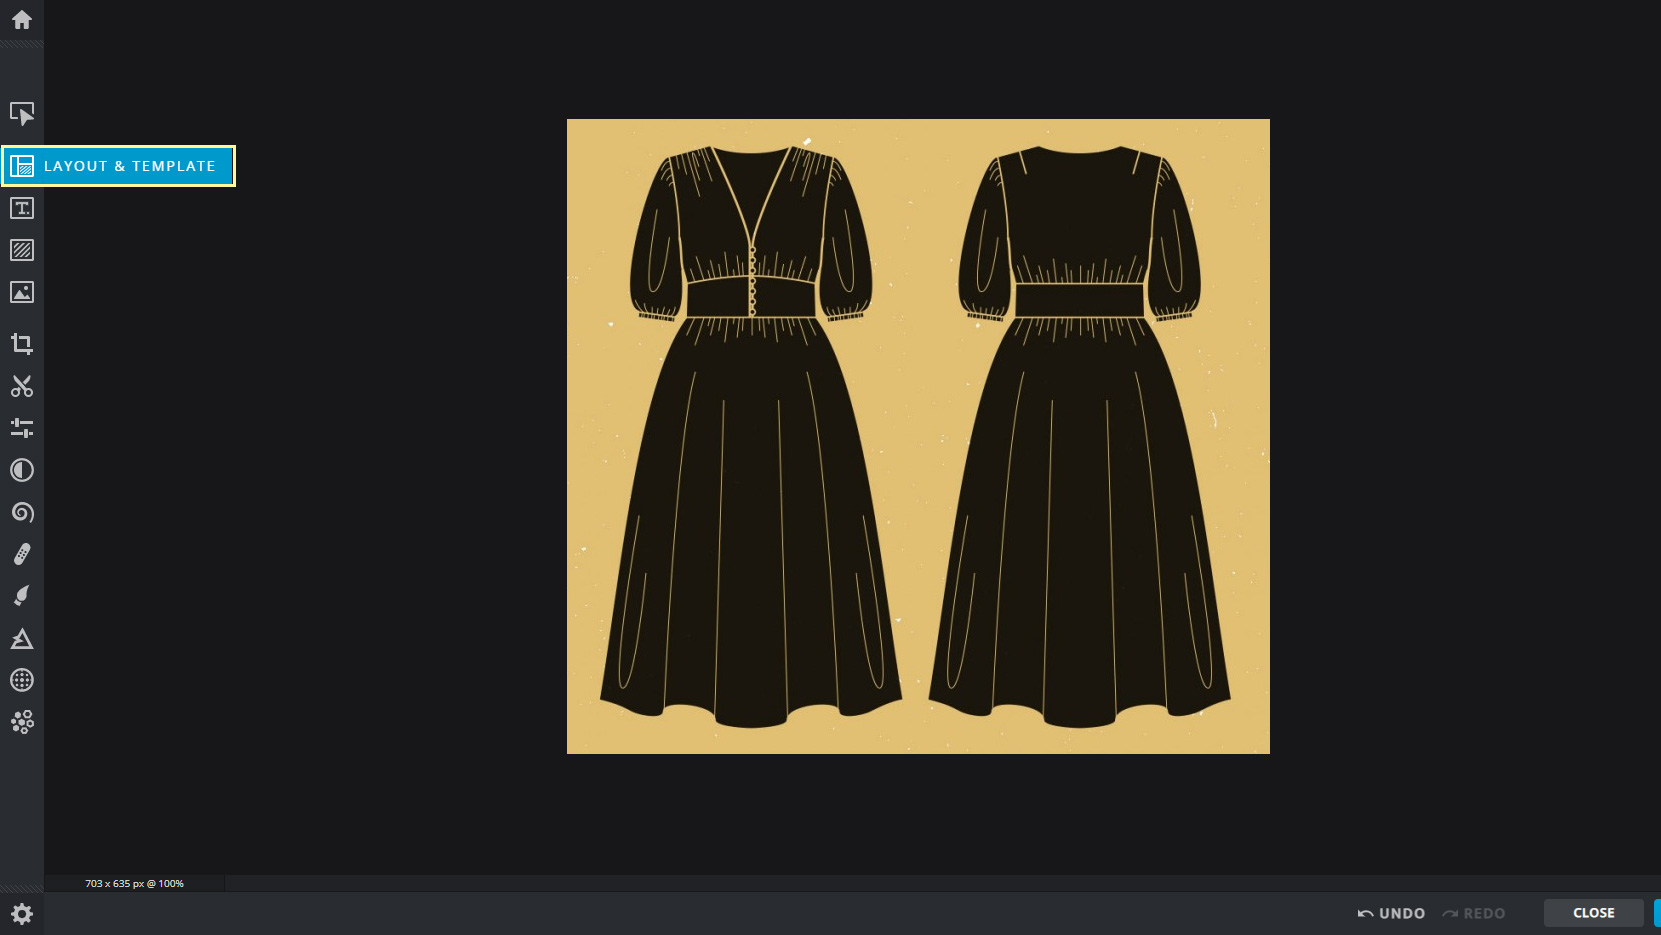
Select the second menu icon that says “Layout & Template”.
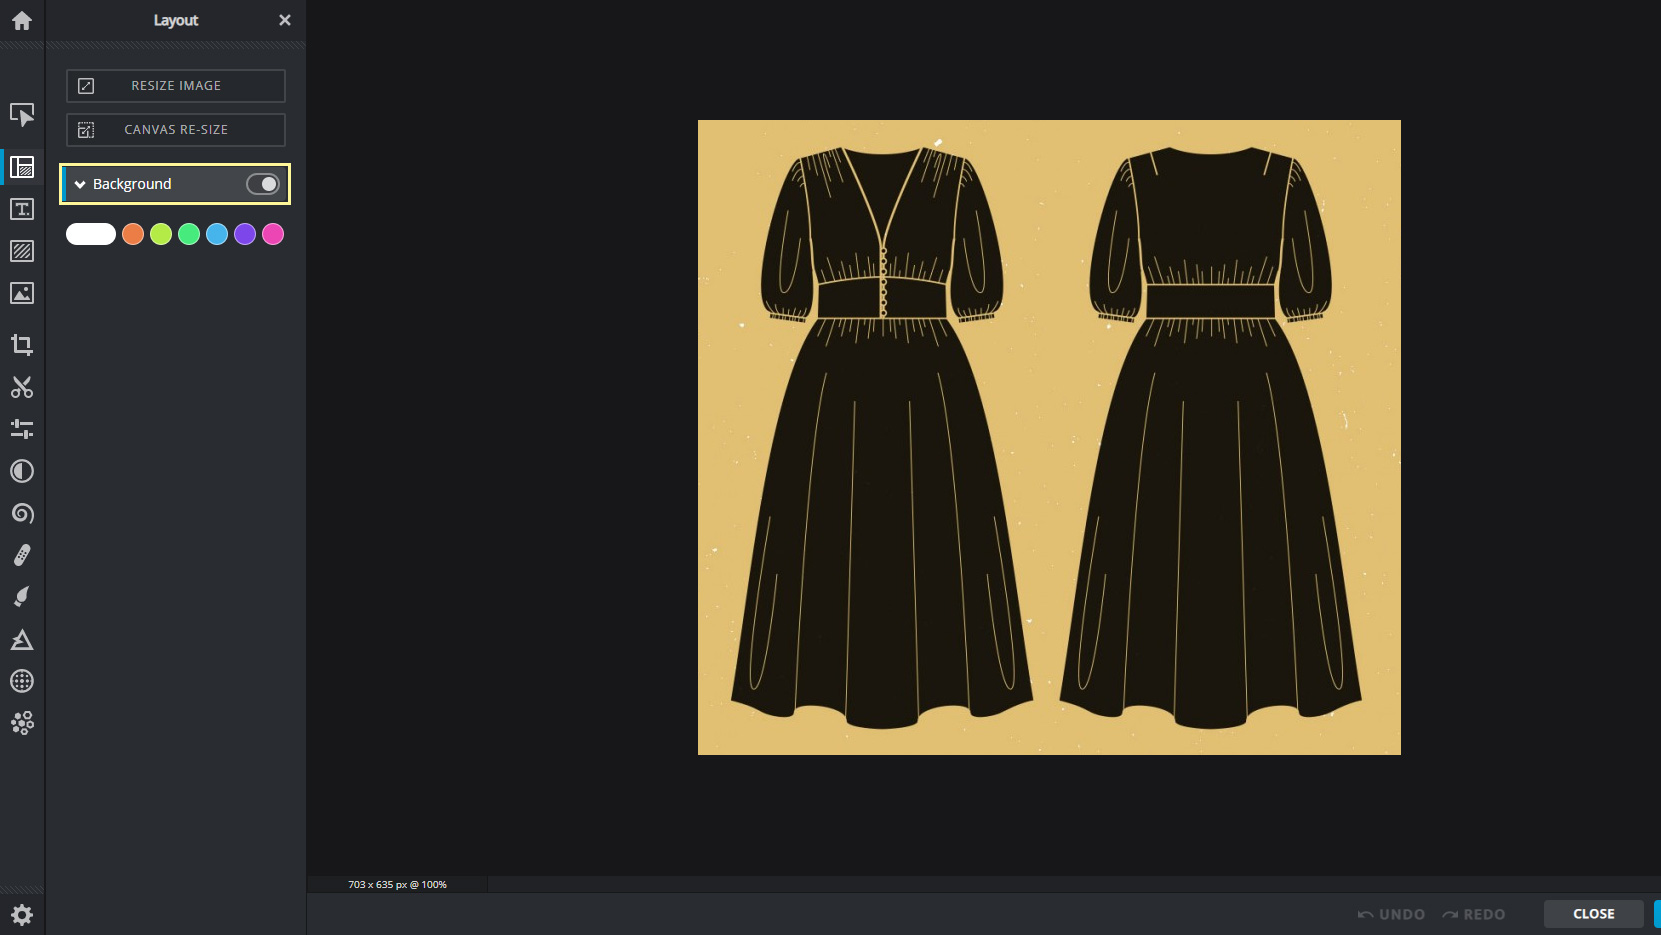
Select “Background” to toggle it on. It will default to white, which is what we want (although you are free to select another color).
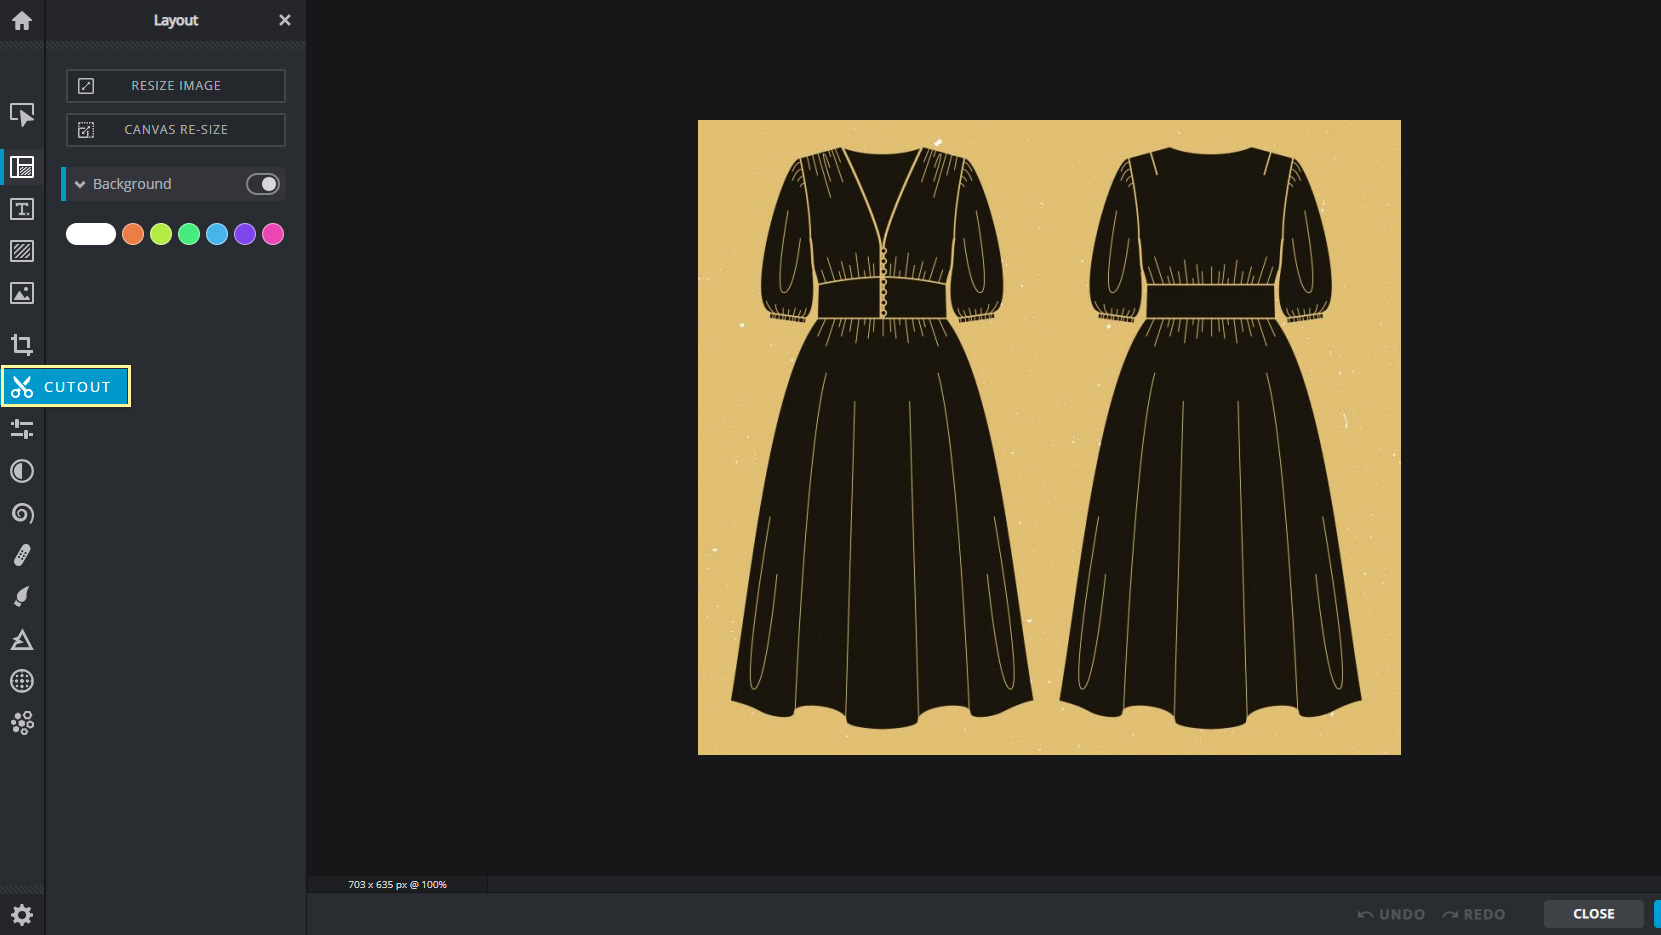
Now select the scissor icon that says “Cutout”.

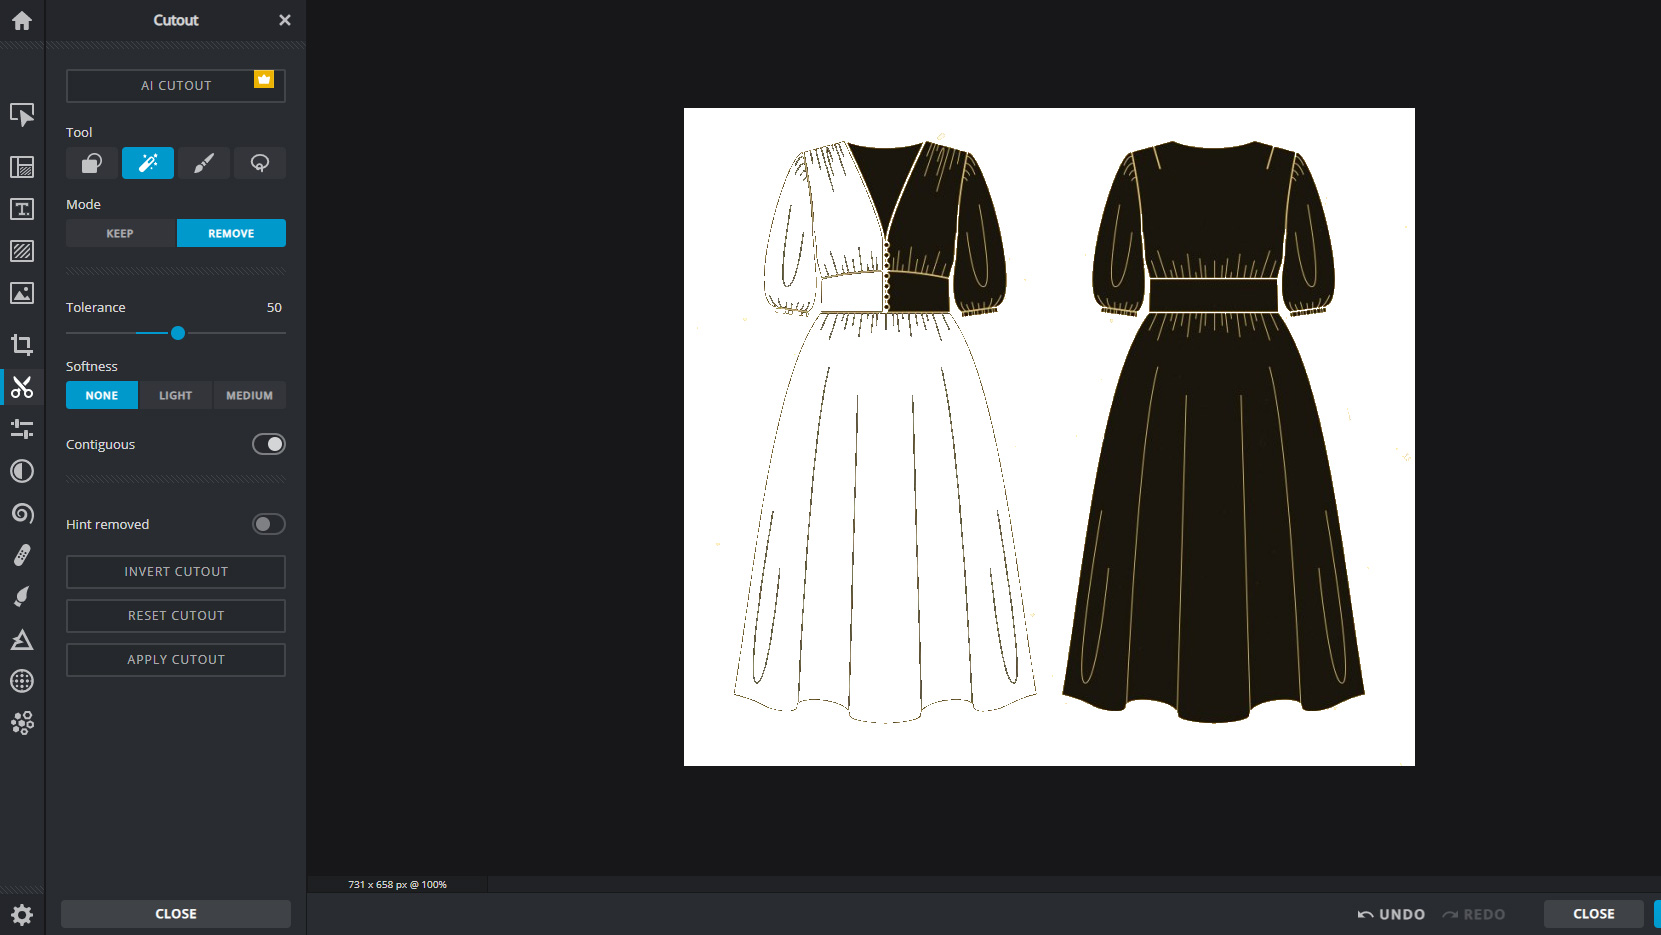
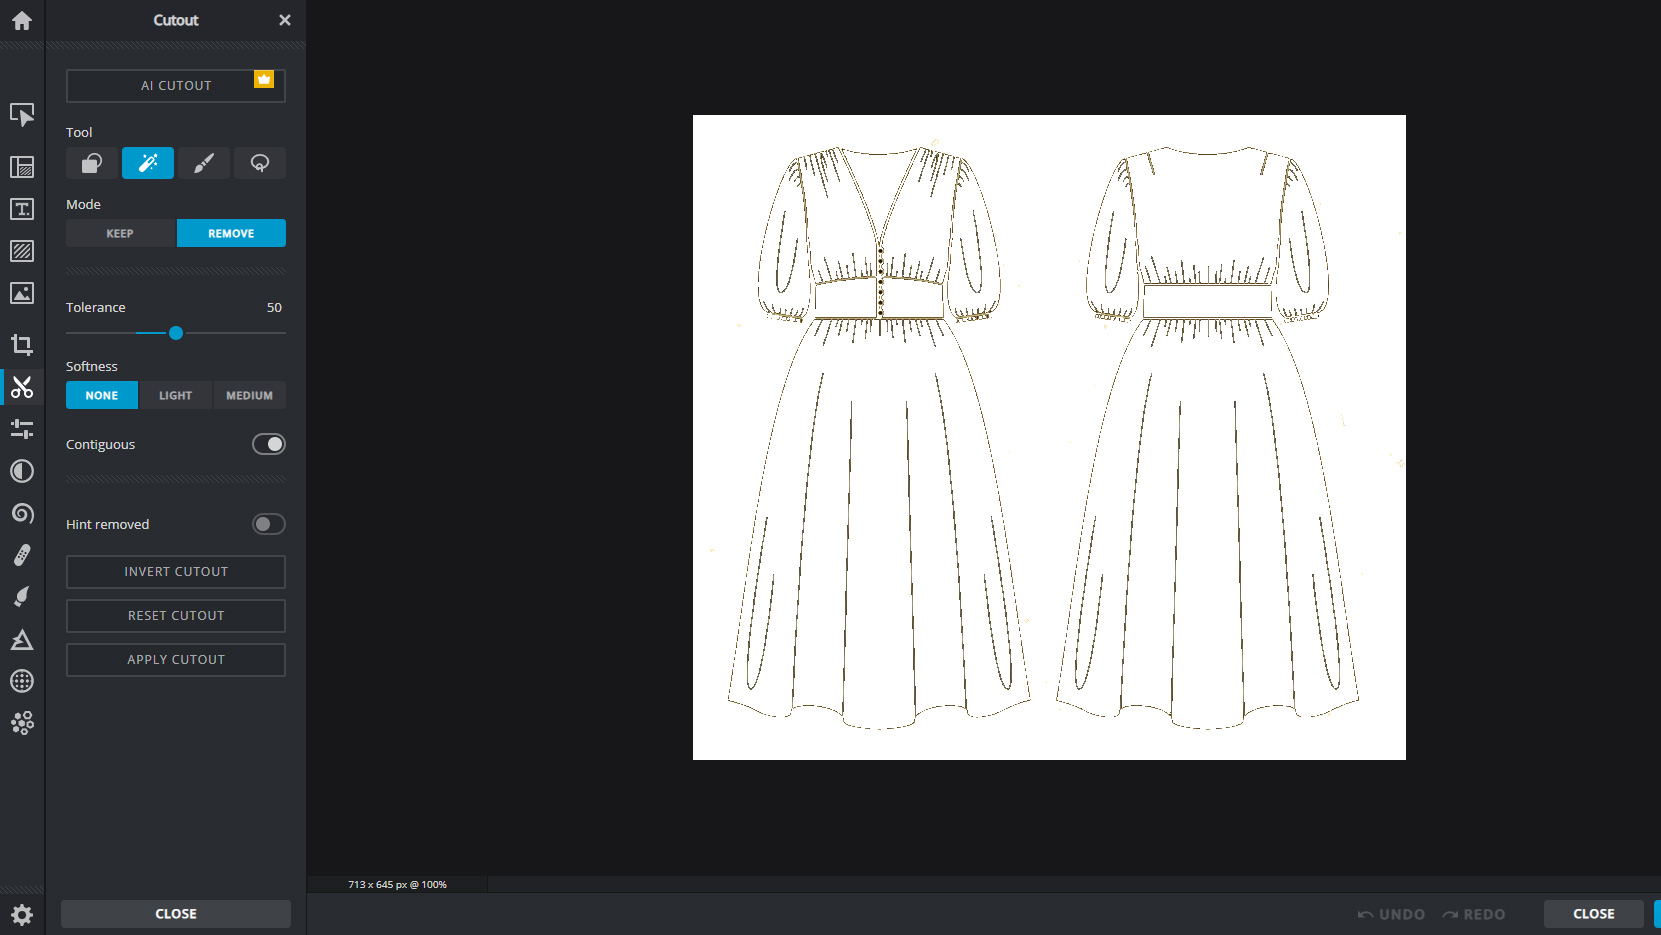
Under Tools, select “Magic Cutout” and slide Tolerance up to 50. This tells the program how sensitive to be when grabbing and removing a single color—you may find that you need to adjust it depending on the image you are working with.
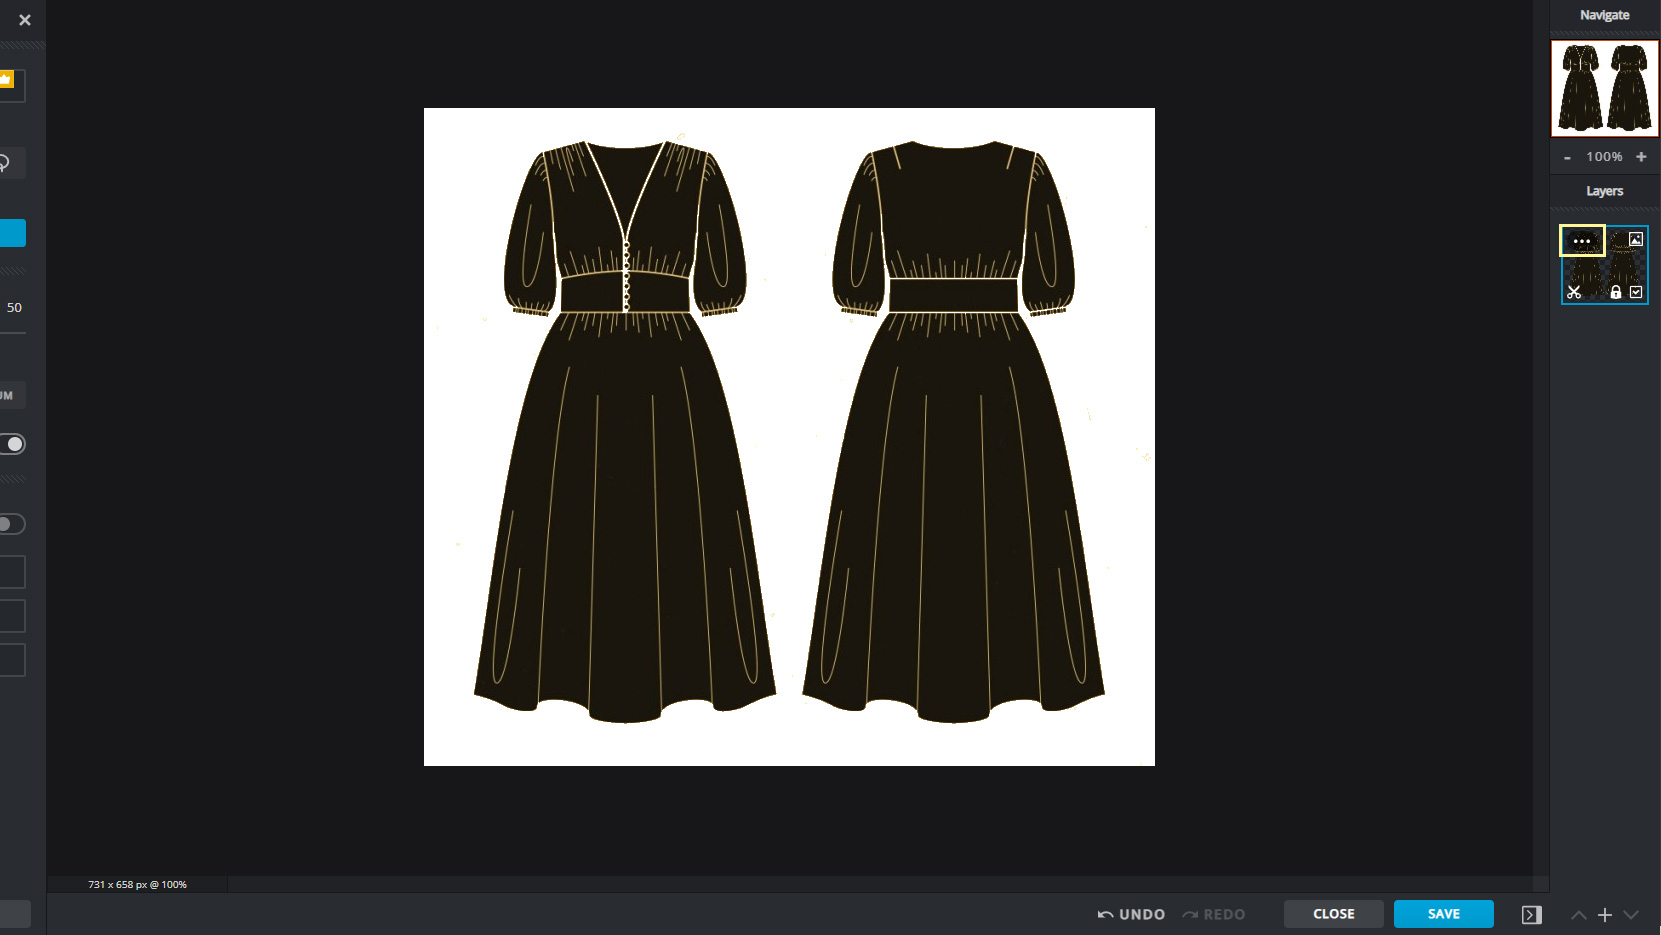
Click the tan background to remove it. On the right hand menu, click the three dots over the line drawing image layer.
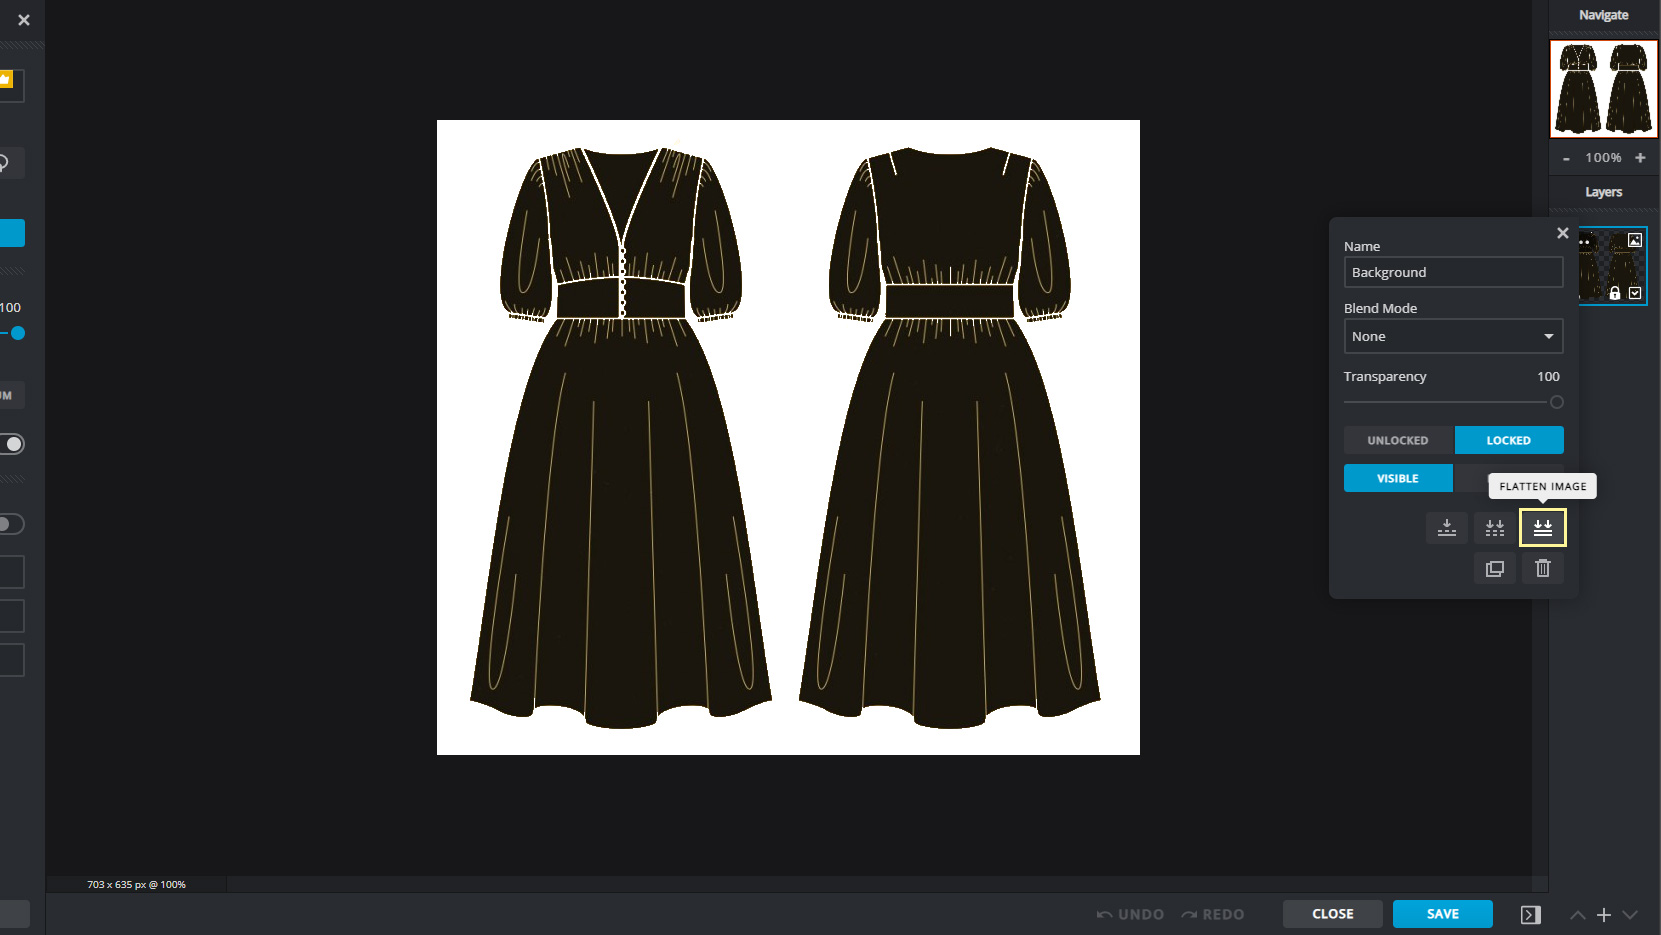
Select “Flatten Image”. Now you will notice a white background on the line drawing image layer.

With the “Magic Cutout” tool still selected, start clicking the areas of black inside the line drawing. Click as many black spots as you need to until you have “cut out” the inside of the line drawing (this will vary from pattern to pattern). We will add our fabric image here later.
Once you have removed them all, you are ready to add your fabric image layer. Skip down to “Adding the Fabric Image” to proceed.
Black and White Line Drawings
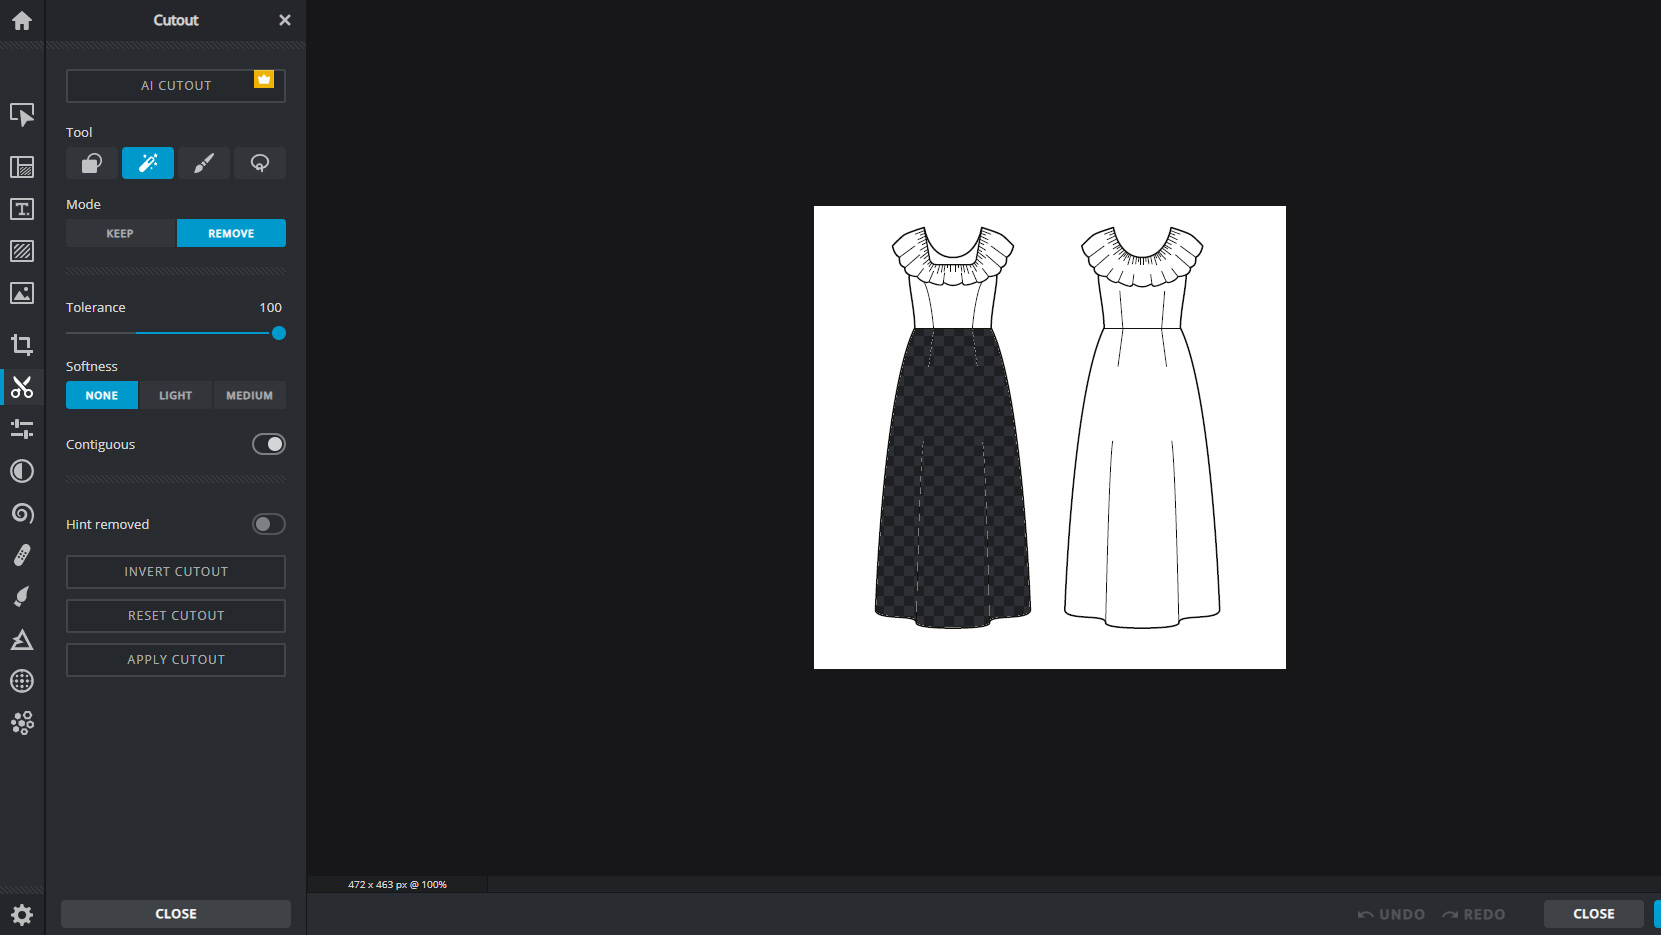
Open your Deer&Doe PDF instructions, and go to the Measurements and Supplies page.
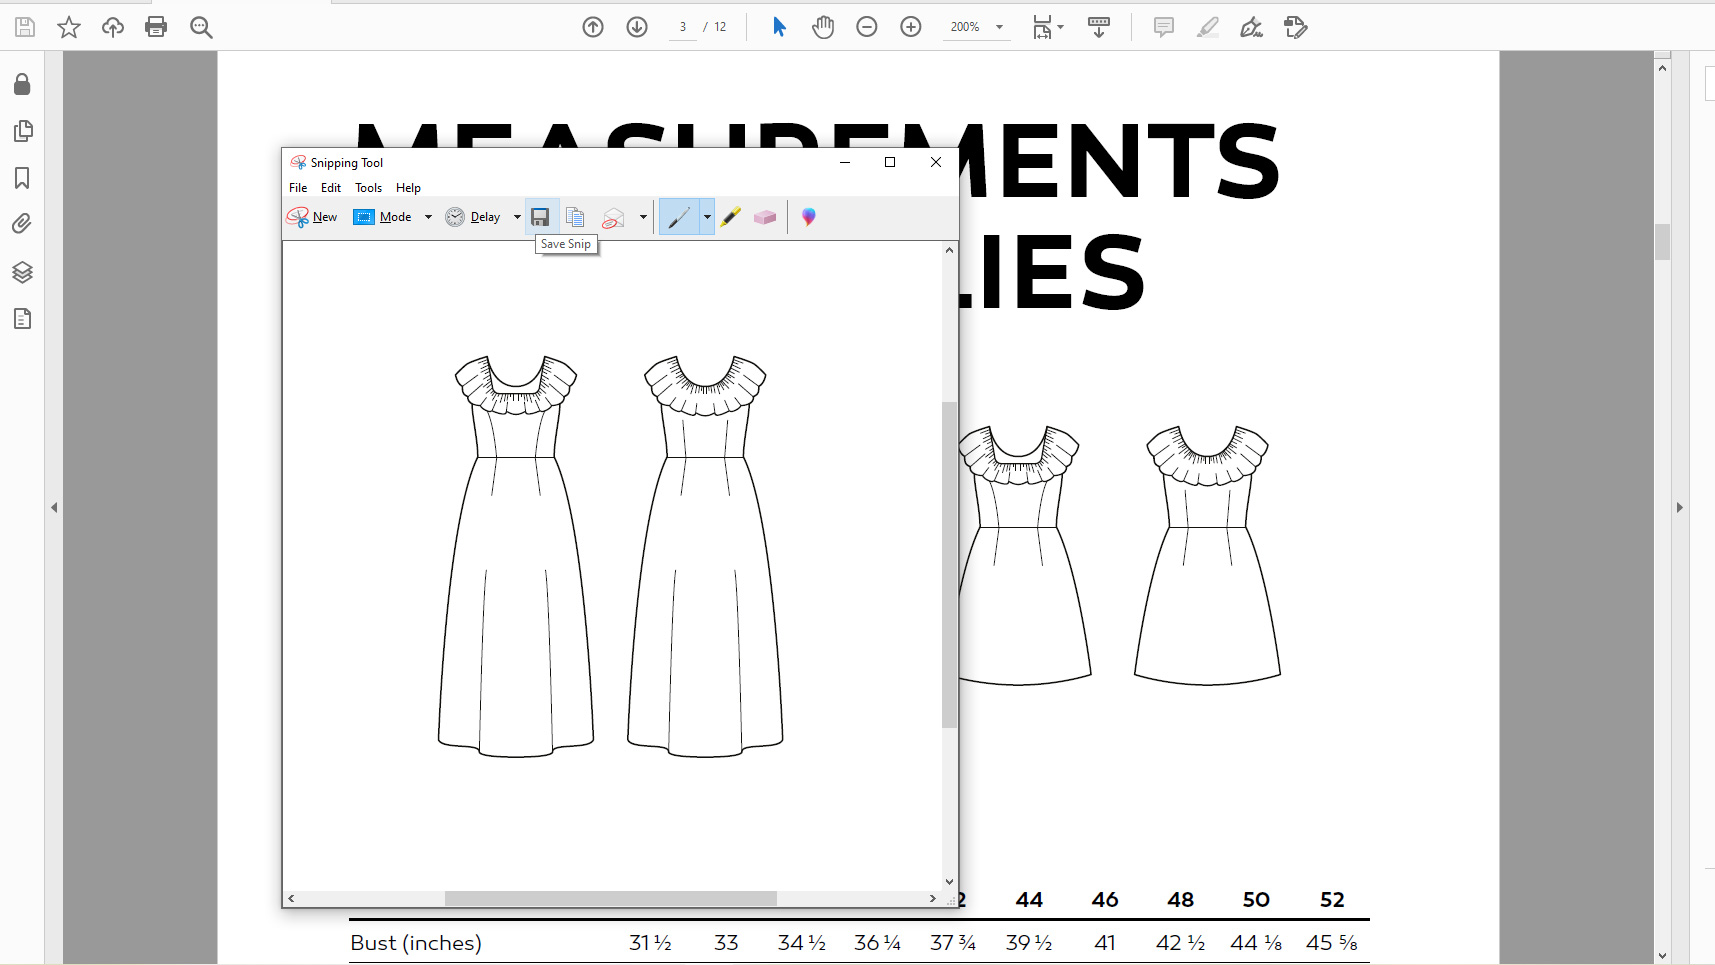
Using a copy and paste program like Snipping Tool (Windows) or Grab (Apple), copy and save the line drawing you would like to edit.
On Pixlr X, click “Open Image” and select the file you just saved.

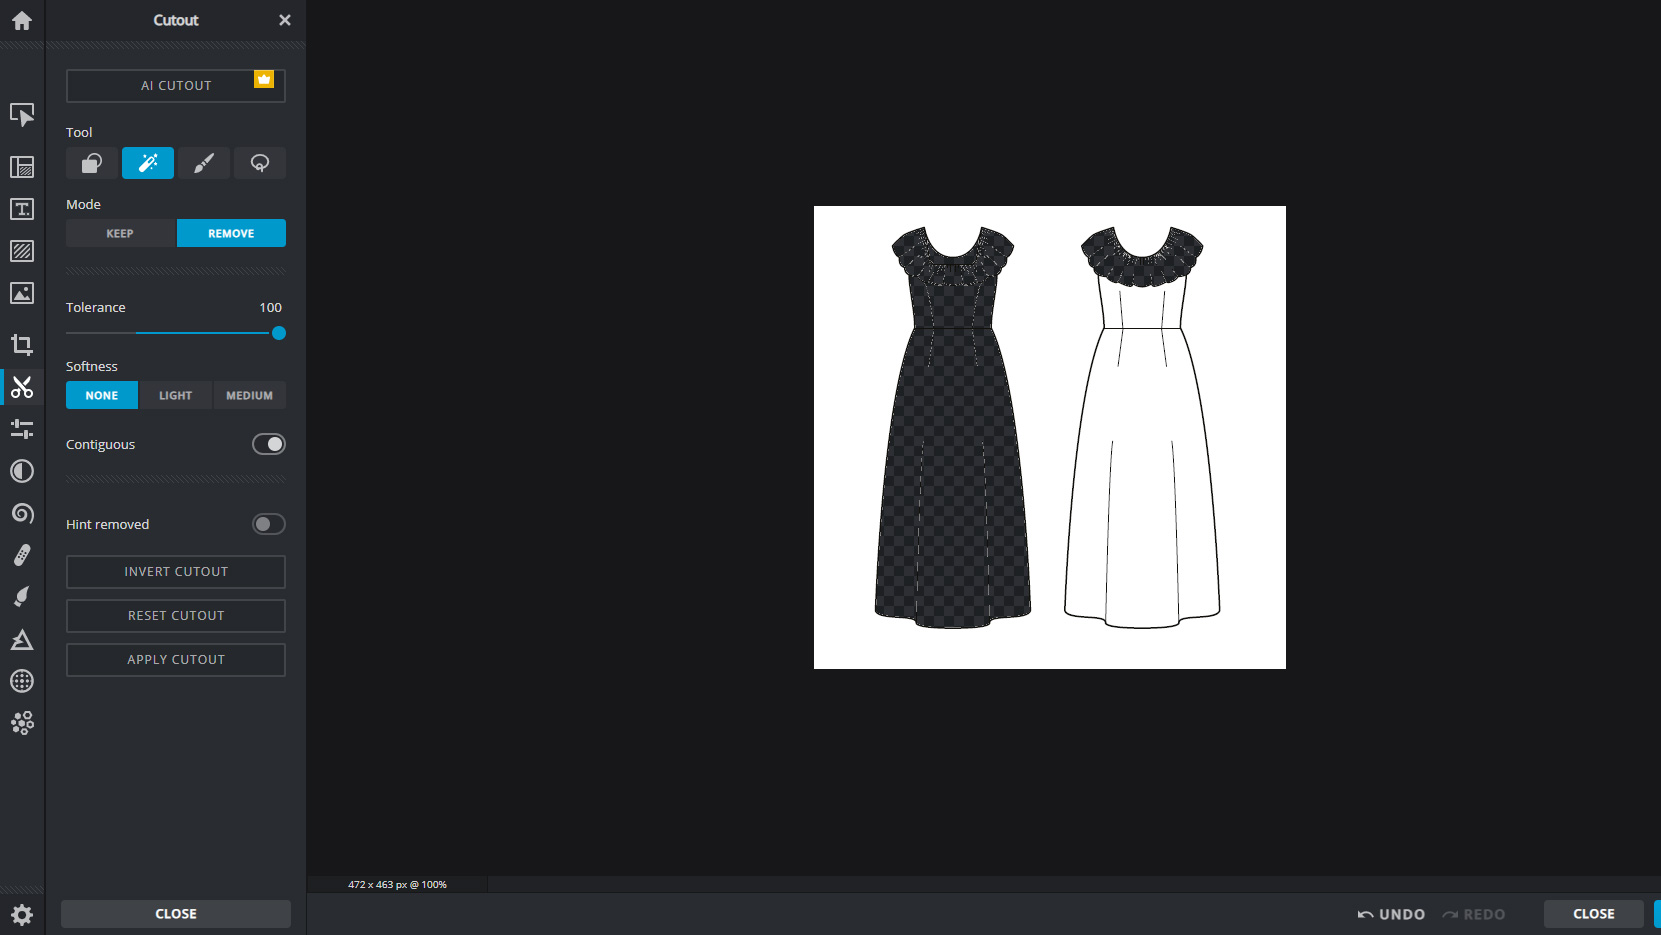
Your line drawing will now open in the photo editor. From the left hand menu, select the scissor icon that says “Cutout”.
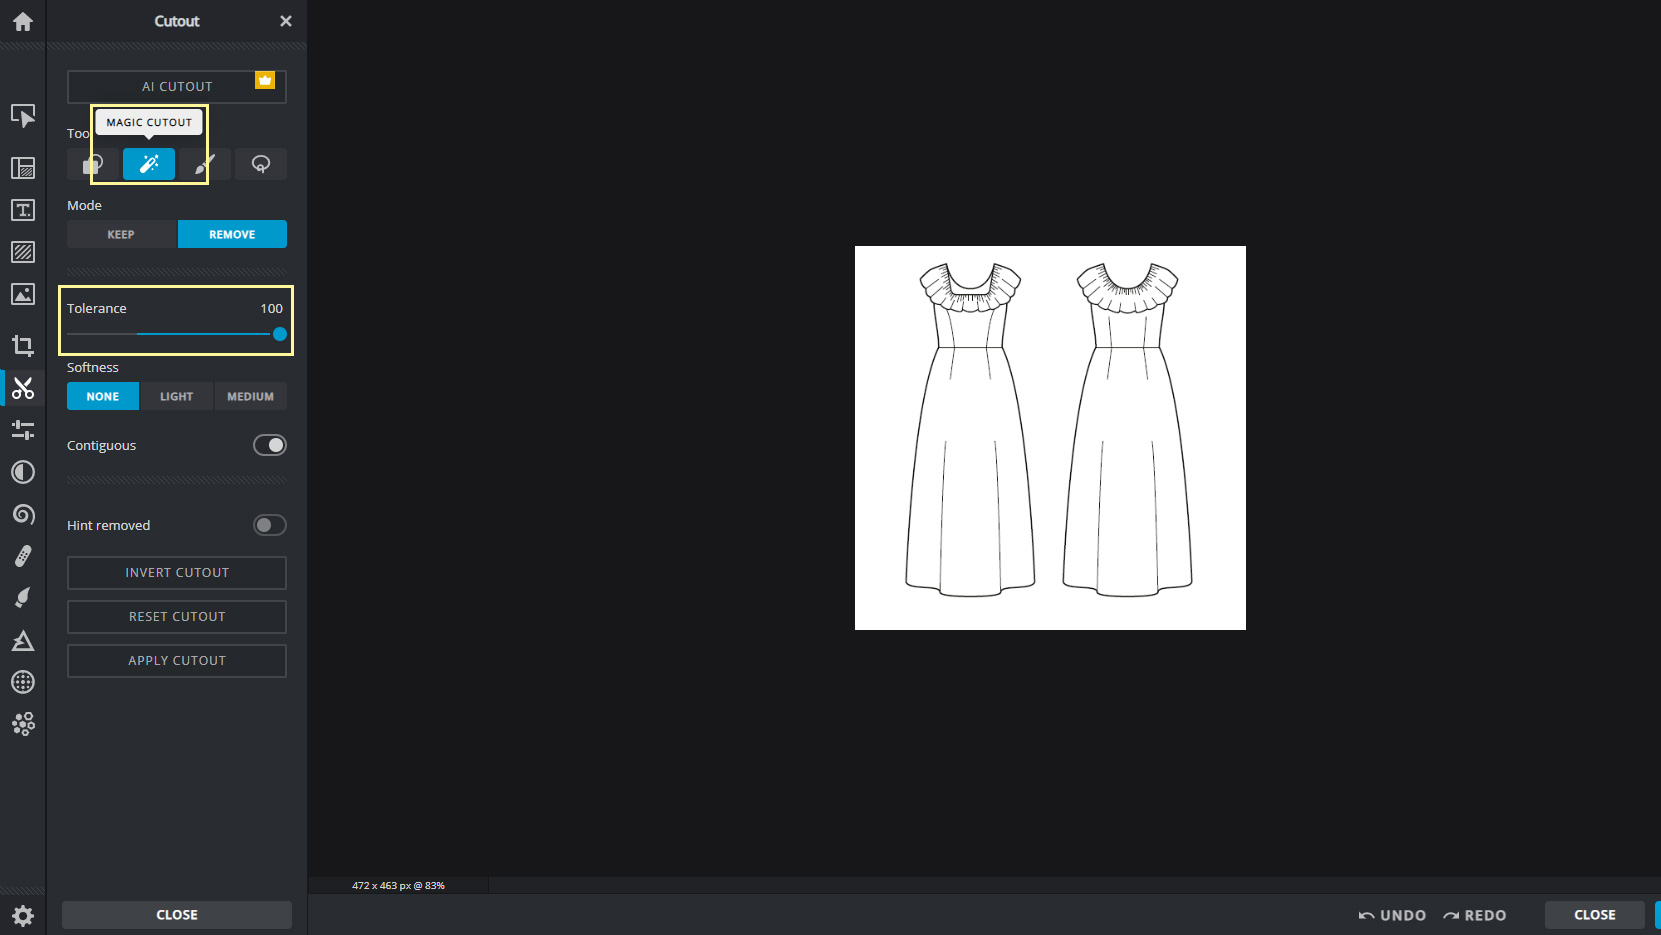
Under Tools, select the “Magic Cutout” icon and slide the “Tolerance” up to 100. This tells the program how sensitive to be when grabbing and removing a single color—you may find that you need to adjust it depending on the image you are working with.
Start clicking the areas of white inside the line drawing. Notice that they disappear and a black and gray grid appears behind them—this is where we will add our fabric image later.

Click as many white spots as you need to until you have “cut out” the inside of the line drawing (this will vary from pattern to pattern).
Adding the Fabric Image
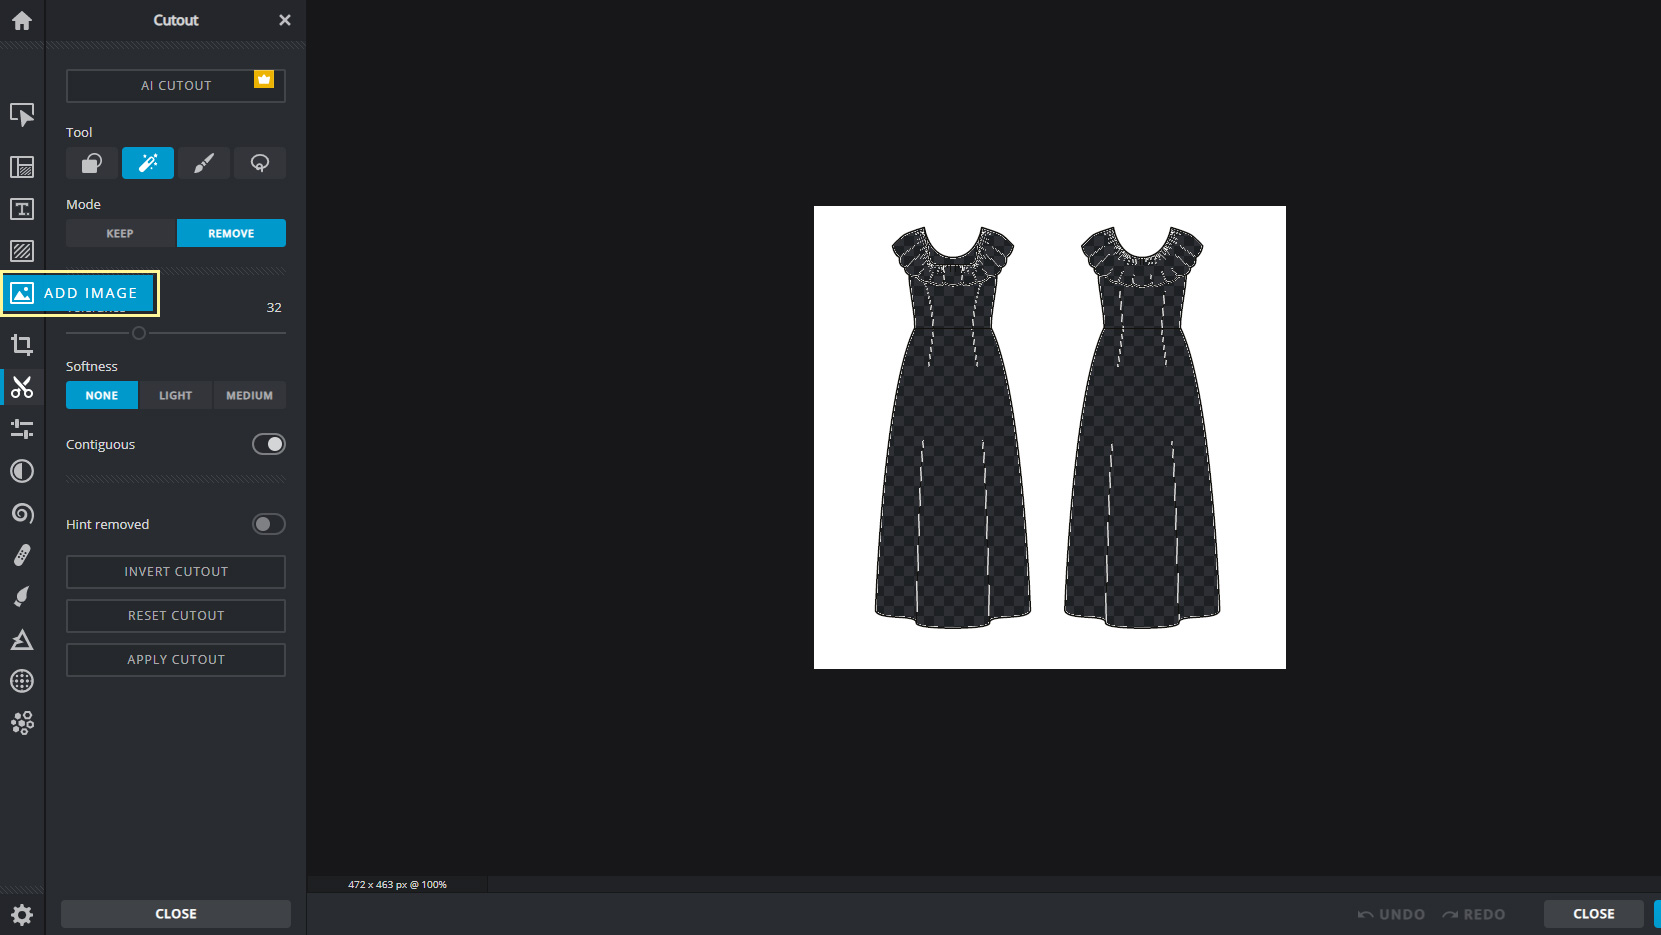
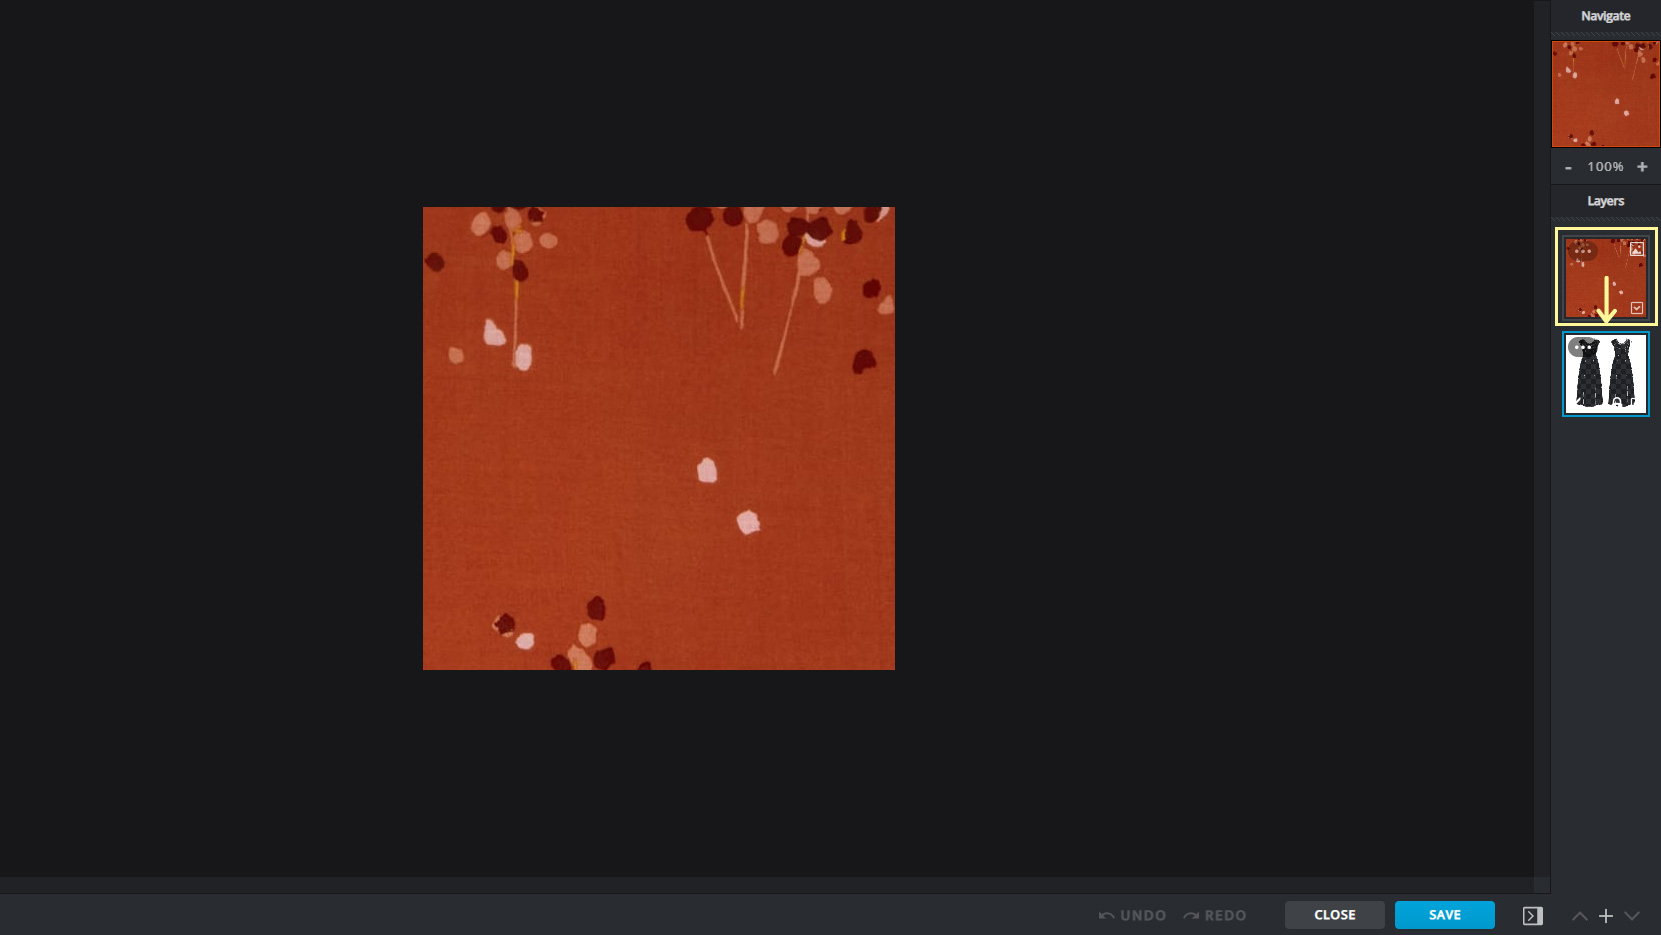
Now we can add an image of fabric to the inside of the line drawing. Click the “Add Image” icon in the menu.

A new menu will appear. You can either select “Browse” to upload a saved image of fabric from your computer, or click “URL” to enter the fabric image URL.
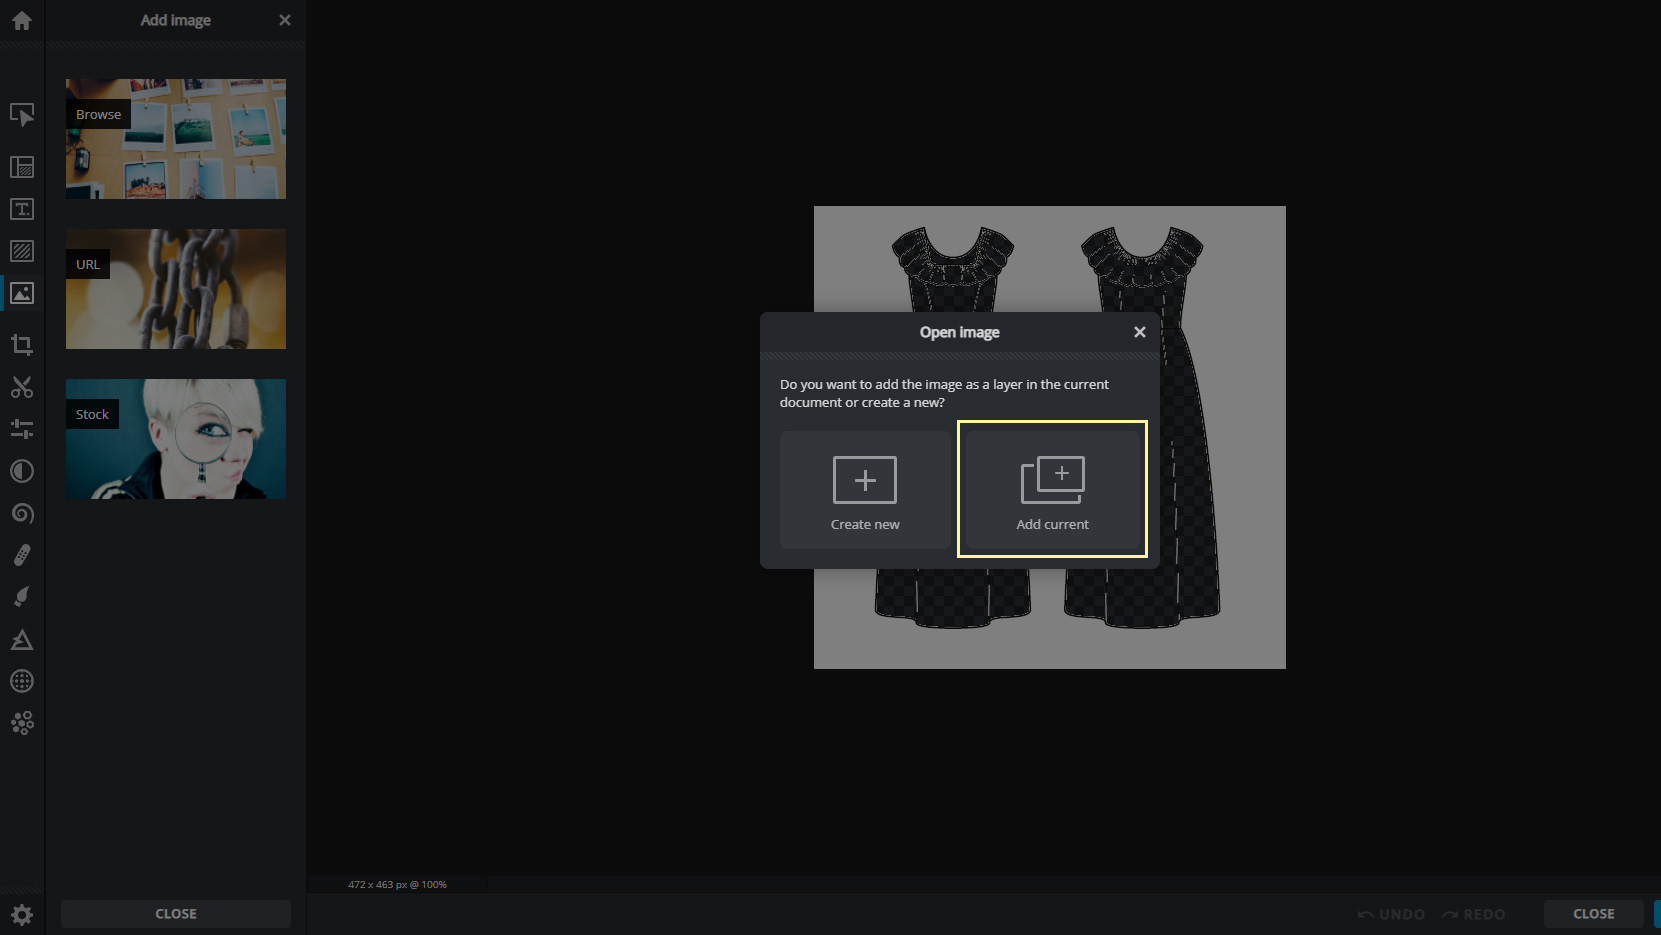
You will be asked whether you want to add the image to the current document or a new one. Click “Add Current”.
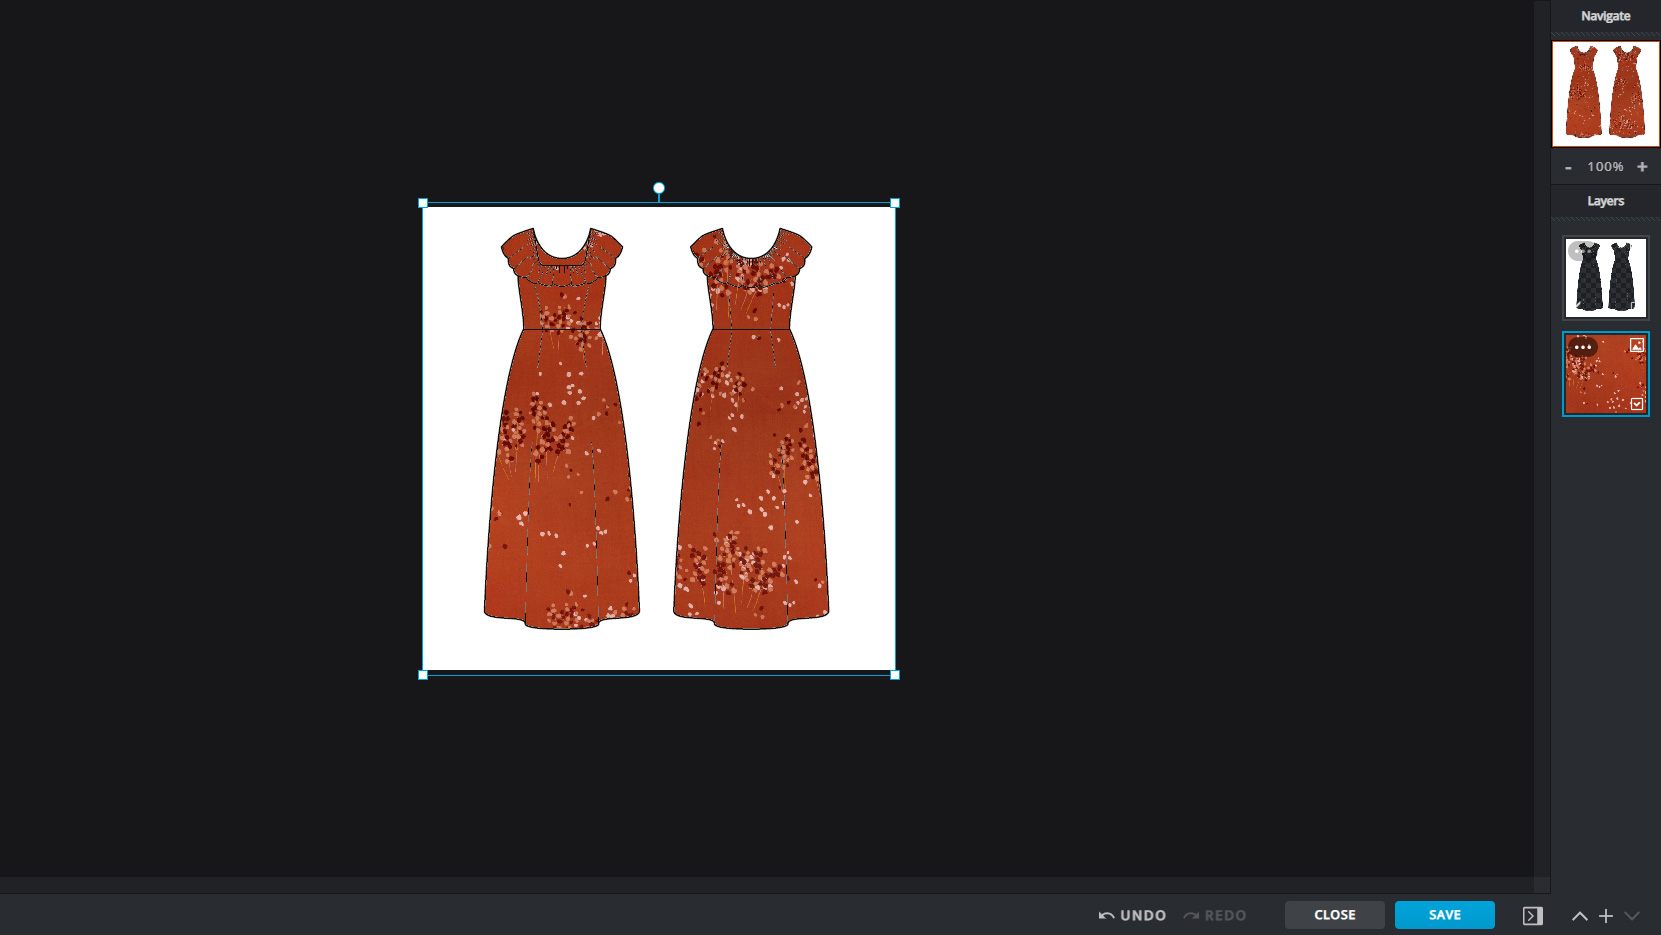
The image will be added to the document, and if you look at the menu on the right hand side of the screen, you will notice that it is sitting on top of our line drawing layer. Click and hold the icon with the fabric image to drag it under the icon with the line drawing.
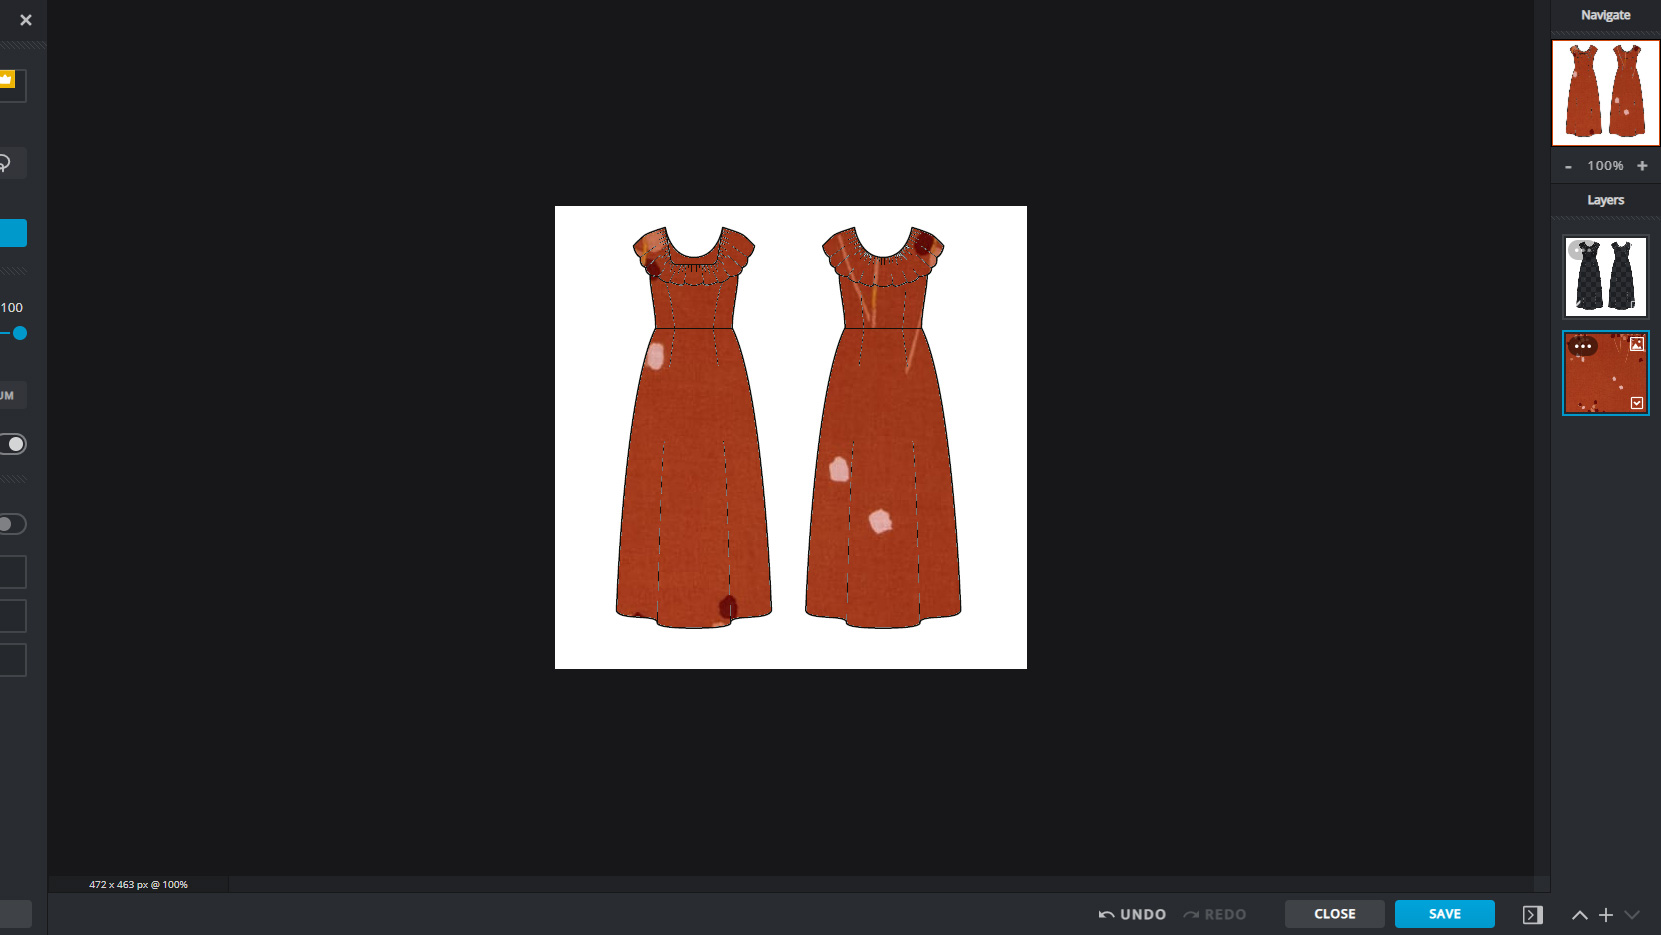
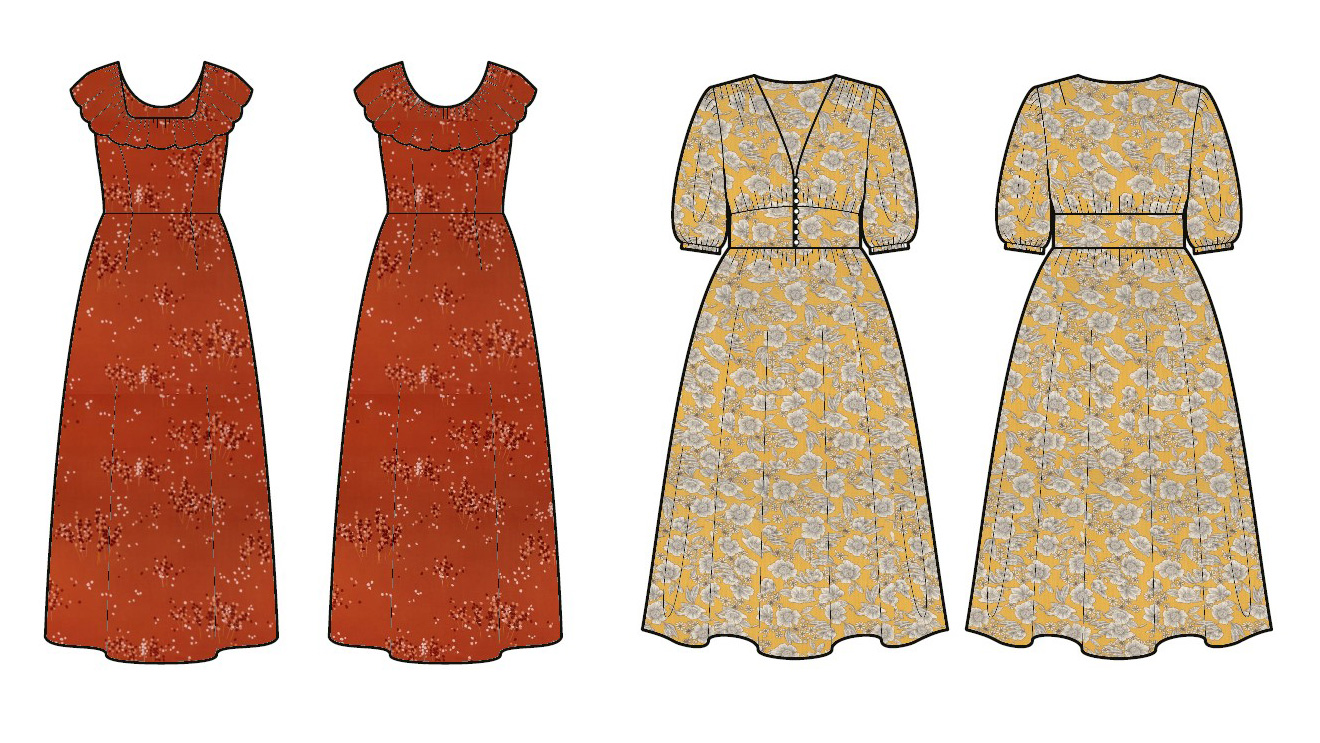
Now you will see the fabric sitting under the pattern line drawing! However, depending on the size of your images, you may need to scale the fabric image up or down. In the example above, the scale of the print is currently much too large for the line drawing.
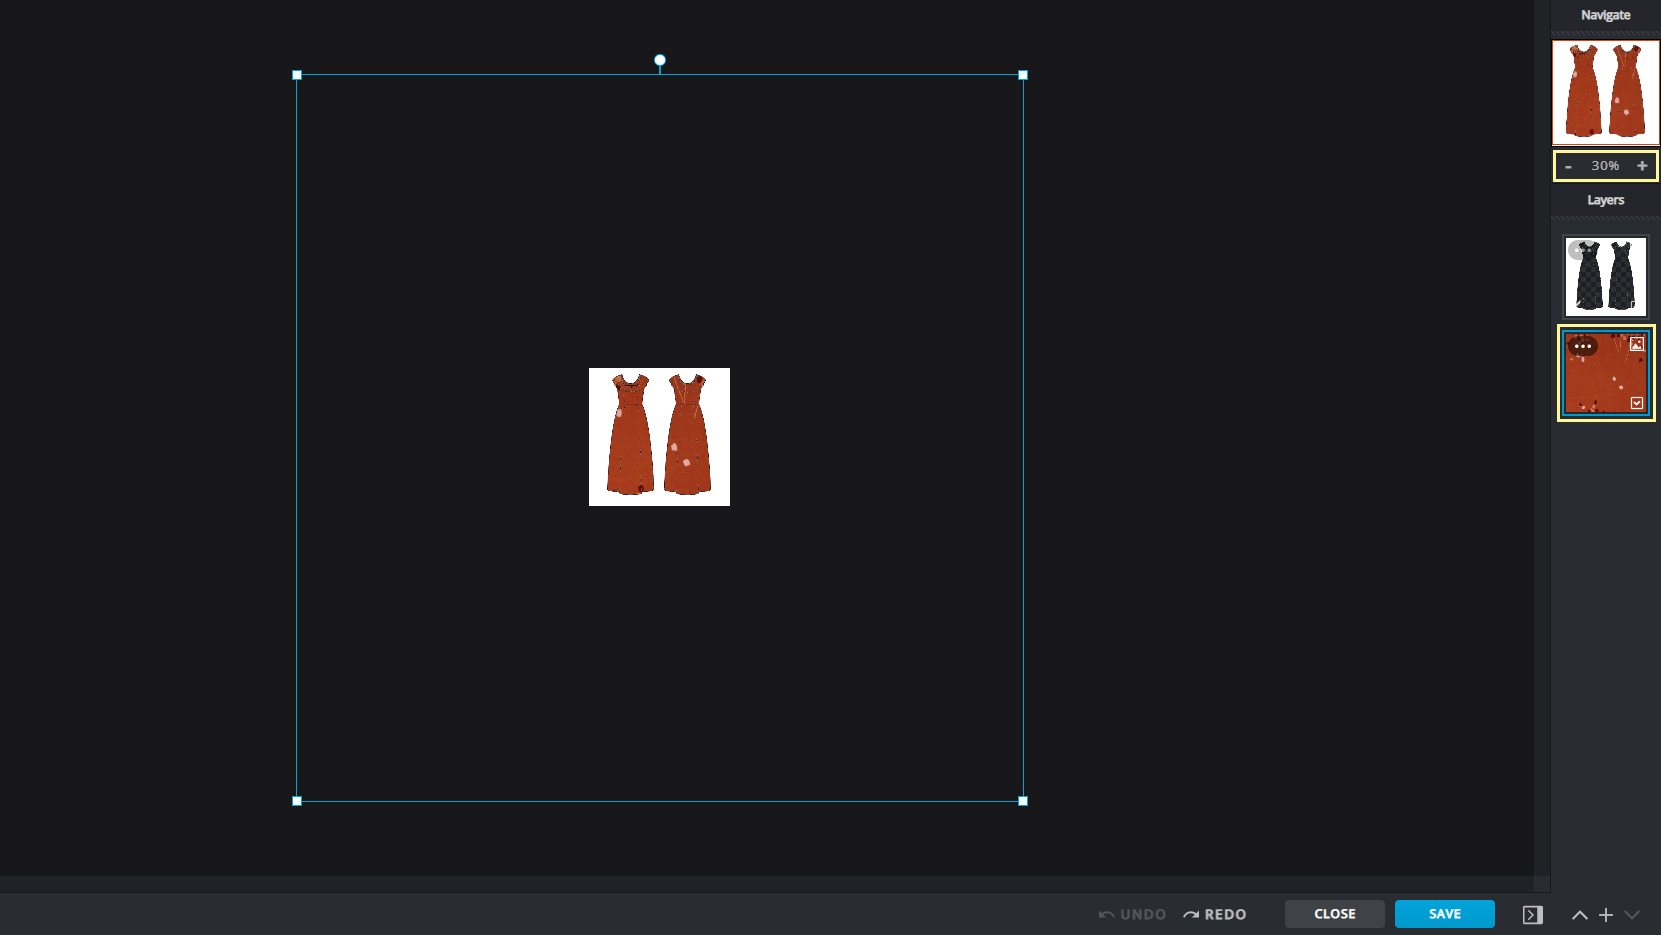
Click the fabric image layer to see the bounding box of the image. If it’s a very large image relative to your line drawing, you may need to zoom out (upper right corner of the screen) to see it.
From here you can drag the corners of the bounding box to resize the fabric image.
Continue resizing until you are happy.
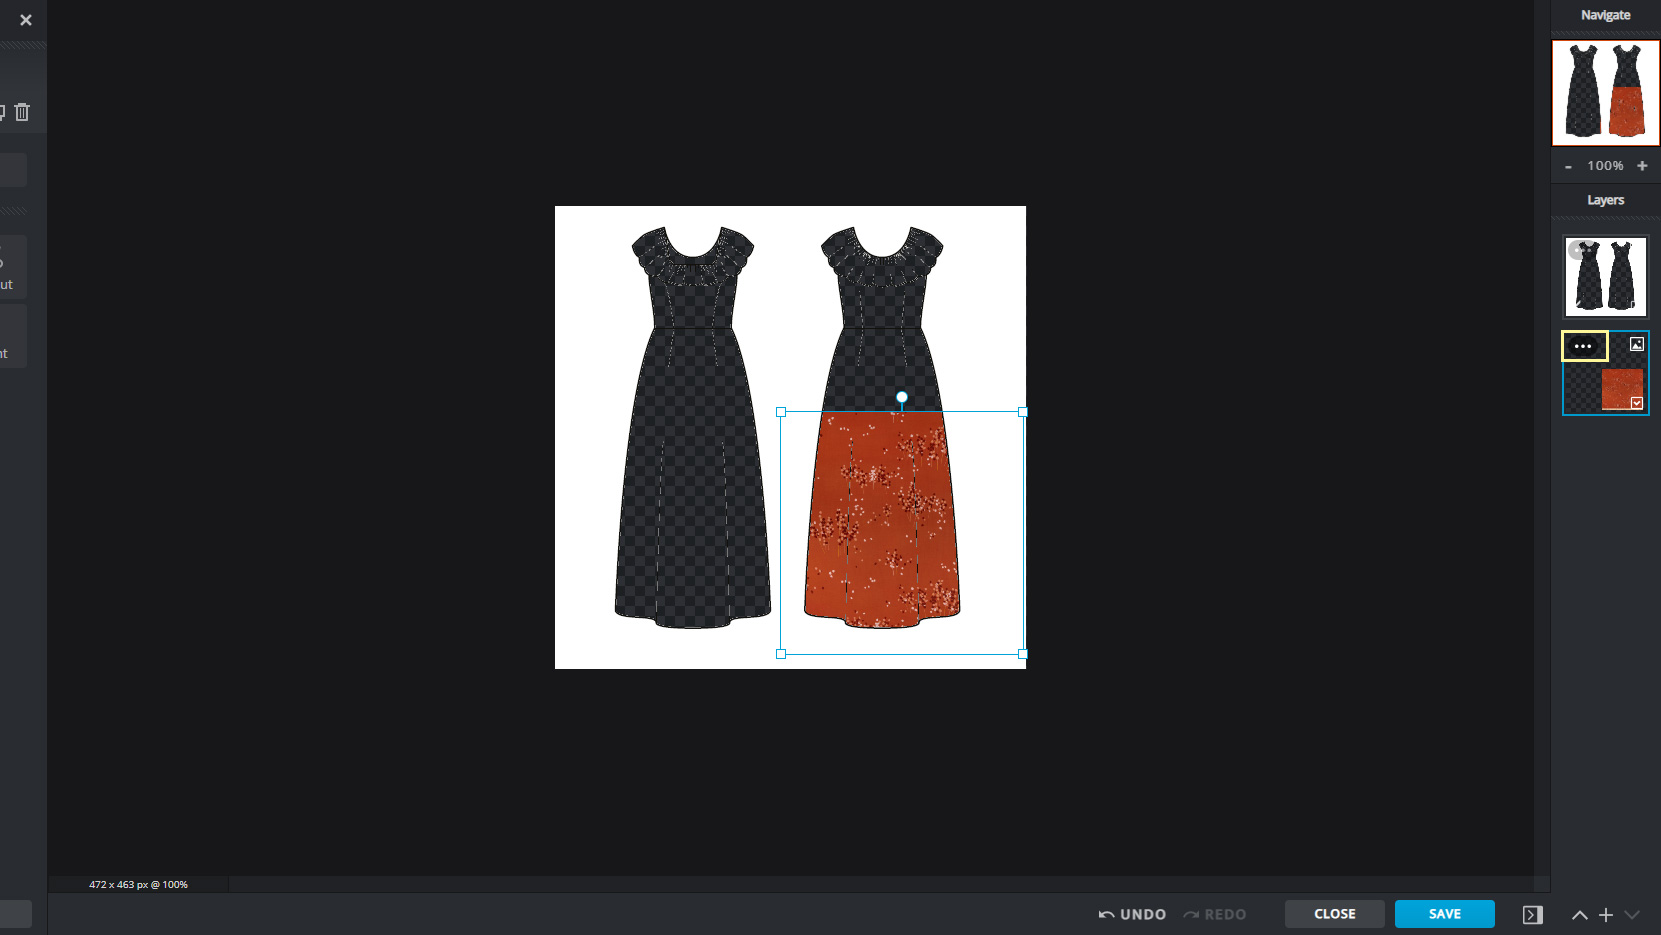
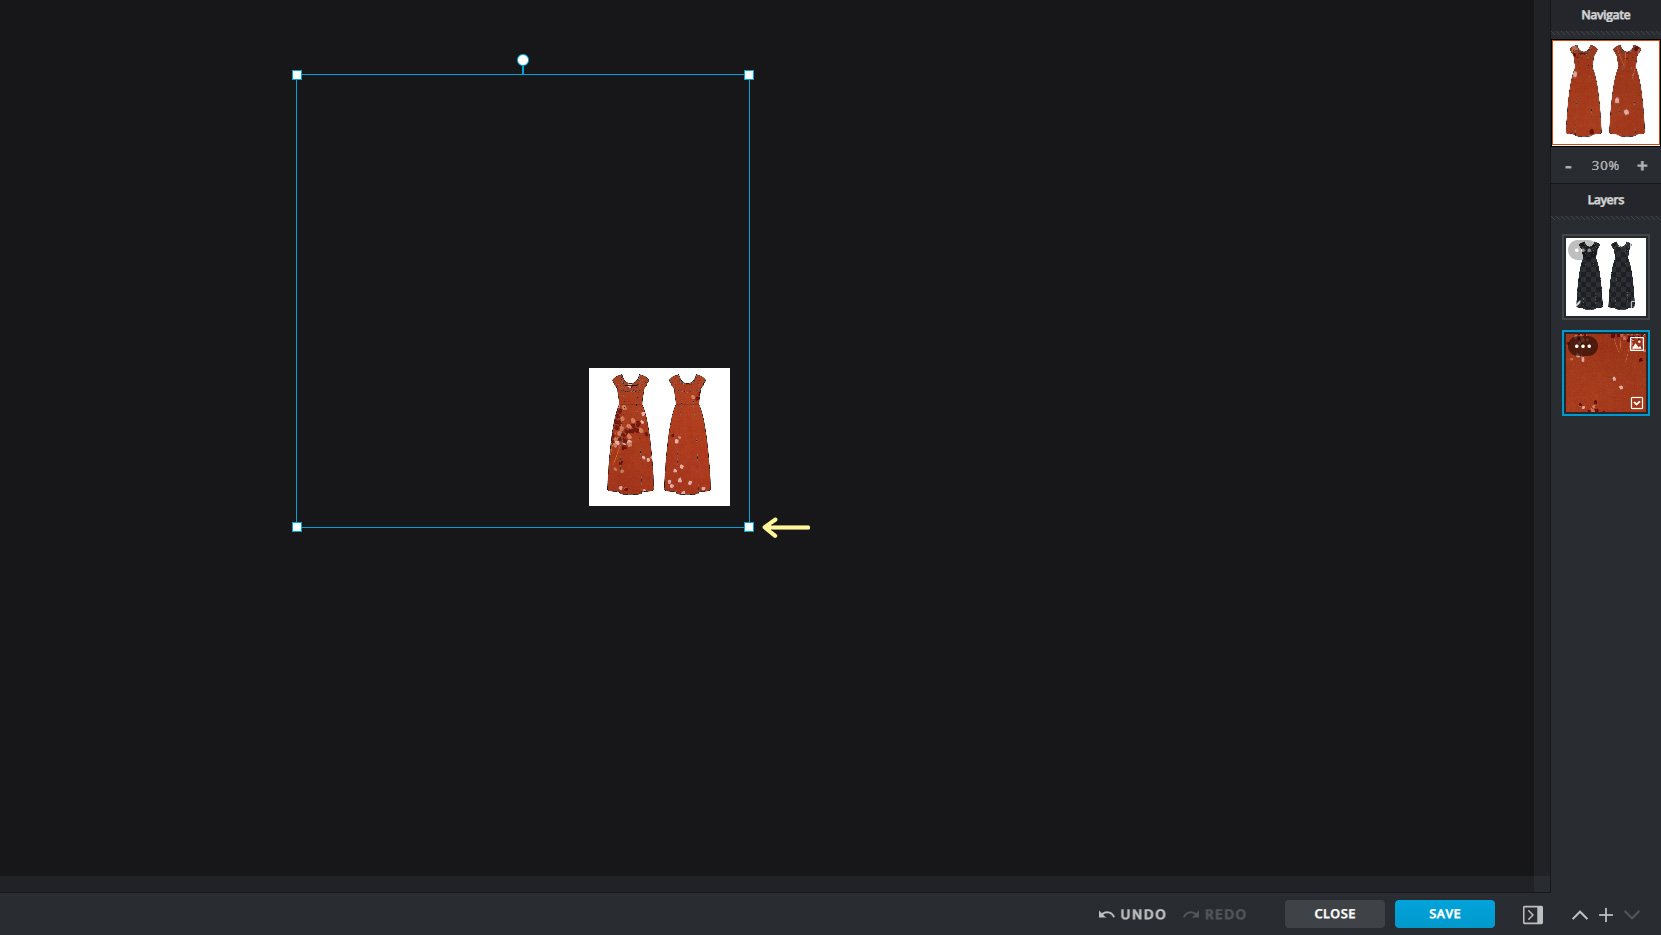
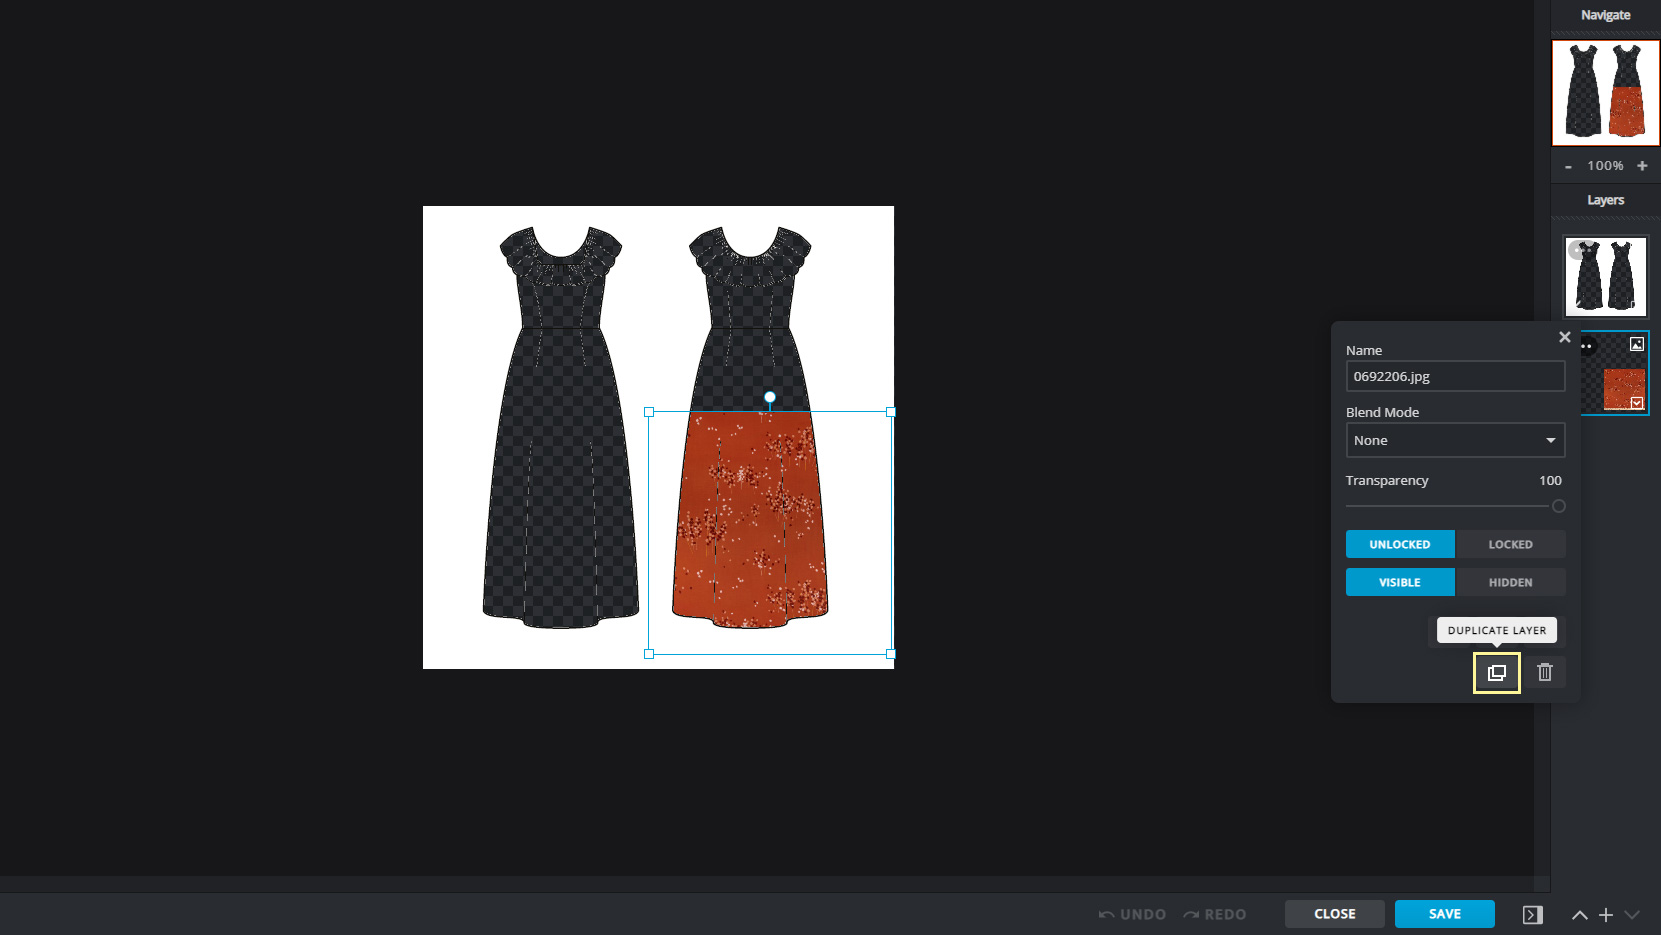
Conversely, if your fabric image size is too small, you may need to duplicate those layers. It’s better to avoid scaling the bounding box up from the original size, because this will create a pixelated image. To duplicate your fabric layer, click the three dots icon on the layer.
Then click “Duplicate Layer”.
You will now see a second fabric image layer. Click the bounding box to drag and move it where you want it.

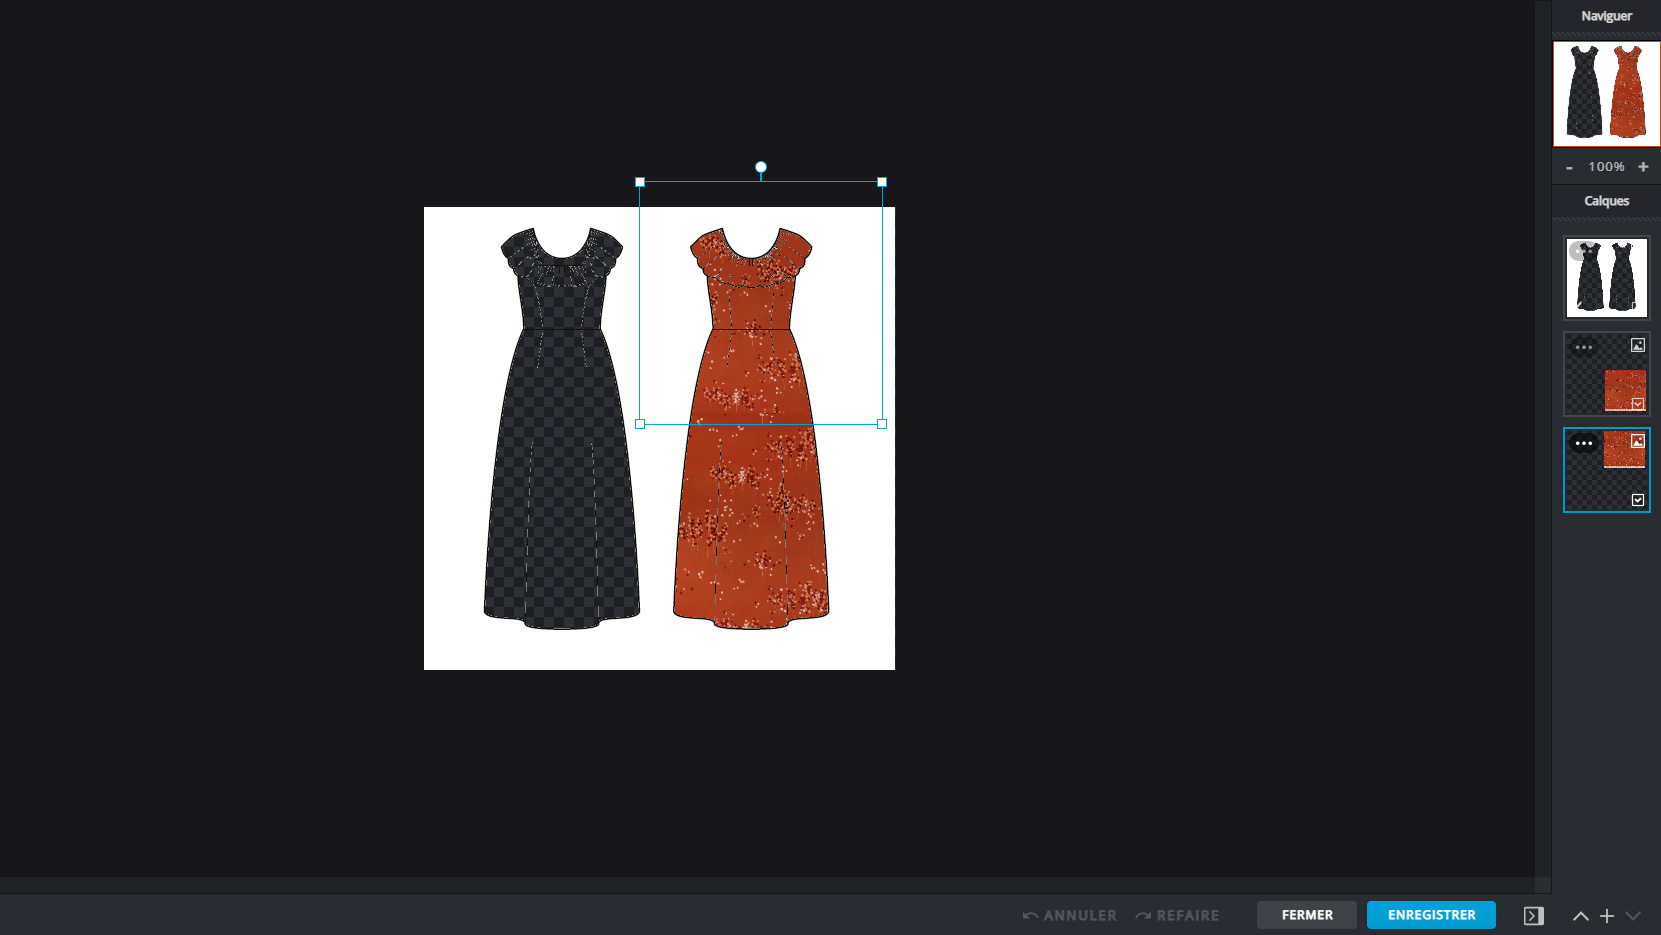
Repeat duplicating and moving layers until you’ve finished filling in your line drawing. Depending on the image, you may not be able to achieve a perfect repeat. This is just a mockup, so that is okay.
Keep in mind that this isn’t an exact science—you will have to make your best judgement about the size and scale of the print. Some fabric shops will provide information in their product listing that can assist in determining print size.
You can continue to experiment with different fabric images until you find one you are happy with, or save the file and enjoy your new pattern mockup!
And there you have it! We can’t wait to see your future pattern mockups. This technique can be such a fun and effective way to think about your projects, and we bet that once you start it will be hard to stop. Enjoy!
6 commentaires
Jenni, August 20 2021
This tool looks like a lot of fun, however I didn’t get the option of adding the image as a layer when adding my fabric image. I was using the first example (beige and black image from your website). Any suggestions as to where I went wrong?
Sylvie, August 23 2021
Hi Jenni,
I tried on my computer and it looks like the app automatically added as a layer. I managed to continue without any difficulty, and it may be the same for you 🙂
Sylvia Jennings, September 16 2021
Wow! Fabulous tip, and really good instructions. Thank you!
ElsieB, September 16 2021
WOW. I will definitely attempt to use this. Thank you
Karina Buck, September 16 2021
Thank you so much, I have been yearning for the software to do exactly this forever!


Ma Remae Joi Ollaban, August 18 2021
Very helpful. I will try this today. Thank you so much for sharing