Hysope is a beautifully proportioned crop top with a boxy silhouette that requires a little extra consideration when doing any bust adjustments. Our patterns are drafted for a C or D cup, but if your bust is smaller or larger, no worries: here’s how to adjust the pattern.
This tutorial will allow you to get a better fit with the Hysope Blouse (available in sizes 34-48 and 46-60), but it will work for any boxy top.
First, you will need to determine whether you need a bust adjustment, and if so, how much. To do this, it’s very helpful to make a muslin, since the adjustment amount can vary depending on the silhouette of the garment, your body type, and your preferred ease.
Bust adjustments are not always necessary! Some patterns with a loose fit will work for a wide variety of body types without any need for modification. Depending on your personal style, you may choose to just size up or down.
You’ll want to make sure your muslin fits properly through the shoulders—that is, the armhole sits at the edge of your shoulders and doesn’t fall towards your arm. Likewise, the armhole should not be sitting too high on the shoulder.
- If your muslin feels too tight at the bust and you notice horizontal drag lines, you’ll need a full bust adjustment. Slash the bodice vertically on a few centimeters at the bust apex, on each breast, and measure the gap that forms naturally. This distance is your bust adjustment value.
- If your muslin bags at the bust, you’ll need a small bust adjustment. Pinch and pin the fabric excess on each breast until you get to a fit that you like: the amount of fabric pinned is the value to remove.
Full Bust Adjustment (FBA)

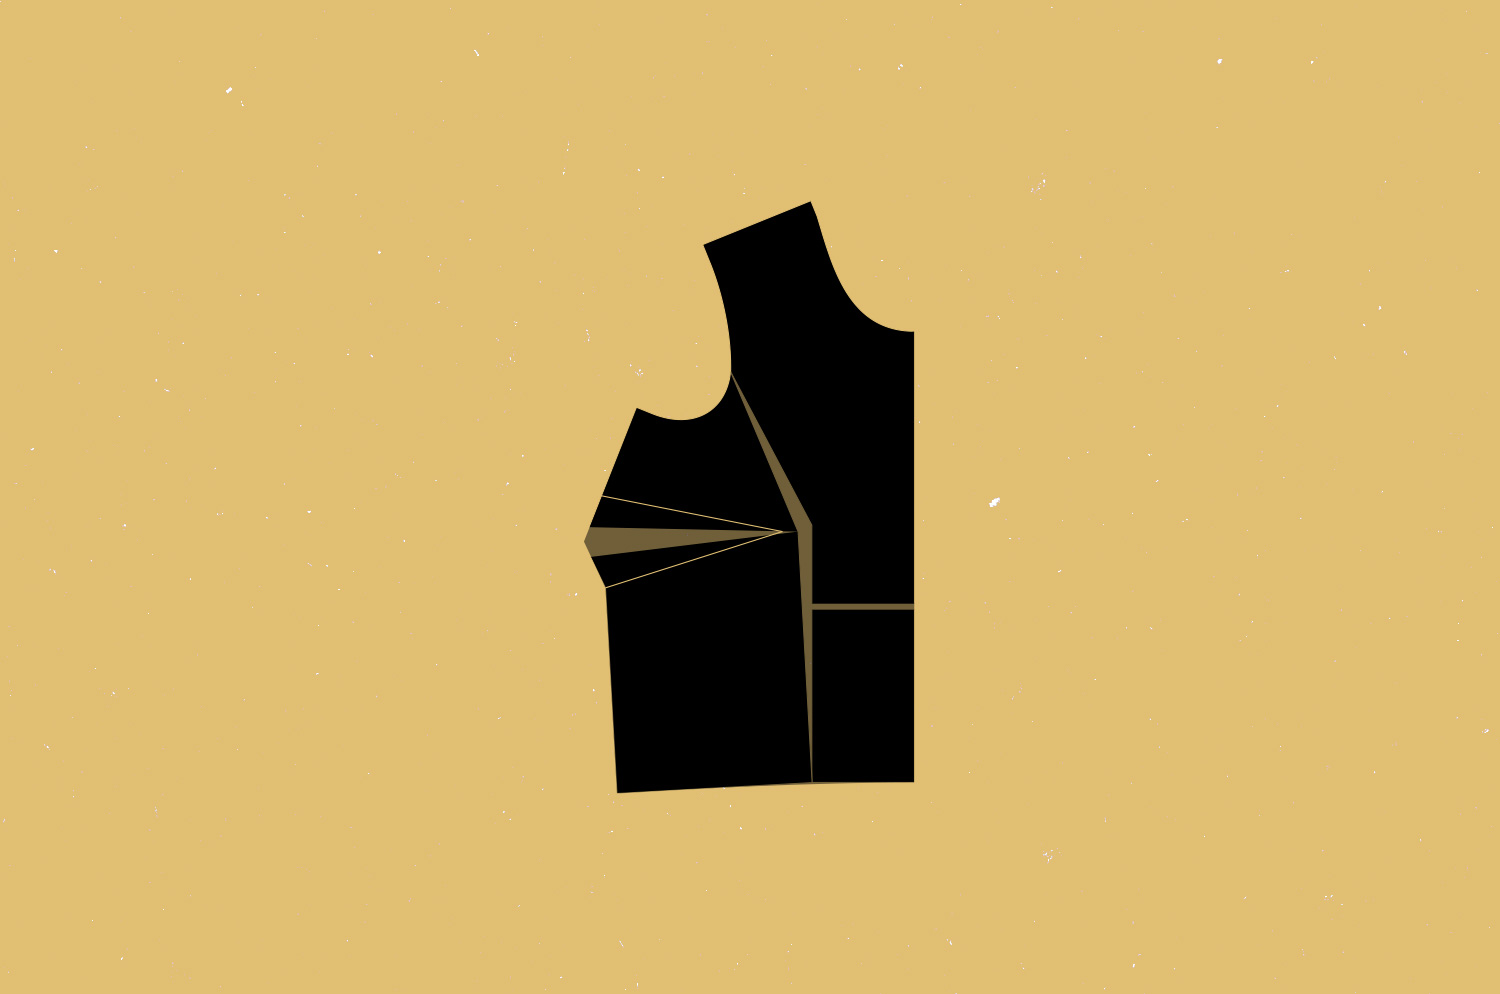
1/ On the front bodice, mark the bust apex (the point that corresponds to the tip of the bust).

2/ Draw a vertical line (parallel to the grain) connecting the bottom of the bodice to the bust apex. Draw a line in the same way connecting the bust apex to the armscye notch, and another line connecting the bust apex through the middle of the dart.

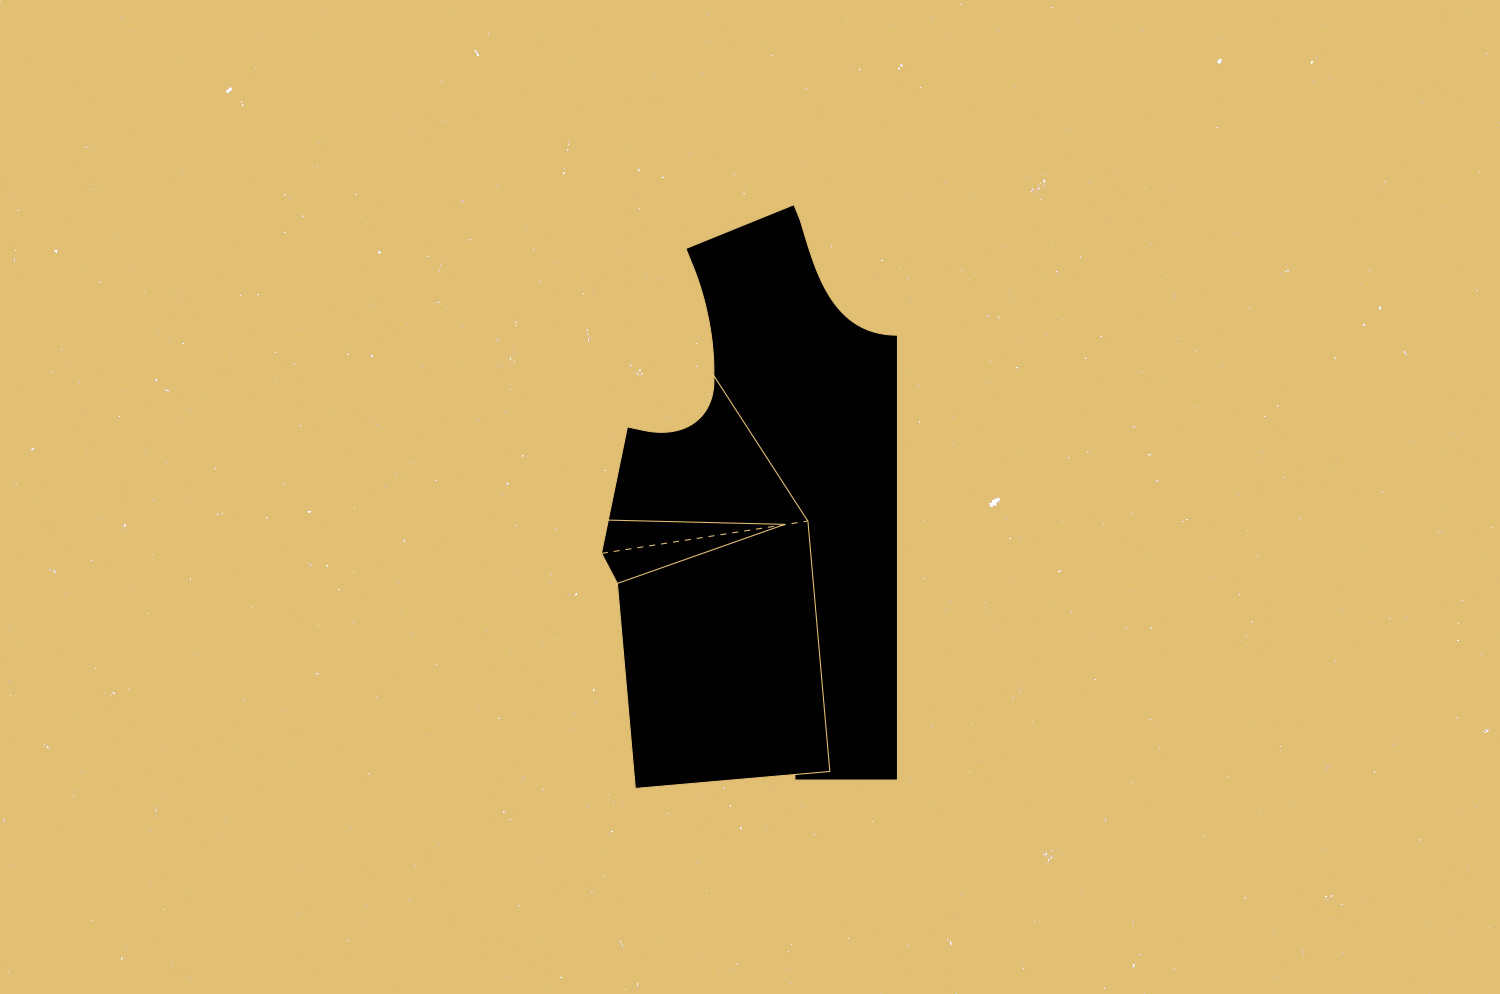
3/ Slash the bodice from the bottom vertical line through the apex and towards the armhole, leaving small hinge at the armhole. Pivot the piece towards the left until the gap at the bust apex is equal to the adjustment amount.

4/ Slash through the line at the dart towards the bust apex, leaving a small hinge at the bust apex. Spread the dart apart and pivot the bottom of the side towards the center front to close the gap at the bottom. Unlike a standard FBA, we want to avoid adding width to the bottom of the front bodice.

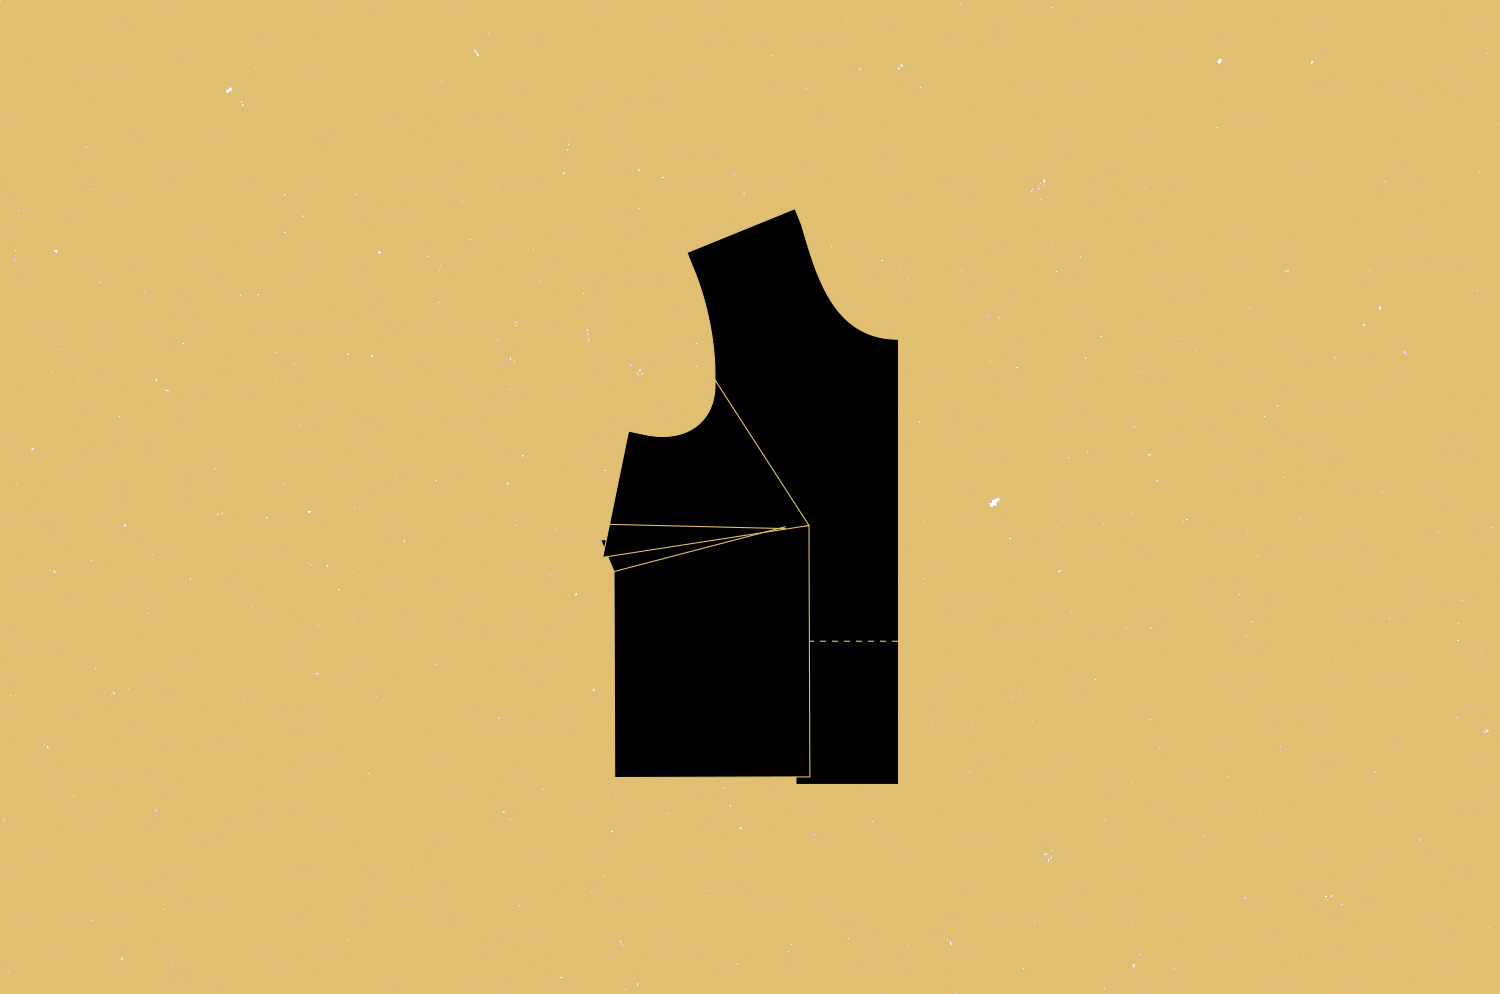
5/ Draw a horizontal line (perpendicular to the grain line) between the first vertical line and the center front of the bodice.

6/ Slash and spread the horizontal line you just drew, until both sides of the waistline are aligned.
7/ Tape together and secure the pieces you just adjusted.

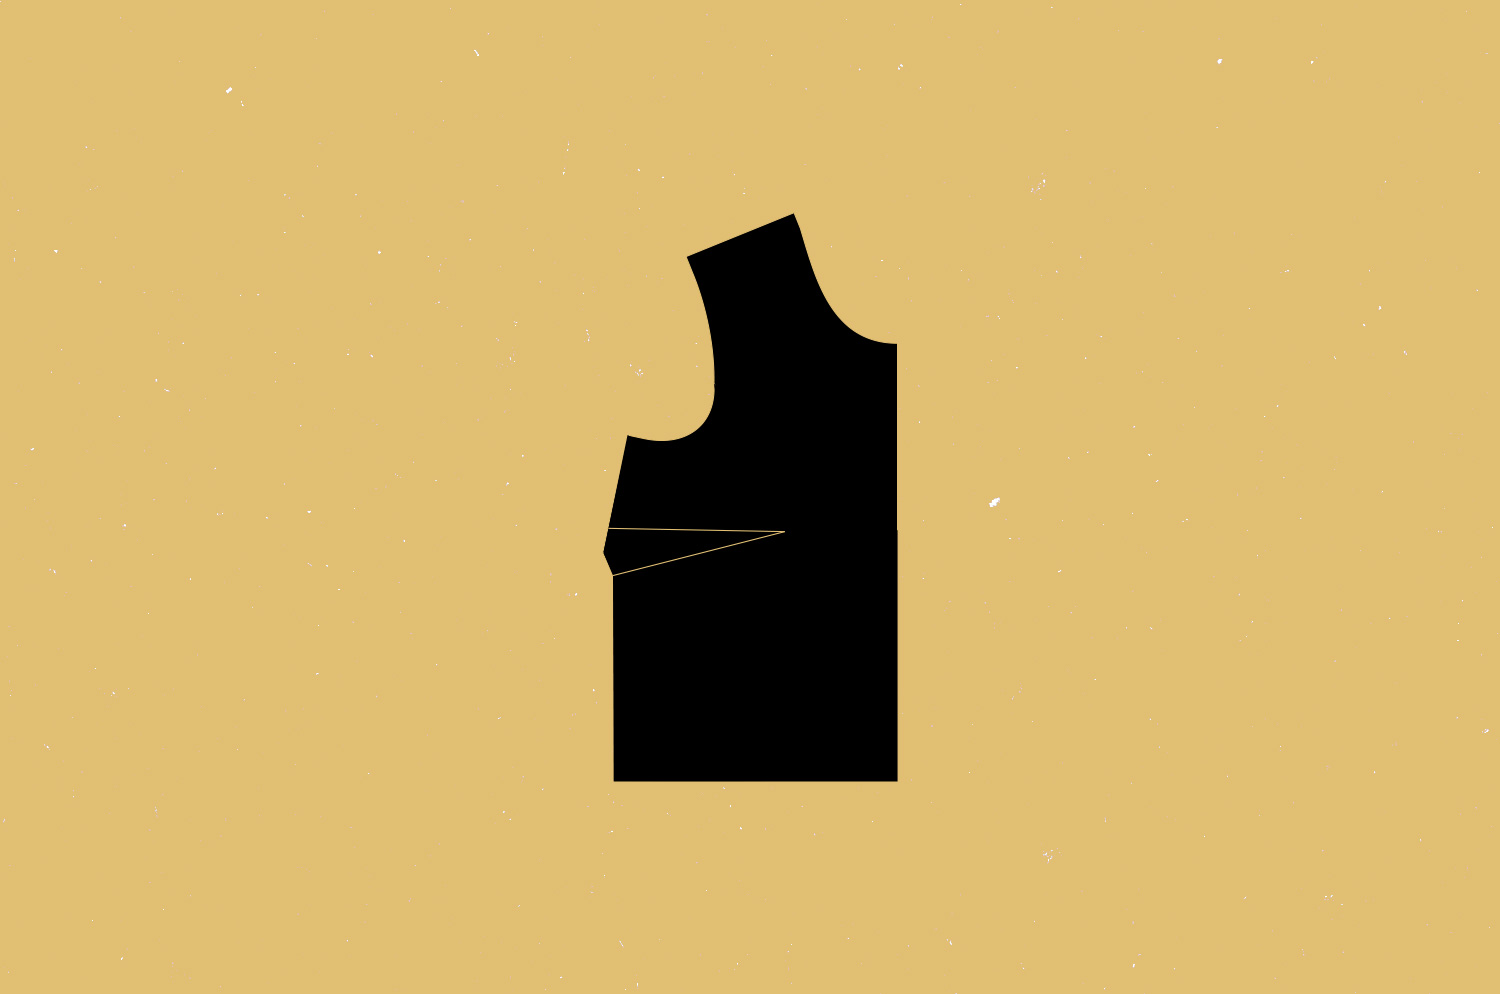
8/ Take a new sheet of pattern paper and trace the edges of the bodice. Draw the dart legs and the armhole notch again.
Small Bust Adjustment (SBA)

1/ On the front bodice, mark the bust apex (the point that corresponds to the tip of the bust).

2/ Draw a vertical line (parallel to the grain) connecting the bottom of the bodice to the bust apex. Draw a line in the same way connecting the bust apex to the armscye notch, and another line connecting the bust apex through the middle of the dart.
3/ Slash the bodice from the bottom vertical line through the apex and towards the armhole, leaving small hinge at the armhole. Pivot the piece towards the right until the overlap at the bust apex is equal to the adjustment amount.

4/ Slash through the line at the dart towards the bust apex, leaving a small hinge at the bust apex. Pivot the lower outer side of the bodice towards the left until the vertical lines (the ones you previously slashed) are parallel with each other. Like a regular SBA, the width of the front bodice will be reduced.
5/ Draw a horizontal line (perpendicular to the grain line) between the first vertical line and the center front of the bodice.

6/ Slash the horizontal line you just drew and push the inner bottom piece up, until the both sides of the waistline are aligned.

7/ Tape together and secure the pieces you just adjusted.
8/ Take a new sheet of pattern paper and trace the edges of the bodice. True the dart and draw the armhole notch again.


